The Development of the Tank in Britain

The Development of the Tank in Britain.

Image

Mark V Tank at Tank Corps Driving School

<http://www.iwm.org.uk/collections/item/object/205071473 >

The trench deadlock on the Western Front brought to the fore the best technical and theoretical minds in Britain. The various technical arms of Britain’s war establishment pursued radical technological innovations to overcome the “learning curve” of machine warfare. Perhaps no subject outside of the genesis of strategic bombing is as controversial or little understood as the origin of the tank during the First World War.

Castaldi, Fontana, and Nuvolari (2009) in their analysis of tank technology development, define the armoured fighting vehicle as “in most general terms: mobility, firepower and protection”.[1] They defer to Guderian as the doctrinal innovator responsible for the “new tactics based on speed and mobility.”[2]

Castaldi, Fontana, and Nuvolari appreciate technological paradigms as sets of “heuristics” or prevailing descriptions for problem solutions.[3] Modern tank capabilities are understood in terms of their applicability to strategic, operational and tactical situations.

 Image

Essentials of Tank Capability.[4]

In material terms, the essence of the problem of the trench deadlock can be expressed by the statistic that 50 infantrymen firing 10 rounds a minute equaled one water-cooled Maxim machine gun at 500 rounds per minute.[5] With the introduction of heavy artillery it likewise became necessary to abandon surprise, as concentrations of artillery required large logistics networks. Furthermore, the heavy artillery bombardments of set-piece battles invariably ruined the landscape. The influence of infantry cannon and direct-fire was reduced in proportion to the expanded role of the heavy artillery.

To return mobility, surprise and direct fire support to the infantry attack, the notion of the armed and armoured vehicle became central. French and British firms independently began to investigate the concept after the initial phase of the war in Autumn of 1914.[6]

The first movements in the direction of an armoured fighting vehicle, naturally enough, came from the fertile mind of H. G. Wells, who had imagined similar machines in 1903.[7]

 Image

Holt tractor (75hp) with 8 inch howitzer

http://www.iwm.org.uk/collections/item/object/205269802

The basic principle according to Heinz Guderian, was the Holt Caterpillar: a machine, once armed, capable of crossing the deadly no-man’s land despite echelon machine-gun fire, barb wire and the storm of steel – the artillery barrage. Such a machine would have “the potential to crush obstacles, cross trenches and convey its armament under bullet-proof protection into the very midst of the enemy, where it could annihilate the otherwise almost invulnerable machine-guns, and enable one’s own infantry to pass open ground without incurring intolerable casualties.” [8]

Churchill, First Lord of the Admiralty, appreciated the problem of deadlock from his usual material perspective. The essence of the problem was the same on land as it was on sea. The problem was protection: men from bullets and ships from torpedoes. “Reduced to its rudiments, it consisted in interposing a thin plate of steel between the side of the ship and the approaching torpedo, or between the body of a man and the approaching bullet.[9] Or, “the Tank was the beginning of the bullet-proof army.”[10]

 Image

RNAS Armoured car section entrained, Eastern Front.

http://www.iwm.org.uk/collections/item/object/205317703>

In Churchill’s vision of the new methods, armored cars operated by the Royal Naval Air Service would “protect the advanced bases which our naval aeroplanes might require to use.”[11]

The exploits of Charles Samson during operations at Dunkirk on one of these missions are legendary.[12] However, they were not to be the norm on the Western Front once the trench lines solidified by the end of October 1914 (the Eastern Front is another story). A new machine was required for surmounting the trenches.

Churchill was unambiguous that it was the RNAS (Royal Naval Air Service) that first embodied the principles that led to the development of the tank: “The armoured car was the child of the air; and the Tank its grandchild.” Churchill also credited the siege howitzer invention of Rear-Admiral Reginald Bacon and the Coventry Ordnance Works, an idea, backed by Field Marshal Lord Kitchener (Minister for War), that would have deployed 15-inch siege howitzers propelled by caterpillar tracks.[13]

 Asked for designs that would cross trenches, Bacon prepared a bridging machine, and Churchill prepared to display the idea to Sir John French and Lord Kitchener.[14] The plan was arranged in November 1914, and was tested by the War Office in May 1915, although the machine was rejected as unsatisfactory.[15] Churchill distinguished these first efforts from the independent efforts of Hankey and Swinton.[16]
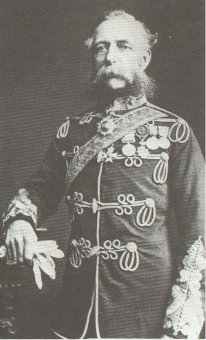
Image

Swinton

http://en.wikipedia.org/wiki/File:E._D._Swinton_op._p._81.jpg

Colonel Swinton developed the idea of an armoured fighting vehicle during his reporting as “Eyewitness” a war correspondent for Kitchener.[17] Swinton had been a first hand witness to the utility of armoured warfare as a member of Samson’s RNAS armoured car squadron during the Dunkirk operations.[18] Swinton, who was also assistant secretary to the CID (Committee of Imperial Defence) since 1913, was in close contact with Maurice Hankey, the CID permanent secretary.[19]

 Image

The Imperial War Cabinet, May 1917.

Hankey, with other members of the secretariat, is in the back row, third from right. First Sea Lord Jellicoe is second from left, back row, with First Lord Carson to his left. The primaries are seated front, including Lord Milner, DLG, Bonar-Law, Robert Borden, and Jan Smuts

http://www.iwm.org.uk/collections/item/object/205124978>

Hankey wrote a letter to Historian and tank proponent Sir Basil Liddell Hart on 3 April 1948, in which he explained Swinton’s contribution.[20]

Hankey explained that he and Swinton first germinated the idea when they met at the CID on 20 October 1914. There Swinton noted the existence of the Holt tractor and the use that could be made of it to break the deadlock.[21] Hankey and Swinton, aware of the bureaucratic opposition their agenda would encounter, agreed to make three separate avenues of approach: Hankey at the War Office, Swinton with the General Staff and Captain T. G. Tulloch (RA) with technical matters and execution.[22]

 Image

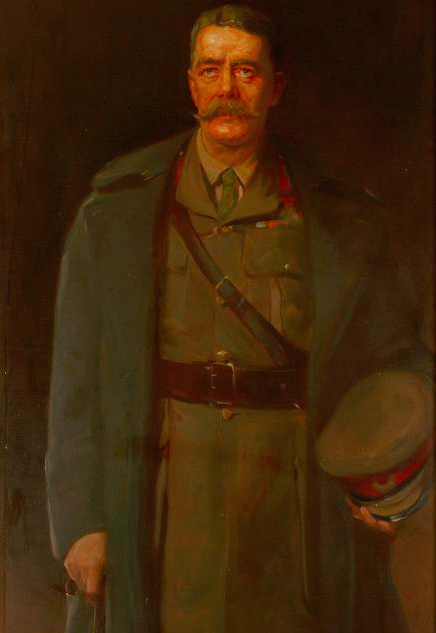
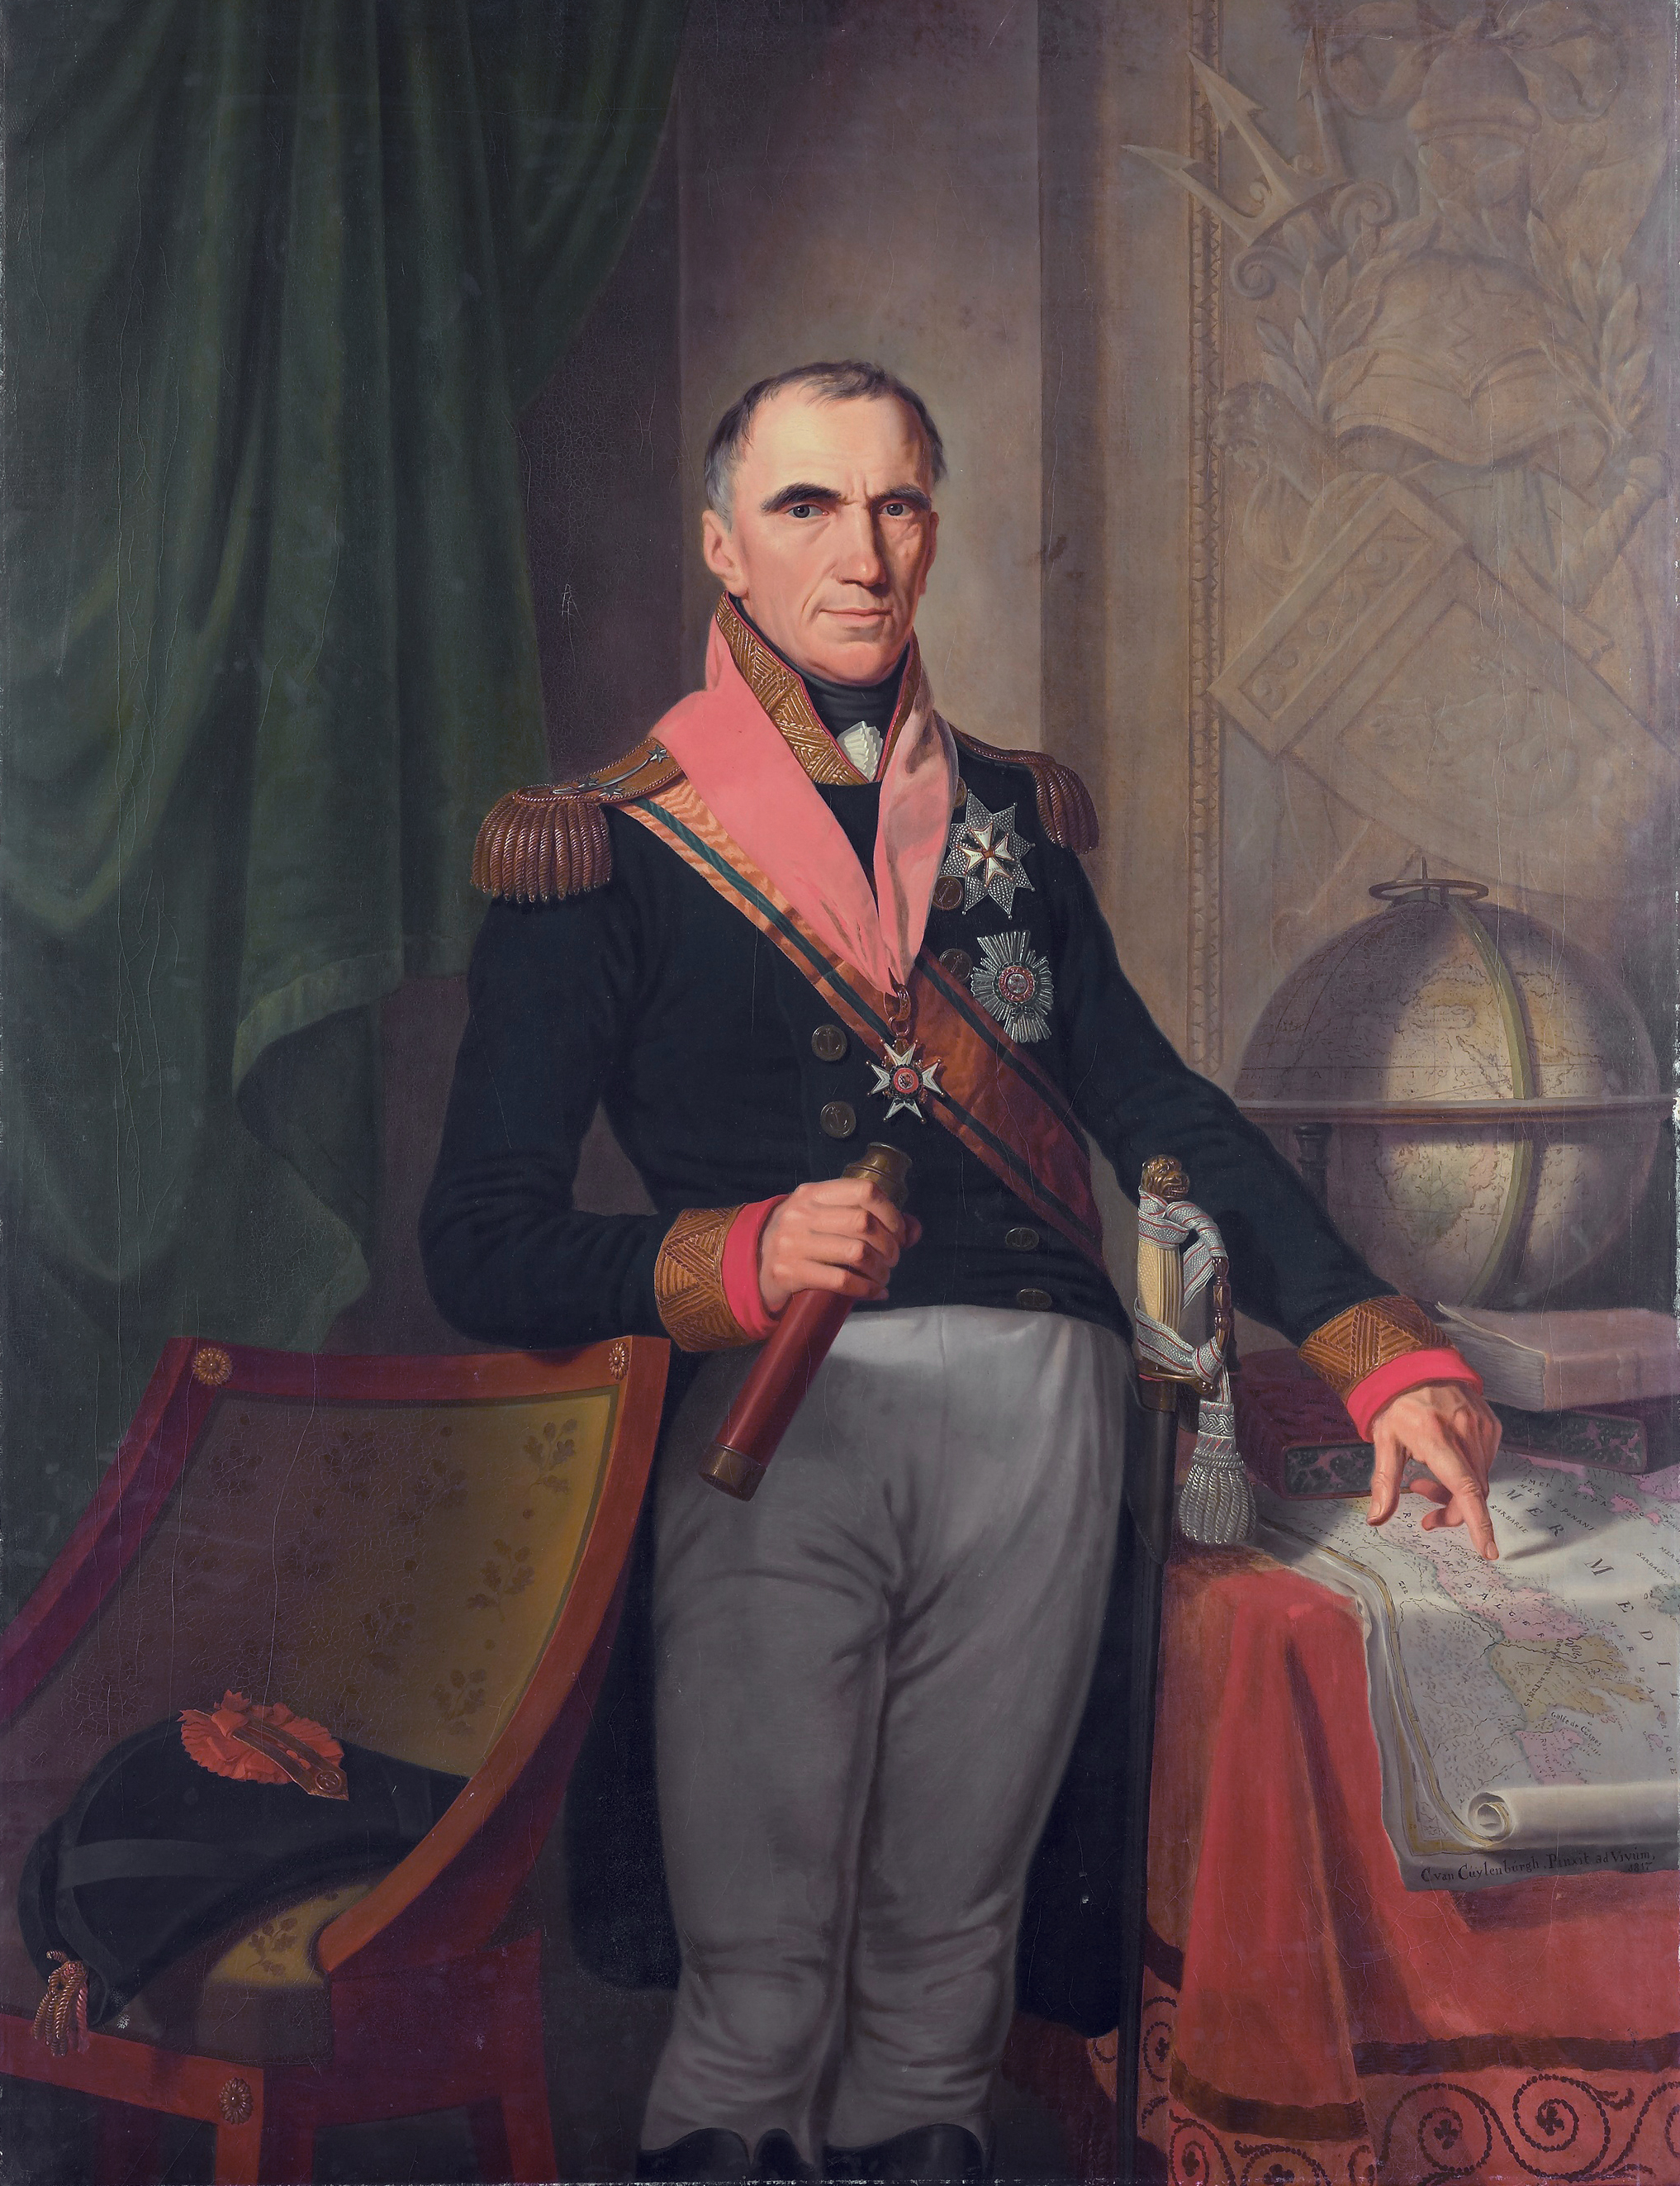
Painting of Horatio Kitchener 1911

http://www.iwm.org.uk/collections/item/object/5346

Guderian relates that Hankey contacted Asquith to follow up on Hankey’s “Boxing Day Memo” (actually dated 28 December 1914). The memo included a proposal for the construction of “large, heavy rollers, themselves bullet proof… with ‘caterpillar’ driving gear… [and] a Maxim gun fitted.”[23]

As Guderian understood the memo, it emphasized the necessity of building “armoured machine-gun carriers with caterpillar tracks.”[24] Guderian critiqued Lord Kitchener for suppressing this early “machine-gun destroyer” initiative.[25]

Indeed, this was the case for Hankey’s approach through the War Office. Although backed by former PM Arthur Balfour (after the May Crisis, First Lord of the Admiralty), and with Asquith showing support, Kitchener detracted from the idea arguing on the case of vulnerability of the tractors to artillery.[26]

Reading Hankey’s December 1914 memo brought Churchill’s mind back around to the machines, and he wrote a letter to Asquith endorsing Hankey’s recommendations.[27]

In that letter, Churchill stated that in December 1914 he had ordered “the Naval Air Service” (RNAS) to build twenty “shields on wheels” for experimental purposes.[28]

Churchill stated that Asquith showed the letter to Kitchener, who received it favourably, but placed further investigation under the responsibility of the Department of the Master General of the Ordnance, which, already dealing with a munitions shortage (the Shell Crisis) failed to move forward with the project.[29]

Feeling that things were not progressing as required, Churchill, on 19 January 1915, instructed Murray Sueter, Director Admiralty Air Department (Churchill calls this the “Air Division”) and chief of the RNAS, to “make certain experiments” with machines designed for defeating trench works.[30]

 Sueter, along with his crack armoured car and airplane engineers went to work on the problem. Unfortunately for Sueter, he never received the recognition he thought deserving and when he took the matter directly to King George V, was court martialed by the Admiralty.[31]

 Image

Tank designers beside “Mother” at Burton Park, Lincoln. Included are Hetherington, Wilson and Tritton.

http://www.iwm.org.uk/collections/item/object/205316258>

Churchill met with Major Hetherington, who was working for Sueter as a member of one of the RNAS Armoured Car Squadrons. In conversation with Churchill on 17 February, Hetherington proposed the construction of “land battleships” on a large scale.[32] Churchill forwarded these proposals to First Sea Lord Sir John Fisher, and on 20 February formed the Landship Committee, president Tennyson-d’Eyncourt, the Chief Constructor of the Navy.[33] Churchill’s secret committee, without correspondence with the War Office, produced two variants of machines, one wheeled the other caterpillar driven, the latter which Churchill ordered into production on 26 March 1915.[34]

At the behest of Hankey, the War Office had actually built and tested a small Holt tractor type, in February and March 1915, as related by Chuchill, although it failed to meet expectations.[35]

After the fallout of the May Crisis (collapse of the Fisher-Churchill regime over the Dardanelles campaign), the Landship Committee faced the financial chopping block, and Churchill claims that his personal appeal to Balfour, the incoming First Lord of the Admiralty (as of 25 May 1915) saved the project- trimmed down to a single machine. This single machine eventually became “Mother” which was tested at Lincoln in January and February 1916.[36]

Meanwhile, in June 1915 Swinton brought his proposal to the attention of Field Marshal Sir John French, who passed it to the War Office.[37] It can be seen then that Hankey’s policy of multiple avenues of approach was steadily building pressure.

A more complex machine was put to trial by the Landship Committee in September 1915. This was the “No 1 Lincoln Machine” – known as “Little Willie” after Walter Wilson – which was laid down on 11 August 1915.[38]

 Image

“Little Willie” the September 1915 trial machine.

< http://www.iwm.org.uk/collections/item/object/205249606 >

Pressured by Sir John French to investigate Swinton’s proposals, Swinton chaired the two pivotal interdepartmental conferences on 28 August and 24 December, 1915, in which the separate avenues of the Admiralty’s Landship committee and the War Office approach were united.[39] The latter meeting concluded with the placing of an order for fifty machines, which, to ensure secrecy, Swinton coined as “tanks”.[40]

Swinton, who had been at the “Little Willie” trial in September 1915 was in close liaison with the machine’s designers, Sir William Tritton and Walter Wilson. Together they worked up a scheme for a larger machine which was approved for construction by the Landship Committee meeting of 29 September 1915.[41]

Image

“Mother” the prototype tank on trials in January 1916.

http://www.iwm.org.uk/collections/item/object/205316267>

Hankey and Swinton continued to work closely, and there was speculation that Swinton was being groomed to succeed Hankey as permanent secretary. In February 1916 the new machines were tested. Shortly afterwards, the Heavy Section, Machine Gun Corps was formed, later renamed the Tank Corps in 1917.[42]

“Mother” underwent trials in February 1916 with Kitchener, Balfour and David Lloyd George in attendance. Kitchener apparently held to his position that these new machines would be vulnerable to enemy artillery.[43]

Lloyd George, then Minister of Munitions, was enthusiastic about the machine’s potential, and maneuvered to have the Landship Committee absorbed into his ministry.[44] From there, Lloyd George ordered 100 of the new model, now known as the “Tank Mark I”.[45] The order was shortly increased to 150 machines. The tank, brainchild of the conspiratorial Swinton-Hankey workgroup, grandchild of the Churchill-Sueter-Samson triumvirate, had come of age.

Image

Tank F-10 and soldiers of the “Heavy Section Machine Gun Corps” at Rollencourt Tank Park (“Tankodrome” 30 June 1917.

http://www.iwm.org.uk/collections/item/object/205236083>

[1] Carolina Castaldi, Roberto Fontana, and Alessandro Nuvolari, “‘Chariots of Fire’: The Evolution of Tank Technology, 1915-1945,” Journal of Evolutionary Economics 19, no. 4 (2009): 546–66. p. 546

[2] Ibid. p. 547

[3] Ibid. p. 547

[4] Ibid. p. 553

[5] Spencer Tucker, Tanks: An Illustrated History of Their Impact, Weapons and Warfare Series 17 (Santa Barbara, California: ABC-Clio, Inc., 2004). p. 6

[6] Ibid. p. 10

[7] Winston Churchill, The World Crisis: 1911-1918, Abridged and Revised Edition (New York: Free Press, 2005). p. 309

[8] Heinz Guderian, Achtung-Panzer!: The Development of Tank Warfare, trans. Christopher Duffy (London: Cassell, 1999). p. 48

[9] Churchill, The World Crisis: 1911-1918. p. 303

[10] Ibid. p. 304

[11] Ibid. p. 304

[12] Charles Rumney Samson, Fights and Flights (Nashville: The Battery Press, 1930). p. 12 et seq.

[13] Churchill, The World Crisis: 1911-1918. p. 305 & Tucker, Tanks: An Illustrated History of Their Impact. p. 11

[14] Churchill, The World Crisis: 1911-1918. p. 305

[15] Ibid. p. 305

[16] Ibid. p. 306

[17] Tucker, Tanks: An Illustrated History of Their Impact. p. 12

[18] Roger Ford, The World’s Great Tanks: From 1916 to the Present Day (Hong Kong: Brown Books, 1997). p. 7

[19] H. C. G. Matthew and B. Harrison, eds., “Swinton, Sir Ernest Dunlop,” The Oxford Dictionary of National Biography (Oxford: Oxford University Press, September 23, 2004), http://www.oxforddnb.com.proxy.lib.sfu.ca/templates/article.jsp?articleid=36392&back=#cosubject_36392.

[20] Stephen Roskill, Hankey: Man of Secrets, vol. Volume I: 1877–1918, 3 vols. (Annapolis: Naval Institute Press, 1970). p. 147

[21] Ibid. p. 147

[22] Ibid. p. 147

[23] Ibid. p. 148

[24] Guderian, Achtung-Panzer!: The Development of Tank Warfare. p. 48

[25] Ibid. p. 48

[26] Roskill, Hankey: Man of Secrets. p. 147

[27] Churchill, The World Crisis: 1911-1918. p. 306, Roskill, Hankey: Man of Secrets. p. 148

[28] Churchill, The World Crisis: 1911-1918. p. 306-7

[29] Ibid. p. 307

[30] Ibid. p. 307

[31] ADM 178/29

[32] Churchill, The World Crisis: 1911-1918. p. 308

[33] Ibid. p. 308

[34] Ibid. p. 309

[35] Guderian, Achtung-Panzer!: The Development of Tank Warfare. p. 49

[36] Churchill, The World Crisis: 1911-1918. p. 310

[37] Guderian, Achtung-Panzer!: The Development of Tank Warfare. p. 49

[38] Ford, The World’s Great Tanks: From 1916 to the Present Day. p. 9

[39] Tucker, Tanks: An Illustrated History of Their Impact. p. 14

[40] Matthew and Harrison, “Swinton, Sir Ernest Dunlop.”

[41] Ford, The World’s Great Tanks: From 1916 to the Present Day. p. 9

[42] Matthew and Harrison, “Swinton, Sir Ernest Dunlop.”

[43] Guderian, Achtung-Panzer!: The Development of Tank Warfare. p. 50

[44] Ford, The World’s Great Tanks: From 1916 to the Present Day. p. 10

[45] Ibid. p. 10

Thomas Cochrane and the Battle of the Basque Roads, April 1809

Every Man Will Do His Duty,

Thomas Cochrane and the Battle of the Basque Roads

Image

Lord Cochrane, The Tenth Earl of Dundonald.[1]

“His courage, ingenuity and resource have never been surpassed: neither, unfortunately, has his lack of tact. His ship’s companies appear to have loved him, but he had a genius for fighting his superiors as well as the French…”[2]

“… the idea that the service as a whole was enthused by ‘the Nelson touch’ is far from correct, as the lethargic attack upon the French fleet in the Basque roads in 1809 demonstrated. Lord Cochrane, the hero of the debacle, was disgusted that more enemy ships were not destroyed by a fleet that played it safe. At stake, he believed, was that vital potency that Nelson had bequeathed. ‘If,’ he wrote after a court martial had acquitted his commander-in-chief, ‘the anticipation of possible danger is to awe a British fleet, when the enemy is within its reach, and by an effort of no uncommon enterprise might be destroyed, we must take our farewell of those gallant exploits … that have thrown a luster over the annals of our country.’”[3]

Thomas Cochrane was a firebrand frigate commander and master of littoral warfare. Known for his antagonistic responses to authority, Cochrane’s naval career became intensely political. In addition to speaking against government corruption as an MP, Cochrane led the naval efforts of the revolutionary Chilean, Brazilian and Greek causes.

Cochrane’s uncompromising approach to warfare, and the controversial fruits it tended to bear, is best illustrated by the case of the Basque Roads, 11-15 April 1809.

Image

Cochrane’s recruitment poster for HMS Pallas.[4] Note Cochrane’s inflated gun count which likely included carronades.

In 1804, Cochrane was appointed commander of HMS Pallas of 32 guns, and sent to cruise the Azores for Spanish shipping. His fortune quickly secured by a number of successful prize captures, Cochrane turned to politics and stood for parliament in the summer of 1806. After the application of liberal bribes, Cochrane was elected in October as MP for the rotten borough of Honiton.[5] In May 1807 he was elected as an independent representative for Westminster.

In the House of Commons, Cochrane’s advocacy for reform resulted in a hasty return to sea. With the Mediterranean fleet under Lord Collingwood, Cochrane was made captain of HMS Imperieuse. In January 1808 he was given a roving commission to intercept and harass the enemy as opportunity afforded.

Cochrane’s success during this phase of his career, described by Arthur Herman as “the single most valuable commission in Royal Navy history”,[6] led to Cochrane’s selection by First Lord of the Admiralty Mulgrave to advise on the raid planned for the Basque Roads where a large French squadron was being massed.

Image

Admiral of the Fleet, James Baron Gambier.[7]

Admiral Lord Gambier, Channel Fleet commander, was responsible for the blockade of the Basque Roads forces. Gambier was a distinguished battleship commander, notable for being the first to break the enemy line at the Glorious First of June as Captain of HMS Defence.[8] Made Baron following the bombardment and capture of the Danish Fleet at the Second Battle of Copenhagen, Gambier, with knowledge of blockade and siege tactics, was a natural choice for Channel Fleet command.

Image

Location of the battle.[9]

Nevertheless, First Lord Mulgrave was disappointed with Gambier’s sluggish persecution of the reduction of the Basque Roads force. The difficulty of attacking the inner anchorage, combined with Gambier’s lethargy, prompted Mulgrave to seek outside solutions.[10] Cochrane was brought in to move things along.

Cochrane arrived at the Admiralty in March 1809 and prepared a plan of attack involving the use of fireships. Gambier considered the dispatch of Cochrane to assist him as unnecessary and at the worst, insubordinate. Furthermore, Gambier was distrustful of Cochrane’s plan of attack with fireships.[11] When Cochrane arrived with the Channel Fleet, although greeted “warmly” by Gambier, Cochrane sensed resentment from the other Channel Fleet captains, wary of the outsider brought in over their heads by the Admiralty.[12]

Gambier’s force was powerful. The fleet comprised the, “120-gun Caledonia, two 80-gun ships, eight 74-gun ships, one 44-gun heavy frigate, four other frigates, three sloops, seven gun brigs, three smaller craft,” in addition to the Congreve rocket-ships, twenty fireships, four explosion ships, and two bomb vessels.[13] The explosion ships were packed with 1500 lbs of gunpowder and fitted with rockets.[14]

Image

Plan of attack, showing location of French ships.[15]

British Order of Battle:

Caledonia (120), Caesar (80), Gibraltar (80), Donegal (74), Bellona (74), Hero (74), Illustrious (74), Resolution (74), Revenge (74), Theseus (74), Valiant (74), Imperieuse (38), Aigle (36), Unicorn (32), Pallas (32), Indefatigable (44), Emerald (36), Mediator (32), Beagle (18), Doterel (18), Foxhound (18), Insolent (14), Encounter (12), Conflict (12), Contest (12), Fervent (12), Growler (12), Lyra (10), Redpole (10), Whiting (4 – fitted as rocket ship), Nimrod (10 – fitted as rocket ship), King George (10 – fitted as rocket ship), Thunder (8) (bomb), Ætna (8) (bomb), 20 fireships, 3 Congreve rocket barges.

The French force was under the command of Admiral Zacharie Jacques Allemand and moored in two lines with a frigate screen: “Elbe (40 guns), Tourville (74), Aquilon (74), Jemmappes (74), Patriote (74), and Tonnere (74); a center line, of the ships Calcutta (troopship), Cassard (74) Regulus (74), Ocean (120), Ville de Varsovie (80), and Foudroyant (80); and an outer line, of the ships Pallas (40), Hortense (40), and Indienne (40).” Backing this force were 2000 troops manning shore batteries (it was these batteries that particularly concerned Gambier).[16] Furthermore, Allemand had positioned his ships in staggered moorage such that the lines could fire through each other without risk.[17]

Gambier had dispatched the Unicorn to investigate the harbour on March 27, however Gambier’s information was sorely deficient, “at best a perfunctory examination.” Cochrane thus spent April 3rd and 5th gathering intelligence on the state of the defences personally, reporting back to Gambier.[18] Cochrane’s reconnaissance suggested no more than a dozen cannon and mortar in the Ile d’Aix battery, possibly as many as twenty. Gambier was convinced the battery’s strength was closer to 50 guns.[19] More significantly, Cochrane’s close reconnaissance indicated that the guns were in poor condition. In fact, the batteries were manned by conscripts.[20]

Image

Fireships attack the Regulus, night of 11 April 1809. Drawing by Louis-Philippe Crepin.[21]

The fireships arrived on 10 April, along with HMS Beagle, and William Congreve himself, aboard the Cleveland.[22] Orders were issued for the night of the 11th.[23]

Allemand was by now aware of the fireships and the likely British plan of attack and prepared defenses: ships boats were placed in the water to tow away the fireships, and sails were reduced to minimize flammable material.[24]

Cochrane personally led the fireship attack at the Basque Roads on the night of 11 April, beginning at 8:30 pm.[25] Two of the explosion vessels were moved into position. At 9:30 Cochrane ordered the fuses lit. Cochrane and his skeleton crew then took to boats and returned to Imperieuse.[26]

The first ships possibly damaged the 2 mile wide harbor boom (a chain of anchor cable) that covered the harbour entrance, however it was actually cleared by HMS Mediator as it led the fireship assault.[27]

Next the fireships attacked, launching rockets as they closed with the anchored fleet.

Many of the fireships failed to get into position or were grounded. The bomb vessel Aetna threw its shells against the enemy batteries, and was supported by rockets and the distant broadsides of Imperieuse, Unicorn, Pallas, and Aigle. The general scene was one of chaos with ships ramming one another and fireships burning in the anchorage.

As dawn broke on the morning of 12 April, 1809, Cochrane saw that the French fleet had in part been immobilized, with some warships run-a-ground completely. Only the Foudroyant and Cassard remained afloat and mobile.

The French forces thus immobilized, Cochrane, at 6 am, signaled for support. He was refused it by Gambier who delayed until the tide had risen, and around 10 am closed to three miles from the harbor. There he anchored, ordering only the Aetna and some other bomb ships to continue the engagement.[28] Meanwhile, the French fleet was slowly regaining its mobility, a combination of rising tide, lighter ships (by throwing their guns overboard) and the tireless efforts of the crews to warp the ships back into deep water.

Image

Destruction of the French Fleet in Basque Roads – April 12th 1809

Imperieuse (38) engages the enemy singlehanded.

Infuriated, after 12 pm, Cochrane brought the Imperieuse in alone and engaged the enemy’s warships about 1 pm. He was engaged singlehanded against the Calcutta, Aquilon, and Ville de Varsovie. Between 1:30 and 1:45 Cochrane repeatedly signaled for assistance.

Cochrane described his predicament in his autobiography, “I did not venture to make sail, lest the movement might be seen from the flagship, and a signal of recall should defeat my purpose of making an attack; the object of this being to compel the commander-in-chief to send vessels to our assistance, in which case I knew their captains would at once attack the [French] ships which had not been allowed to heave off and escape.”[29]

Finally recognizing Cochrane’s intentions, Gambier dispatched additional ships to assist (two ships of the line and seven frigates). Seeing the approach of the Channel Fleet, the three ships engaged by the Imperieuse surrendered one by one, the last at 5:30. The Calcutta was set afire and exploded, and the Aquilon was likewise set afire by the British, an operation during which Cochrane was nearly killed: “He was assisting the captain of the Aquilon to retrieve some personal effects from his ship before it was fired, and was seated in a gig when it was struck by a stray shot. Ironically, the only casualty was the French captain,” who was mortally wounded.[30]

The Tonnerre was set afire by its own crew to prevent captured and exploded shortly thereafter. At 10 pm, Cochrane dispatched a ship’s boat with the objective of conducting a rocket attack against the Ocean, although the attack was not made and the French flagship had in fact been abandoned.[31] Cochrane remained with the Aetna into the morning 13 April, still trying to conduct attacks against the Ocean. Later on the 13th, Cochrane conducted another assault against Ocean with all the light ships he could muster, Beagle, Aetna, Conflict, Contest, Encounter, Fervent, Growler, Whiting, Nimrod, and King George. [32]

Image

Louis-Philippe Crepin’s depiction of Allemand’s force is disarray on 12 April 1809, showing Regulus run aground.[33]

Gambier instructed Cochrane to abandon his efforts and return to the flagship. Cochrane refused, carrying on with his efforts to destroy as many of the enemy warships as possible. Using his adhoc group of bomb and rocket ships, Cochrane was preparing to continue the battle on the morning of the 14th when Gambier again ordered him to the flagship. Cochrane was ordered to carry dispatches back to England, for which he departed on the morning of the 15th.[34]

In sum the French lost four warships and a frigate out of the 11 ships of the line originally in the anchorage.[35] Most of the surviving ships had lost their guns and over 200 crewmen were killed with 650 taken prisoner.[36] The Royal Navy suffered 10 men killed, 1 captured and 37 wounded.[37]

“The French government treated this disaster harshly. The French commanders were tried by court-martial; two were imprisoned, and Captain Jean Baptiste Lafon of the Calcutta was condemned and shot”.

Years later from St. Helena, Napoleon complained, “The French admiral was an imbecile… but yours was just as bad. I assure you that if Cochrane had been supported, he would have taken every one of the ships.”[38]

Image

Cartoon satirizing Gambier for his hesitancy, with Cochrane eager to attack at right.[39]

Nevertheless, Gambier’s hesitancy had apparently lost what Cochrane considered a great opportunity to destroy the entire French squadron. Cochrane was “disgusted at the failure to exploit the success at the Aix Roads and to annihilate the enemy, as would have been expected of him by Horatio Nelson.”[40]

In the resulting Court Martial, Gambier was acquitted and Cochrane found guilty of libel. Cochrane returned to parliament and spoke out against the Admiralty on charges of corruption. Cochrane’s return to sea, this time with the North American Squadron, was waylaid by an unfortunate turn of events. In 1814, as a result of a stock manipulation scandal (involving futures purchased on fraudulent claims of Napoleon’s death), Cochrane was struck from the Navy list and then expelled from the Commons on 5 July and then actually imprisoned until July 1815. In this affair it seems possible that Cochrane had been setup by his rivals at court.[41] On the other hand, Cochrane’s guilt in this affair remains a possibility.[42]

After returning to Parliament to continue his political career, Cochrane in May 1817 accepted the offer of the Chilean government to assist in the development of the revolutionary navy against Spain. He arrived in Valparaiso on 28 November 1818. Recognizing the serious threat Cochrane presented to Spanish interests, the government of Spain had attempted to buy-off Cochrane before his departure.

In 1820 Cochrane became involved in a Chilean project to liberate Peru, during which he antagonized the Chilean and Spanish governments: the latter by capturing the last Spanish warship in the South Pacific, and the former by capturing the newly appointed Chilean “protector” of Peru’s treasury when payment to his sailors was refused.[43] Cochrane also became involved in the Brazilian and Greek revolutions. Cochrane became Earl of Dundonald on 1 July 1831 after the death of his father, and was restored to the Royal Navy with rank of Rear Admiral and with a general pardon by William IV in May 1832. Cochrane was made Admiral on 21 March 1851.

Image

Albumen print of Cochrane, 1850s.[44]

Cochrane died on 31 October 1860. Cochrane was immortalized as the developer of the Chilean Navy, a debt Chile repaid through the legacy of his name.

Image

Chilean dreadnought Almirante Cochrane as requisitioned aircraft carrier HMS Eagle.[45]

Likely the definitive modern source on Cochrane’s early career is John Sugden’s 1981 PhD Thesis for the University of Sheffield, “Lord Cochrane, Naval Commander, Radical, Inventor (1775-1860)”, described by Nicholas Rodger as a “sober and critical life of Cochrane: a marvel indeed, but unfortunately unpublished.”[46] Thanks to the miracle of the Internet, it is freely available here.[47]

[1] http://collections.rmg.co.uk/collections/objects/108718.html

[2] Naval Review, review of Review of “Life of a Seaman. Thomas Cochrane, 10th Earl of Dundonald.,” by E. G. Twitchett, The Naval Review 20, no. 2 (1932): 405.

[3] John Sugden, Nelson: The Sword of Albion (London: The Bodley Head, 2012)., p. 852

[4] J. R. Hill and Bryan Ranft, eds., The Oxford Illustrated History of the Royal Navy (Frome, Somerset: Oxford University Press, 1995)., p. 147

[5] Andrew Lambert, “Cochrane, Thomas, Tenth Earl of Dundonald (1775-1860),” Oxford Dictionary of National Biography (Oxford University Press, January 2012).

[6] Arthur Herman, To Rule the Waves (New York: HarperCollins Publishers Inc., 2004)., p. 401

[7] http://collections.rmg.co.uk/collections/objects/107615.html

[8] Herman, To Rule the Waves., p. 401

[9] http://upload.wikimedia.org/wikipedia/commons/9/9e/Basque_Roads.svg

[10] John Sugden, “Lord Cochrane, Naval Commander, Radical, Inventor (1775-1860): A Study of His Earlier Career, 1775-1818” (PhD, University of Sheffield, 1981)., p. 112

[11] http://militaryhistory.about.com/od/navalbattles1800s/p/Napoleonic-Wars-Battle-Of-The-Basque-Roads.htm

[12] http://militaryhistory.about.com/od/navalbattles1800s/p/Napoleonic-Wars-Battle-Of-The-Basque-Roads.htm; N. A. M. Rodger, The Command of the Ocean (New York: W. W. Norton & Company, 2006)., p. 555

[13] http://ageofsail.devhub.com/blog/774372-rockets-attack-on-basque-roads-1114-april-1809/

[14] Lambert, “Cochrane, Thomas, Tenth Earl of Dundonald (1775-1860).”

[15] Sugden, “Lord Cochrane, Naval Commander, Radical, Inventor (1775-1860): A Study of His Earlier Career, 1775-1818.”, between pages 113-4

[16] http://ageofsail.devhub.com/blog/774372-rockets-attack-on-basque-roads-1114-april-1809/ ; Ibid., p. 116

[17] Ibid., p. 113

[18] Ibid., p. 117

[19] Ibid., p. 117

[20] Ibid., p. 120

[21] http://en.wikipedia.org/wiki/File:Regulus_under_attack_by_British_fireships_August_11_1809.jpg

[22] Sugden, “Lord Cochrane, Naval Commander, Radical, Inventor (1775-1860): A Study of His Earlier Career, 1775-1818.”, p. 123

[23] Ibid., p. 124

[24] http://militaryhistory.about.com/od/navalbattles1800s/p/Napoleonic-Wars-Battle-Of-The-Basque-Roads.htm

[25] http://ageofsail.devhub.com/blog/774372-rockets-attack-on-basque-roads-1114-april-1809/

[26] http://militaryhistory.about.com/od/navalbattles1800s/p/Napoleonic-Wars-Battle-Of-The-Basque-Roads.htm

[27] Sugden, “Lord Cochrane, Naval Commander, Radical, Inventor (1775-1860): A Study of His Earlier Career, 1775-1818.”, p. 126

[28] http://ageofsail.devhub.com/blog/774372-rockets-attack-on-basque-roads-1114-april-1809/

[29] Sam Willis, Fighting at Sea in the Eighteenth Century: The Art of Sailing Warfare (Woodbridge: The Boydell Press, 2008)., p. 160

[30] Sugden, “Lord Cochrane, Naval Commander, Radical, Inventor (1775-1860): A Study of His Earlier Career, 1775-1818.”, p. 134

[31] Ibid., p. 136

[32] Ibid., p. 137

[33] http://en.wikipedia.org/wiki/File:Regulus_stranded_on_the_shoals_of_Les_Palles_August_12_1809.jpg

[34] Sugden, “Lord Cochrane, Naval Commander, Radical, Inventor (1775-1860): A Study of His Earlier Career, 1775-1818.”, p. 138

[35] N. A. M. Rodger, The Command of the Ocean (New York: W. W. Norton & Company, 2006)., p. 556

[36] Sugden, “Lord Cochrane, Naval Commander, Radical, Inventor (1775-1860): A Study of His Earlier Career, 1775-1818.”, p. 138

[37] Ibid., p. 119

[38] Ibid., p. 139

[39] http://en.wikipedia.org/wiki/File:Sternhold_and_Hopkins_at_Sea_or_a_Slave_out_of_Time.jpg

[40] Lambert, “Cochrane, Thomas, Tenth Earl of Dundonald (1775-1860).”

[41] Ibid.

[42] Naval Review, review of Review of “Life of a Seaman. Thomas Cochrane, 10th Earl of Dundonald.,” by E. G. Twitchett, The Naval Review 20, no. 2 (1932): 405.

[43] Lambert, “Cochrane, Thomas, Tenth Earl of Dundonald (1775-1860).”

[44] http://www.npg.org.uk/collections/search/portrait/mw148125/Thomas-Cochrane-10th-Earl-of-Dundonald?LinkID=mp61959

[45] http://en.wikipedia.org/wiki/File:HMS_Eagle_underway_1930s.jpeg

[46] Rodger, The Command of the Ocean., p. 852

[47] http://etheses.whiterose.ac.uk/3466/1/290354.pdf

Breaking the Line: Cavalry Tactics at Balaklava

Breaking the Line: Cavalry Tactics at Balaklava

25 October 1854

 Image

“Into the Valley of Death” by John Charlton.1

“Popular history presents the Crimean War as the British army’s most disastrous campaign, with the blundering charge of the Light Brigade and the suffering soldiers at Balaclava saved only by Florence Nightingale.”2

“In English literature the War inspired Tennyson’s ‘Charge of the Light Brigade,’ a poetic description of an episode in the battle of Balaklava. It might be added that this conflict, which is considered by many scholars as unnecessary and a result of misunderstandings, was the more tragic since typhus and other epidemics caused even more deaths than did the actual fighting.”3

The Alliance between Britain and France was formally arranged in March 1854 when the two powers agreed to assist the Ottoman Sultan against the Russian Empire.4 The Allies commenced operations in the Crimea with a 50,000 man expeditionary landing at Balaklava in September 1854, with the intention of securing Sevastopol, Russia’s primary naval base on the Black Sea.5 Due to the introduction of steam transport the expeditionary force’s cavalry contingent arrived in theatre before the fodder for its horses, not to mention tents for the soldiers: the supply train had been dispatched on sailing vessels with resultant delays.6 The Czarist forces in immediate opposition, under Prince Menshikov, were defeated at the Battle of the Alma, 20 September 1854. The Allied guns expended 900 rounds during the Alma.7 In response to this setback, Menshikov retreated to Sevastopol, where as C-in-C, with Gortschakoff as second in command and Chomutoff in command of the artillery he prepared his defences.8 Vice-Admiral Kornilov, who had fought at the Battle of Sinope, 30 November 1853, and was Chief of Staff of the Black Sea Fleet, led the Russian garrison.9

 Image

Battle of the Alma, by Horace Vernet.10

 In preparation for the siege of Sevastopol the Allies deployed heavy artillery, and by the end of September naval guns and army howitzers were in position on the heights overlooking Balaklava.11 Insufficient logistics resulted in a cholera outbreak that weakened the Allied army throughout the initial phase of the campaign.12

 Image

Shipping at Balaklava Harbour, 1855.13

The Russian forces defending Sevastopol were eager to prevent the extended siege of the port and prepared a counter attack of the Allied beach-head. Early in October Russian infantry and artillery moved into position: Brigadier-General Airey, Lord Raglan’s Quartermaster-General,14 spotted a brigade size force, 5,000 men, as they moved towards the Allied positions on 3 October, a report complemented by reconnaissance from the 4th Dragoons that identified 3,500-4,000 cavalry on 7 October.15 The same day, Lord Raglan, General Airey and staff committed to reconnaissance of the Russian positions and a council of war was held in the evening.16 On 10 October four French battalions, 2,400 men, began construction of trenches and redoubts for their cannon to prepare for the siege.17

Image

Roger Fenton’s photograph of the Allied commanders: Lord Raglan, Omar Pasha and Marshal Pelissier.18

Allied reinforcements continued to pour in from the beach-head, despite the long range Russian batteries zeroed on the Balaklava approach.19 The British 2nd Division entrenched two miles from Sevastopol, supported by the 4th Division, and covered to the right by the 3rd Division and Light Division (Lt. General Sir George Brown)20 with the 1st Division outside Balaklava, the Royal Marines in garrison at the town itself.21 The Russian lines at this time were permeable, certain Polish soldiers defected and crossed the Allied lines with sensitive information.22

On 17 October Vice-Admiral Kornilov was mortally wounded when the Allied guns, in conjunction with a fleet sortie, bombarded Sevastopol in the opening phase of the siege that was to last for the next 13 months.23 Continuous shelling and skirmishing for the next three days highlighted the strength of Meshikov’s positions. On 20 October reports arrived from England that Sevastopol had fallen, propaganda which “excited great indignation and ludicrous astonishment” from the forces in theatre.24

 Image

Positions of Allied forces around Sevastopol, October 1854.25

On 25 October, Menshikov opened his counter-attack with 25,000 men, led by General Pavel Liprandi.26 William Howard Russell, war correspondent for The Times witnessed the battle of Balaklava and provided the account Lord Tennyson used as source material for his renowned poems.27

 Image

General Pavel Petrovitch Liprandi28

 The morning of 25 October, pursuant to their plan of attack, Russian artillery commenced bombardment of the Allied positions with shell. The Allied batteries at No. 1 redoubt fell and the Turkish gunners retreated, but were run down by Russian cavalry as they withdrew to No. 2 redoubt.29 A Russian cavalry charge carried No. 2 redoubt and the Turkish soldiers continued their retreat towards No. 3 redoubt, only to be likewise overrun. Russian gunners, well practiced in the rapid preparation of batteries,30 immediately secured the Allied batteries stationed in the captured redoubts and turned them against the Allied positions.31 These guns included advanced models capable of firing highly accurate rotating shells prior to the introduction of cannon rifling through a sophisticated ovoid barrel design, later employed against Sevastopol with deadly effect.32 The Turkish batteries abreast the French trenches and Allied naval batteries emplaced on the Balaklava heights ineffectively returned fire.33

The Turkish infantry, armed with the new Minie rifle, reformed when they fell back upon the positions occupied by Britain’s 93rd Highlander regiment. Upon engaging these positions, well formed, the Russian cavalry were forced to halt their advance and deployed at half a mile distance in brigade strength, 3,500 strong in preparation for a decisive charge.34 Opposite the Russian cavalry were the positions held by the 93rd regiment, bayonets fixed in a “thin red streak”- two lines deep- supported by the entire Allied cavalry force: the French cavalry and the British cavalry division under Lord Lucan: Brigadier-General Scarlett’s Heavy Brigade composed of the veteran Scots Greys, Enniskillens, 4th Royal Irish [Dragoon Guards], 5th Dragoon Guards, and 1st Royal Dragoons35 flanked by Lord Cardigan’s Light Brigade (Dragoons, Lancers, Hussars) on the left echelon.36

Image

“Major General George Charles Earl of Lucan, KCB, Commander of the Cavalry Division.”37

Russell vividly described the moments between the formation of the opposing lines, broken by sporadic shell bursts, and the thunderous ensuing charge of the Russian cavalry.38 The Turks fired rifle volleys at 800 and 600 yards.39 At 250 yards the 93rd regiment fired volley, breaking up the Russian charge at close range.40

The initial cavalry charge stopped short, General Liprandi developed a flanking manoeuvre against Raglan’s HQ (defended by the French Zouaves) positioned on the heights overlooking Balaklava. Liprandi planned to use his “corps d’elite- their light blue jackets embroidered with silver lace” for this coup de main.41 Observant of the weakness of the Allied position from his HQ on the heights above the precarious Allied position, Raglan dispatched orders for Lord Lucan to have Scarlett’s Heavy Brigade prepare a counter-charge.42 Russell, with his exclusive report for The Times in mind, watched from Raglan’s HQ as the opposing cavalry forces deployed.

The British charge, in what can only be described as a measure of incredulous courage, began when the “trumpets rang out … through the valley,” as the cavalry with the Greys and Enniskillens at the spear-point charged directly into the mass of veteran Russian cavalry and, with consummate skill, smashed through their lines.43

Tennyson immortalized this moment in his “Charge of the Heavy Brigade”44

Fell like a cannon-shot,

Burst like a thunderbolt,

Crash’d like a hurricane,

Broke thro’ the mass from below,

Drove thro’ the midst of the foe

With this devastating frontal assault underway, the 4th Dragoon Guards and 5th Dragoon Guards swung in from the flanks and completed the route of the Russian cavalry.45 No doubt Cannae was the central thought on Lucan’s mind at this point. Raglan dispatched his aide-de-camp, Lord Curzon, with congratulations- “Well done!”- intended for General Scarlett who had personally led the counter-charge.46 There were 35 British killed and wounded.47

Image

Major General the Hon. Sir James Scarlett, KCB, Commander of the Heavy Cavalry Brigade with Lt. Colonel Alexander Low, 4th Light Dragoons.48

Cardigan was now ordered to recaptured the Allied redoubts, defended by 30 to 40 captured guns.49 Russell described the orders that led to this attack: Brigadier Airey through Captain Nolan of the 15th Hussars, ordered Lucan “to advance” upon the Russian positions.50 Upon receipt of these orders, Lucan asked for clarification, to which Nolan was said to have replied, “’There are the enemy, and there are the guns,’ or words to that effect”.51 Lucan passed the order on to his brother-in-law, Cardigan, and thus Cardigan assumed he was to charge the mile and a half against the Russian cannon positioned in their emplacements. It was not yet 1100 hours.52 Spurred by the decisive victory of the Heavy Brigade, without delay, at 1110 the Light Brigade charged.53

Lord Cardigan recalled the charge in 1855: “We advanced down a gradual descent of more than three-quarters of a mile, with the batteries vomiting forth upon us shells and shot, round and grape, with one battery on our right flank and another on the left, and all the intermediate ground covered with the Russian riflemen; so that when we came to within a distance of fifty yards from the mouths of the artillery which had been hurling destruction upon us, we were, in fact, surrounded and encircled by a blaze of fire, in addition to the fire of riflemen upon our flanks.”54

Image

Lord Cardigan: James Thomas Brudenell.55

Russell editorialized: “Surely that handful [the Light Brigade, 636 men] were not going to charge an army in position? Alas! It was but too true- their desperate valour knew no bounds, and far indeed was it removed from its so-called better part- discretion.”56 The Russian cannon opened fire at 1,200 yards.57 Captain Nolan was killed as he led the first line.58 Riding alongside Nolan was Private James Lamb, 13th Light Dragoons: Lamb described Nolan receiving a mortal wound from one of the first Russian volleys then, still charging, disappeared into the gun smoke.59 The Russian gunners kept up fusillade fire of mixed canister and grape as the Light Brigade galloped in.60 Lamb himself was knocked unconscious and awoke unhorsed and lost in the dense smoke.61

 The Allied guns on the Balaklava heights fired counter-battery, although the Light Brigade had already broken through.62 Quoth Tennyson:

Plunged in the battery-smoke

Right thro’ the line they broke;

Cossack and Russian

Reel’d from the sabre-stroke

Shatter’d and sunder’d.63

  Image

“Charge of the Light Cavalry Brigade” 1855 Lithographic print.64

Lamb saw Russian infantry forming up from the gun positions to add their rifle fire to the melee. He initially mistook the charge of the French Dragoons (see below) as another flanking attack by Cossacks.65

Russell described the appearance of “a regiment of [Russian] lancers” which counter-attacked at this point, although Colonel Shewell (8th Hussars) seeing the brigade’s exposed flank, immediately charged the approaching enemy.66 During this encounter with unquestionable courage and skill the Russian gunners rallied to the guns and fired grape directly into the general melee: Russell is unambiguous that it was this courageous act by the gunners that broke the Light Brigade.67 Covered by the Heavy Brigade, Cardigan retreated, clearing the guns by 1135. Lucan and Cardigan were both wounded, the latter by lance.68

Image

Four survivors from the 17th Lancers.69

Meanwhile, the French cavalry charged the Russian guns firing enfilade on the Light Brigade.70 One of these positions was covered by a regiment of Polish Lancers which the French Dragoons engaged despite suffering terrible casualties from incoming grape and canister.71 The Russian forces began to withdraw from the Allied redoubts: No. 1 was recaptured, and at 1115, as the melee between the Light Brigade and the Russian lancers occurred, No. 2 position was destroyed when the withdrawing Russian forces exploded its magazine.72 No. 3 position was abandoned but with great success as the Russians hauled off seven of the nine Allied guns emplaced there.73 The British had in total 13 officers killed and missing, 156 soldiers killed and missing and 21 officers and 197 men wounded. 520 horses had become casualties.74

Private Lamb’s calvary regiment was decimated, suffering nearly 50% casualties: “we went into action that morning 112 strong and came out with only 61.”75 Lamb, himself wounded, had difficulty returning to the Allied lines and once back found himself reported as killed.76

The Russians celebrated the victory at Sevastopol when the captured guns were added to their armoury. At 2100 a general barrage of the Allied position commenced although without effect.77

The assault of 25 October was followed by a brigade sized attack “4,000 Russians” against the 2nd Division’s position on the British right flank.78 The Russians again attempted to displace the 2nd Division on 5 November resulting in the Battle of Inkerman, a desperate close order affair, which Russell described as “the bloodiest struggle ever witnessed since war cursed the earth.”79

Image

“The Thin Red Line” by Mark Wells <http://www.coroflot.com/mark19/art> satirizing Robert Gibb’s 1881 portrayal80 of the 93rd Highlander Regiment at the “Battle of Balaclava on October 25, 3054… [sic]”81

2 Arthur Herman, To Rule The Waves: How the British Navy Shaped the Modern World, New York: HarperCollins’ Publishers, 2004, p 541

3 Nicholas Riasanovsky and Mark Steinberg, A History of Russia, Seventh Edition, New York: Oxford University Press, 2005, p 316

4 Eric Grove, The Royal Navy Since 1815, New York: Palgrave Macmillan, 2005, p 29

5 F. R. Bridge and Roger Bullen, The Great Powers and the European States System 1814-1914, Second Edition, Toronto: Pearson Education Limited, 2005, p 121

6 Geoffrey Till, Seapower: A Guide for the Twenty-First Century, second edition, Cass Series: Naval Policy and History, New York: Routledge, 2009, p 237; Andrew Lambert and Stephen Badsey, The Crimean War, The War Correspondents, Stroud, Gloucestershire: Bramley Books, 1997, p 90

7 Lambert & Badsey, The Crimean War, p 90

8 Lambert & Badsey, The Crimean War, p 93

9 Lambert & Badsey, The Crimean War, p 96

11 Lambert & Badsey, The Crimean War, p 88, 90

12 Lambert & Badsey, The Crimean War, p 89-90; see also, John Sweetman, “‘Ad Hoc’ Support Services During The Crimean War, 1854-6: Temporary, Ill-Planned and Largely Unsuccessful,” in Military Affairs 52, no. 3 (July 1, 1988): 135

14 Lambert & Badsey, The Crimean War, p

15 Lambert & Badsey, The Crimean War, p 89, 92-3

16 Lambert & Badsey, The Crimean War, p 94

17 Lambert & Badsey, The Crimean War, p 95

19 Lambert & Badsey, The Crimean War, p 90

20 Hudson, ed., William Russell, p 6 fn

21 Lambert & Badsey, The Crimean War, p 90

22 Lambert & Badsey, The Crimean War, p 93

23 Lambert & Badsey, The Crimean War, p 96

24 Lambert & Badsey, The Crimean War, p 102

25 Lambert & Badsey, The Crimean War, p 99

26 Lambert & Badsey, The Crimean War, p 103

27 Robert Hill, ed., Tennyson’s Poetry, Second Edition, New York: W. W. Norton & Co., 1999, p 307-8, 307 fn.

29 Roger Hudson, ed., William Russell: Special Correspondent of The Times, London: The Folio Society, 1995, p 28

30 Lambert & Badsey, The Crimean War, p 91

31 Hudson, ed., William Russell, p 28-9

32 J. F. C. Fuller, The Conduct of War: 1789-1961, New Brunswick, N. J.: Da Capo Press, 1992, p 89 fn

33 Hudson, ed., William Russell, p 29

34 Hudson, ed., William Russell, p 29

35 Hudson, ed., William Russell, p 29

36 Hudson, ed., William Russell, p 29

38 Hudson, ed., William Russell, p 29

39 Hudson, ed., William Russell, p 29

40 Hudson, ed., William Russell, p 30

41 Hudson, ed., William Russell, p 30

42 Hudson, ed., William Russell, p 30

43 Hudson, ed., William Russell, p 30-1

45 Hudson, ed., William Russell, p 31

46 Hudson, ed., William Russell, p 30-1

47 Hudson, ed., William Russell, p 31

49 Hudson, ed., William Russell, p 31

50 Hudson, ed., William Russell, p 31-2

51 Hudson, ed., William Russell, p 32

52 Hudson, ed., William Russell, p 32

53 Hudson, ed., William Russell, p 32

54 John France, Perilous Glory: The Rise of Western Military Power, New Haven: Yale University Press, 2011, p 232

56 Hudson, ed., William Russell, p 32

57 Hudson, ed., William Russell, p 32

58 Hudson, ed., William Russell, p 33

59 James Lamb, “The Charge of the Light Brigade,” Strand Magazine: An Illustrated Monthly (July 1891): 348–351

60 Lamb, “The Charge of the Light Brigade,” p 348

61 Lamb, “The Charge of the Light Brigade,” p 348

62 Hudson, ed., William Russell, p 33

63 Hill, ed., Tennyson’s Poetry, p 308

65 Lamb, “The Charge of the Light Brigade,” p 349

66 Hudson, ed., William Russell, p 33

67 Hudson, ed., William Russell, p 33

68 Hudson, ed., William Russell, p 33

69 Hudson, ed., William Russell, between pages 30-31

70 Hudson, ed., William Russell, p 33

71 Lamb, “The Charge of the Light Brigade,” p 349

72 Hudson, ed., William Russell, p 33

73 Hudson, ed., William Russell, p 33

74 Lambert & Badsey, The Crimean War, p 117

75 Lamb, “The Charge of the Light Brigade,” p 350

76 Lamb, “The Charge of the Light Brigade,” p 351

77 Hudson, ed., William Russell, p 34

78 Hudson, ed., William Russell, p 34

79 Hudson, ed., William Russell, p 34

81 <http://s3images.coroflot.com/user_files/individual_files/original_45080_whgILURoklUO1Ao1p3Ys6tIBk.jpg> See also Bill Ashcroft, Gareth Griffiths, and Helen Tiffin, The Empire Writes Back: Theory and Practice in Post-colonial Literatures, Routledge, 2002

Nelson’s Touch: Lord Exmouth and the Bombardment of Algiers, 1816

Nelson’s Touch: Lord Exmouth and the Bombardment of Algiers, 1816

The Nelson Touch: noun, “a masterly or sympathetic approach to a problem.”1

Image

Admiral of the Blue, Sir Edward Pellew, Lord Exmouth.2

Sir Edward Pellew, Baron Exmouth, was C-in-C Mediterranean fleet in 1816: considered the “most brilliant frigate commander of the age” with a litany of achievements during the Napoleonic Wars.3 Pellew was 59 in 1816.4 First promoted to Captain at the age of 25 during the American Revolution, Pellew was a rising star in the Royal Navy, known as a gunnery specialist and a naval disciplinarian.5 A favourite of Chanel Fleet C-in-C, John Jervis (later First Sea Lord Earl St. Vincent) Pellew was given independent command during the blockade of Brest, where he excelled.6 Between 1804-9 Pellew commanded in the East Indies.7 Upon return to England in 1811 he was asked for choice of command and naturally selected the Mediterranean- where during the denouement of the Napoleonic Wars he covered Toulon.8 His command of the Mediterranean renewed in 1815, Exmouth remained C-in-C Mediterranean through 1816.

The bombardment of Algiers was ultimately justified as necessary to enforce the release of Christians enslaved there, significantly the new British subjects of the Ionian islands.9 As ordered Pellew was first to “call” at Tunis and Tripoli in March 1816.10 The Dey, the leading Algerian potentate backed by the Ottoman Janissary Crops, agreed to release any British prisoners and to ransom Christian Italian and Spanish slaves.11 Exmouth pressed to arrange the same deal the Tunisians and Tripolitanians had agreed to: in future, Christians captured would be treated as POWs rather than slaves.12 The Dey, whose income was at least partially reliant on the ransom of “slaves” could not agree to this.13

slavetrade

Medal commemorating the abolition of the slave trade in Britain, 1807. Intended to deter Arabic speaking slave traders.14

A detailed account of the events leading up to the bombardment was provided by Pellew’s great-great- grandson for The Naval Review in 1966 to commemorate the 150th anniversary of the battle.15

The C-in-C had only limited success in arranging the release of Christian slaves during his first visit to the Algerian port in 1815.16 The Admiral, however, aware of the recent international arrangements at Vienna, knew that the British foreign secretary, Lord Castlereagh, had arranged to make the international slave-trade formally illegal. Unfortunately there was no political mechanism beyond the Royal Navy for enforcement.17 Exmouth was not certain how the reactionary Tory Prime Minister, Lord Liverpool, would negotiate concerning a unilateral movement against Algiers, so Exmouth returned to England to seek clarification.18 It turned out Liverpool’s government was as resolute in foreign policy as it was reactionary in public policy19 and thus with carte blanche asked Pellew for his requirements. The Admiralty’s expectation, based on Nelson’s dictum that ten sail-of-the-line was the smallest contingent reasonable for such an operation, was confounded when Exmouth requested only “five or six” battleships and “as many” frigates and bomb vessels.20 In fact, Exmouth had good intelligence from one of his frigate captains, Captain Ware, concerning the structure of the Algiers harbour and was aware that a few shallow draft ships would be more suited than a larger fleet contingent.21

Exmouth’s picked squadron sailed from Plymouth on 28 July composed of the following warships:

Queen Charlotte (100 guns, flagship, flag-captain James Brisbane), Impregnable, (98, rear-admiral of the blue David Milne, flag-captain Edward Brace), Superb (74, captain Charles Ekins), Minden (74, William Paterson), Albion (74, John Coode), Leander, (50, Edward Chetham), Severn (40, Frederick Aylmer), Glasgow (40, Anthony Maitland), Granicus (36, William Wise), and the Herbus (36, Edward Palmer).22 The British assault compliment was five brigs and four bomb vessels: the Beelzebub, Fury, Hecla and Infernal.23

 capellen

Baron Theodorus Frederik van Capellen.24

Exmouth was reinforced by Dutch Vice-Admiral Baron Frederik van de Cappellen’s squadron at Gibraltar. The Dutch Admiral’s force added six warships, four 40 gun frigates, a 30 gun frigate and an 18 gun ship.25

 large

Cartographic map of the Algiers fortification complex with attack positions, showing the mole and inner harbour.26

The Algerian defences covering the harbour were formidable: in stone fortified positions around a shallow littoral there were emplaced 318 cannon firing various weight of naval ball (many in double or triple tiers, or batteries), eight mortars, and two long barrelled 68 lb heavy guns. These defences were flanked by additional cannon along the coast and supported by positions on the heights behind the city, the total number of cannon in excess of 1,000, manned by 4,000 Algerians.27

These fortified positions were supported by the entire Algerian fleet, positioned in the inner harbour and composed of nine large vessels (frigates and corvettes) and “nearly 50 gunboats”.28

The combined British and Dutch force arrived on 27 August 1816.29 Exmouth sent in shore parties under flag of truce to present ultimatums. The Algerian government was to release the British consul- then held hostage- as well as all other European prisoners, and to abolish Christian slavery.30 With an expectation of rejection amidst a burning desire to bring the enemy action, only two hours were allowed for a response.31

 attackplan

The plan of attack was minimalist but careful.32 Exmouth intended to concentrate against the mole: the enemy strongpoint covering the anchored fleet and destroy both.33 Each ship was provided with a copy of Captain Ware’s earlier reconnaissance and instructions of the position the C-in-C intended to occupy.34 Extensive firing practice and a novel gunsight aided preparation.35

Forming a perpendicular line, the battleships would shell the entrance to the inner harbour, with the Dutch frigates covering the city batteries. Bomb vessels would throw their shells and rockets from 2,000 yards, with the gunboats in support.36

Exmouth did not waste time, taking advantage of favourable wind, Leander led the first detachment followed by Queen Charlotte, Implacable and Superb, towards the heavily fortified “mole” position at 1435 hours. Apparently, the Algerians at this point opened fire. Exmouth immediately retaliated, ordering firing.37

Bombardment_of_Algiers_1816_by_Chambers (1)

George Chambers 1836 painting of the bombardment, showing the destruction of the inner harbour warships.38

Essentially, the fleet formed into perpendicular line, dropped anchors, and proceeded to obliterate the Algerian positions from ranges as short as 80 or 50 yards. Queen Charlotte poured in 50 gun broadsides, after three salvos completely demolishing the fortifications opposite.39 Leander closed with the Algerian frigates covering the entrance to the inner harbour, pinning their crews with overwhelming fire, while simultaneously engaging batteries opposite, despite suffering heavy casualties as a result.40 At 1600 hours Pellew dispatched Lieutenant Richards in one of Queen Charlotte‘s boats to set fire to the Algerian frigate covering the entrance to the inner harbour. Two Royal Navy seaman were killed in the process but the task was accomplished.41

HMS Impregnable, unable to close range, was firing from a distance with heavier guns but suffering serious casualties.42 At 1630 hours Admiral Milne requested support from Exmouth.43 Pellew dispatched the Glasgow to draw fire, but due to the now prevailing calm weather was unable to get into position.44

Meanwhile, the bomb vessels wrought deadly work to the Algerian’s anchored fleet in the inner harbour: by 1900 hours all of the Algerian gunboats were aflame and under continuous bomb and rocket attack.45

large (1)“The bombardment of Algiers, 27 August 1816” also showing Algerian frigate aflame.46 Note high angle bomb and rocket attacks.

The bombardment lasted nine hours,47 The general conflagration caused by the burning Algerian navy spread to the surrounding town as the bombardment continued into the evening. At 2200, with the enemy’s positions either totally destroyed or on fire (and the expedition ships running low on ammunition) Exmouth signalled that the fleet was to cut its cables and move out to sea.48 The fleet reformed at 0200 on 28 August out of range of any surviving batteries.49

Over 800 casualties were suffered by the Royal Navy, with 128 killed: a 16% casualty rate.50 Queen Charlotte had eight killed, 131 wounded. Impregnable 50 killed 160 wounded. Superb eight killed 84 wounded (including Captain Ekins). Minden seven killed, 35 wounded. Albion three killed, 16 wounded (including Captain Coode). Leander 17 killed and 118 wounded. Severn three killed and 34 wounded. Glasgow 10 killed and 37 wounded. Garnicus 16 killed and 40 wounded. Herbus, four killed and 17 wounded. Infernal had two killed and 17 wounded. The Dutch had 13 killed and 52 wounded.51

 medal1

Medal made between 1816 and 1820 commemorating the bombardment, with Exmouth’s bust on obverse (not shown).52

Exmouth’s flag-captain, James Brisbane met with the Dey of Algiers on 29 August during which, with the Algerian port defences still smouldering around, the Dey agreed to the expedition’s demands.53 Money changed hands, including large sums to compensate the British consul for loss of property and to Naples and Sicily for repatriating their former slaves, of which 1,200 Christians were freed.54

Admiral Pellew returned to England on 3 September and was shortly thereafter made Viscount.55 Amidst the numerous decorations and promotions handed out, Rear-Admiral Milne was knighted as Knight Commander and Captains Ekins, Aylmer, Wise, Maitland, Paterson and Coode were made Knight Companions.56

Memory of the devastation caused by the 1816 bombardment resulted in the absolution of a planned 1824 bombardment in advance of the Dey’s capitulation.57

exmouthSir Edward Pellew, Viscount Exmouth, painted 1818.58

“Admiral Edward Pellew’s thundering subjugation of Algiers reaffirmed that Britannia was still very much the unrivalled mistress of the oceans.”59

3 Herman, To Rule The Waves, p 400; see also A. P. P., “Lord Exmouth and the Bombardment of Algiers” p 319

4 A. P. P., “Lord Exmouth and the Bombardment of Algiers” p 319

5 A. P. P., “Lord Exmouth and the Bombardment of Algiers” p 319

6 A. P. P., “Lord Exmouth and the Bombardment of Algiers” p 320; Jervis described Pellew’s efforts during the aborted capture of Belle Ille as “the most masterly I ever saw”

7 A. P. P., “Lord Exmouth and the Bombardment of Algiers” p 320

8 A. P. P., “Lord Exmouth and the Bombardment of Algiers” p 320

9 <http://collections.rmg.co.uk/collections/objects/14159.html>; Charles Rathbone Low, The Great Battles of the British Navy, London: Routledge, 1872 <http://books.google.ca/books?id=slgBAAAAQAAJ>, p 430; A. P. P., “Lord Exmouth and the Bombardment of Algiers” p 321

10 A. P. P., “Lord Exmouth and the Bombardment of Algiers” p 322

11 Low, The Great Battles of the British Navy, p 430;

12 A. P. P., “Lord Exmouth and the Bombardment of Algiers” p 321

13 A. P. P., “Lord Exmouth and the Bombardment of Algiers” p 322

15 A. P. P. [Pellew?], “Lord Exmouth and the Bombardment of Algiers” in The Naval Review 54, no. 4 (1966): 318

16 A. P. P., “Lord Exmouth and the Bombardment of Algiers” p 322

17 Paul Kennedy, The Rise And Fall of British Naval Mastery, New York: Charles Scribner’s Sons, 1976, p 165

18 Low, The Great Battles of the British Navy, p 430

19 Ramsay Muir, A Short History of the British Commonwealth, vol. ii, third edition, London: George Philip & Son, Ltd., 1924, p 325-6

20 Low, The Great Battles of the British Navy, p 431

21 A. P. P., “Lord Exmouth and the Bombardment of Algiers” p 321

22 Grove, The Royal Navy Since 1815, p 5; A. P. P., “Lord Exmouth and the Bombardment of Algiers” p 320

23 Low, The Great Battles of the British Navy, p 431; Grove, The Royal Navy Since 1815, p 5

25 Low, The Great Battles of the British Navy, p 431

27 Low, The Great Battles of the British Navy, p 431-2

28 Low, The Great Battles of the British Navy, p 432

29 Low, The Great Battles of the British Navy, p 431

30 Low, The Great Battles of the British Navy, p 432

31 Low, The Great Battles of the British Navy, p 432

32 A. P. P., “Lord Exmouth and the Bombardment of Algiers” p 323

33 A. P. P., “Lord Exmouth and the Bombardment of Algiers” p 322

34 A. P. P., “Lord Exmouth and the Bombardment of Algiers” p 324

35 A. P. P., “Lord Exmouth and the Bombardment of Algiers” p 324

36 Low, The Great Battles of the British Navy, p 433

37 Low, The Great Battles of the British Navy, p 432

39 Low, The Great Battles of the British Navy, p 433

40 Low, The Great Battles of the British Navy, p 433-4

41 Low, The Great Battles of the British Navy, p 433

42 Grove, The Royal Navy Since 1815, p 5

43 Low, The Great Battles of the British Navy, p 434

44 Low, The Great Battles of the British Navy, p 434

45 Low, The Great Battles of the British Navy, p 434

47 Grove, The Royal Navy Since 1815, p 5

48 Low, The Great Battles of the British Navy, p 434; A. P. P., “Lord Exmouth and the Bombardment of Algiers” p 319

49 Low, The Great Battles of the British Navy, p 434

50 Grove, The Royal Navy Since 1815, p 5; Andrew Lambert, “The Shield of Empire” in The Oxford Illustrated History of the Royal Navy, edited by J. R. Hill and Bryan Ranft,,Oxford Illustrated Histories, Oxford: Oxford University Press, 1995, p 167

51 Low, The Great Battles of the British Navy, p 434-5

53 Low, The Great Battles of the British Navy, p 435

54 Low, The Great Battles of the British Navy, p 435

55 Low, The Great Battles of the British Navy, p 435 <http://en.wikipedia.org/wiki/Viscount_Exmouth>

56 Low, The Great Battles of the British Navy, p 435

57 Grove, The Royal Navy Since 1815, p 5

59 John Sugden, Nelson: The Sword of Albion, London: The Bodley Head, 2012, p 853

HMS Inflexible: Scion of the Mediterranean Fleet

HMS Inflexible:

Scion of the Mediterranean Fleet

 Image

Lithograph of Inflexible, 1880.1

The ironclad battleship displaced between 11,407 and 11,880 tons.2 Propelled by twin screw compound expansion engines fired by 12 boilers, the warship developed 8407 horsepower for a top speed of 14.75 knots.3 Coal bunkers provided for 1200 tons of coal for a range of 5200 miles at 10 knots.4 As complete, Inflexible featured a full sailing rig.5 The rig was replaced with masts between 1885 and 1887 when Inflexible was recommissioned.6

Image

Drawing showing Inflexible‘s formidable citadel armour.7

Built 16 years after HMS Warrior, the ironclad was protected by a belt 24 to 16 inches thick, turrets 17-18 inches thick and a deck covered in 3 inches of plate. The plate of the central citadel was applied as two layers of 12 inch compound armour, wrought iron and steel.8 440 sailors and officers crewed the ship.9 Inflexible was the first RN ship lit by electricity.10 Inflexible was further protected by 135 watertight subdivisions and 12 bulkheads.11 Inflexible served mainly in the Mediterranean Fleet during the 1880s and 1890s, after November 1893 becoming the Portsmouth Port Guard ship until 1897. Placed in reserve in November 1901, Inflexible was broken up for scrap in 1903.12

 Image

Painting of Inflexible with sailing rig.13

Planned as a counter to the heavy ironclads being developed by Italy (the famous Duilo and Dandolo),14 Inflexible was to carry 60 ton muzzle-loading cannon.15 In response to the Italian plan to purchase larger calibre Armstrong cannon (eventually settling on 100 ton guns), Inflexible was up-gunned to 81 ton muzzle-loaders and laid down on 24 February 1874.16 When complete, the Inflexible carried four 81 ton 16.25 inch bore muzzle-loading cannon in twin turrets, capable of firing about one round every 11 minutes, although they had been rated at a shell every two to five minutes.17 Inflexible was also the first British battleship to feature torpedo tubes, one mounted on both port and starboard bows.18 Two auxiliary torpedo tubes were carried one a piece aboard Inflexible‘s steam launches.19 Supporting this powerful main armament were four 6 lb QF guns, eight 4.7 inch cannon and a pair of 3 lb guns.20 Like all ironclad battleships of this period, the Inflexible also carried a prow ram.

Image

Sir John Fisher, as Captain Royal Navy (RN), commanded Inflexible at the bombardment of Alexandria.21 Fisher as Captain HMS Inflexible22

Inflexible was commissioned on 5 July23 and fully ready for sea by October 1881.24 Sir Edward Reed, former Secretary and later Chief Constructor of the Institute of Naval Architects and by 1880 a liberal MP, felt the design deficient, leading to the formation of a government committee resulting in delays to completion.25 As a result of these maneuverings, Inflexible required seven and a half years to complete.26 Selected as a choice commander for the RN’s newest, heaviest warship, John Fisher was the first to command Inflexible.27

 Image

Model of Inflexible as complete.28

The bombardment of Alexandria: Egyptian General Ahmed Arabi led a revolt against the European backed Khedive government of Egypt, and besieged the government palace at Alexandria. Arabi then moved to strengthen Alexandria’s harbour defence.29

At the time, the Mediterranean Fleet was under the command of Vice-Admiral Sir Frederick Seymour.

Seymour had at his disposal, in addition to HMS Inflexible: Alexandria, Invincible, Sultan, Superb, Temeraire, Penelope, Monarch, and gunboats Beacon, Bittern, Condor, Cygnet, and Decoy. Reinforcements from the Channel Squadron were dispatched including Achilles, Agincourt and Tamar.30

 Image

Drawing of naval squadron between 1870-5 including HMS Penelope (1867), and Invincible (1869) ships that took part in the 1882 attack against the Alexandria fort complex.31

Following the British defeat in the First Boer War of 1881, the Gladstone administration was under significant pressure to prevent a repeat.32 The government thus authorized Seymour to issue an ultimatum (set for 11 July 1882) for Arabi’s forces to stop work on the development of Alexandria’s fort defences.33 A “massacre” of Europeans by a mob likely influenced Seymour to issue his ultimatum.34 To attack the Alexandria fort complex Seymour placed his flag aboard HMS Invincible and along with Penelope and Monarch planned to close to decisive range against the Res el Tin forts. Inflexible would stand-off and shell the forts with its heavy cannon.35 A detachment of gunboats led by Charles Beresford in the Condor would attack the Marabout forts. A large squadron of international vessels stood by to evacuate non-Egyptian subjects. All told, Seymour could employ ninety heavy guns.36

 Image

Plan for the bombardment, showing disposition of RN ships along coast and International Squadron to north west.37

On 11 July 1882 at 0700 Seymour launched his ten and a half hour attack.39 Alexandra fired the first salvo and at 0830 the Monarch detonated an Egyptian magazine.40 Inflexible and Temeraire moved to attack the forts at Pharos and Ada while Condor attacked the forts at Marsa.41 When firing ceased at 1730, Inflexible had fired 88 of its 16 inch shells.42 The fleet poured in over 3000 shells, silencing ten of the 44 Egyptian cannon and inflicting hundreds of causalities.43 American observers described Temeraire‘s fire as the most accurate.44 The RN suffered fifty-three casualties.45 Seymour ordered Fisher to land marines to secure the forts on 13 July.46 Fisher deployed 150 sailors and 450 marines for this purpose.47 Fisher and the Inflexible moored at Alexandria and later Port Said before returning to Malta, Fisher suffering from dysentery no doubt worsened by a heavy prescription of opium. Fisher developed malaria and was thus invalided to England.48 He returned to duty in April 1883.49

 Image

Bombardment of Alexandria, 11 July 1882, painting by De Simone (1883).38

Following the naval demonstration, a conference was arranged at Constantinople, although the Ottoman Empire refused to intervene. Britain then dispatched Sir Garnet Wolseley in a unilateral fashion, whose army defeated General Arabi at the battle of Tel-el-Kebir in September 1882.50 Although Arabi had been defeated, Britain had interjected into an Egypt beset by internal crisis- namely the Mahdi’s rebellion in the Sudan.

Image

Edinburgh, slightly smaller battleship of similar configuration to Inflexible in 188751

Inflexible would be the last British battleship built to carry a full sailing rig.52

Image

Inflexible in 1887.53

3 Tony Gibbons, ed., The Encyclopedia of Ships., San Diego, CA.: Thunder Bay Press, 2001, p 259

4 <http://collections.rmg.co.uk/collections/objects/546028.html&gt;; Gibbons, ed., The Encyclopedia of Ships, p 259

5 Massie, Dreadnought: Britain, Germany, and the Coming of the Great War, Toronto: Random House of Canada Ltd., 1991, p 390

8 Gibbons, ed., The Encyclopedia of Ships, p 259; Archibald Hurd, “Her Majesty’s Navy, 1837-1897” in The Ludgate no. 4 (June 1, 1897): 161–166, p 163

9 Gibbons, ed., The Encyclopedia of Ships, p 259

15 Eric Grove, The Royal Navy Since 1815, New York: Palgrave Macmillan, 2005, p 53

16 Grove, The Royal Navy Since 1815, p 53

17 Gibbons, ed., The Encyclopedia of Ships, p 259; John Leather, World Warships in Review 1860-1906, Purnell Books Services, London: Purnell Book Services Limited, 1976, p 13; Grove, The Royal Navy Since 1815, p 53; Massie, Dreadnought, p 419

18 Leather, World Warships in Review 1860-1906, p 13

19 Massie, Dreadnought, p 420

21 James Morris, Pax Britannica: The Climax of an Empire, vol. 2. 3 vols., Reprinted 1981., Bungay, Suffolk: Penguin Books, Ltd., 1968, p 241

25 Grove, The Royal Navy Since 1815, p 42, 59; <http://en.wikipedia.org/wiki/Edward_James_Reed#Parliamentary_career&gt;

26 Massie, Dreadnought, p 419

27 Massie, Dreadnought, p 151

29 Massie, Dreadnought, p 420-1

30 Grove, The Royal Navy Since 1815, p 66-7

32 J. F. C. Fuller, The Conduct of War: 1789-1961, New Brunswick, N. J.: Da Capo Press, 1992, p 132

33 Massie, Dreadnought, p 421

34 Ramsay Muir, A Short History of the British Commonwealth, vol. 2., 2 vols., Third edition, London: George Philip & Son, Ltd., 1924, p 655

35 Grove, The Royal Navy Since 1815, p 66-7

36 Massie, Dreadnought, p 421

39 Grove, The Royal Navy Since 1815, p 66-7; Massie, Dreadnought, p 421

40 Arthur Herman, To Rule The Waves: How the British Navy Shaped the Modern World, New York: HarperCollins’ Publishers, 2004, p 468

41 Herman, To Rule The Waves, p 468

42 Massie, Dreadnought, p 421

43 Massie, Dreadnought, p 421

44 Herman, To Rule The Waves, p 469

45 Herman, To Rule The Waves, p 468

46 Grove, The Royal Navy Since 1815, p 67

47 Massie, Dreadnought, p 422

48 Massie, Dreadnought, p 422-3

49 Massie, Dreadnought, p 424

50 Muir, A Short History of the British Commonwealth, p 655

51 Leather, World Warships in Review 1860-1906, p 28

52 Massie, Dreadnought, p 419

Sea Harrier FRS1: Operation Corporate

Sea Harrier FRS1: Operation Corporate

 auld

Lt. Commander Andy Auld’s FRS.1 (XZ499) 800 NAS at HMS SHEATHBILL [Port San Carlos] in June 1982i

The 14,000 lb aircraft was powered by a single Rolls-Royce Mk 104 Pegasus vector thrust turbofan, generating 21,500 lbs of static thrust.ii The aircraft could accelerate to Mach 1.25 (600) knots in a dive. Armed with 2 30 mm ADEN gun pods (200 rounds), with options for cluster bombs (600 lb) or rocket pods (2 inch) and 5,000-8,000 lbs of payload including AIM-9L “Sidewinder” IR missiles.iii Harriers were flown by NAS Nos 800, 801, 809 and (HQ, training) 899.iv 899 NAS had previously been 700A Intensive Flying Trials Unit at RNAS Yeovilton. Harrier trials had been conducted as early as August 1969, when the first Harrier landings were made aboard HMS Blake. Operational trials were carried out a decade later in 1979.v In March 1980 the newly formed 899 (HQ) squadron possessed 6 aircraft.vi In 1998 FRS.Mk 1s were operating with NAS 800 and 801, in addition to 899 squadron.vii

General Leopoldo Galtieri’s military junta government declared “that 1982 would be ‘The Year of the Malvinas’” clarifying beyond a doubt the Argentine intention to settle the Falklands question.viii On 31 March 1982 intelligence was received “indicating that an Argentine Task Force” was heading towards the Falklands.ix

Hermes

Hermes, Centaur class,in May 1981. Note NAS 800 Harriers at stern.x

The Falkland Islands in addition to South Georgia, were invaded on the night of 1/2 April 1982.xi HMS Invincible was placed on alert on April 2.xii Argentine bank assets in Britain were frozen on April 3.xiii A rapid series of events followed, beginning with the establishment of the shipping Exclusion Zone on April 5. The “Zone”- termed as such to avoid the wartime connotations of “blockade” – was established for 200 miles around the islands.

Task Force 317, under overall command of Admiral Fieldhouse, was composed of three distinct naval components: CTG 317.8 (Carrier Battle Group, RA Woodward), CTG 317.0 (Amphibious Task Group, Commodore Clapp), CTG 317.1 (Landing Force, Brigadier Thompson).xiv Submarines were operated under the separate command of Task Force 324.xv

During the Falklands War the Fleet Air Arm operated 20 FRS Harriers, squadrons aboard HMS Hermes and HMS Invincible.xvi RAF No. 1 Squadron GR3s also operated from Hermes.xvii In combat, 28 Harriers flew 2,197 sorties, resulting in 23 shoot-downs.xviii No 800 NAS and 899 (Hermes) flew 1,126 sorties and launched 14 AIM-9L sidewinders (only two of which missed their targets).xix No 801 and elements of 809 NAS were stationed aboard Invincible.xx

On 1 May 1982 seven aircraft were brought down by Sea Harriers for no losses.xxi The case of 1 May provides a startling example of the Harrier’s combat capability and the skill of the NAS and RAF operators. That afternoon, RAF Flight Lieutenant Paul Barton (801 Sqd.) and Lieutenant Commander John Eyton-Jones in two Harriers were on combat air patrol westward of the Task Force at 15,000 feet when HMS Invincible reported an enemy flight of six aircraft approaching, although this and another force aborted their attacks after firing several radar guided anti-air missiles and a resulting dog-fight.xxiii The flight was intercepted by a pair of Harriers flown by Lts Hale and Penfold. Penfold was able to attack and destroy Dagger C-433 with an AIM-9.xxiv

Dave Smith

Lt Dave Smith landing ZA193/93 on Hermes after destroying Dagger (C410 of Grupo 6) […] with his port AIM-9L Sidewinder on 24 May 1982”xxv ( 9 IAI Daggers were downed by Sea Harriers.xxii )

The major engagement of 1 May occurred when the FAA (Argentine Air Force) launched a coordinated attack with 20 aircraft. The first elements (a pair of Mirage IIIEAs from Grupo 8 flown by Captain Garcia Cuerva and Lieutenant Carlos Perona) were intercepted by Barton and wingman Lieutenant Steve Thomas (XZ452 and XZ453).xxvi xxvii Barton downed Perona (later recovered by the FAA) with an AIM 9, while Thomas chased Cuerva, damaging the latter’s aircraft with an AIM 9.xxviii Cuerva was unfortunately killed in a friendly fire incident as he returned to base.xxix The next day Thomas downed two Daggers, beginning the legend of the Harrier as Black Death: La Muerte Negra.xxx

The same day, 9 Harriers carrying thousand lb bombs attacked Stanley Airport in support of the ‘Black Buck’ Vulcan raids.xxxi Harriers from Hermes and Invincible were launched against Stanley Airport and dropped thousand lb and cluster bombs.xxxii Dave Stanley’s NAS 800 Harrier (ZA192) was hit by 20mm flak as he overflew the airport on 1 May.xxxiii Nigel “Sharkey” Ward, commander No. 801 NAS, has critiqued the Vulcan missions, each of which required 18 refuelling missions flown by 12 aircraft and 130,000 gallons of fuel “sufficient to fly 260 Sea Harrier missions… dropping 1,300 bombs.”xxxiv

 Dagger

IAI Dagger (Dassault Mirage 5) flown by Argentine Air Force.xxxv

The next day, 2 May 1982 HMS Conquerer torpedoed the ARA General Belgrano. On 4 May the FAA launched a pair of Super Etendards armed with 2 of Argentina’s 5 air capable Exocet missiles against the Task Force, resulting in the fatal strike against HMS Sheffield.xxxvi

 Sheffield

Sheffield after Exocet strike.xxxvii

Retaliation attacks by Vulcan and Harrier aircraft was organized on 4 May. It was during this operation that Lt Nick Taylor, in XZ450 was hit and killed by AA. The attack was carried out by the remaining aircraft, ZA192 (cluster bombs) and XZ460 (1,000 lb bombs).xxxviii On 9 May, four Harriers, including XZ460 and ZA191 bombed and strafed the Argentine trawler Narwhal.xxxix On 10-11 May attacks were carried out by NAS 800 against the Stanley airfield: due to the Roland missiles defending the airport, bombs could only be dropped at 18,000 feet and were generally inaccurate.xl On 15 May the Argentine supply ship Rio Carcarana was spotted near Port King, and was attacked by Harriers XZ459 and XZ494, resulting in the ships abandonment.xli A similar fate met the Bahia Buen Suceso docked at Fox Bay and attacked by Harriers XZ500 and ZA191.xlii

On 18 May Atlantic Conveyer arrived carrying 4 FRS aircraft (No 809 NAS) and 4 GR.3s (No 1 RAF, of which two more aircraft arrived shortly afterwards).xliii

 GR3Harrier

GR3 and FRS1 comparison.xliv

In a series of events known as “Bomb Alley” to the British, and “Death Valley” to the Argentines, the Ardent was sunk on May 21 by Skyhawks A-4Q0660 and A4Q0665 (A-4Q0660 was destroyed by XZ457’s AIM-9 launch and A-4Q0665’s pilot was forced to eject as a result of cannon hits).xlv Another Skyhawk in the area, A-4Q0667 was downed by cannon fire from Harrier XZ500.xlvi The sinking of the Ardent was a result of the Argentine attempt to disrupt Operation Sutton, the landing at Port San Carlos. During this operation, several waves of Dagger and Skyhawk aircraft attacked the Task Force. Patrolling Harriers XZ492 and XZ496 intercepted three Skyhawks and downed two of them. XZ455 and ZA176, launched in support, caught four incoming Daggers and destroyed C-409.xlvii

The Antelope was sunk on May 23, the same day Hermes CAP ZA192 and ZA191 intercepted a helicopter resupply force enroute from Port Stanley to Port Howard.xlviii The Coventry & Atlantic Conveyor were destroyed on May 25. The day before three Daggers were downed by Harriers XZ457 and ZA193.xlix Terrible losses were also inflicted upon the Royal Fleet Auxiliary vessels Sir Tristram and Sir Galahad on June 8 when they were attacked by eight Skyhawks and five Daggers.l Three Skyhawks were downed by AIM-9s and cannon by ZA177 and XZ499 in the evening of June 8.li

coventry

Coventry hit fatally by three 1,000 lb bombs.lii

Lastly the Fearless was destroyed on June 8. Of these losses, the Sheffield and Atlantic Conveyor were destroyed by Exocets fired from FAA Super-Etendard 3-A-203.liii The loss of Atlantic Conveyor was particularly disastrous as not only had 10 Harriers been scrambled to intercept, but the Conveyor also carried the lion’s share of the Chinook helicopters required for the Commando heavy lift for land operations.liv The Argentines claimed to have scored an Exocet hit upon HMS Invincible, in addition to several bomb hits, on 30 May 1982, though Invincible sustained no damage that day.lv The majority of damage inflicted upon the Task Force was the result of A-4 Skyhawk attacks with conventional munitions. Skyhawk kills included the Ardent, Antelope and the Coventry. In total the 48 Skyhawks possessed by Argentina sank “a destroyer, two frigates and two landing ships” though at the steep and unacceptable price of 22 planes.lvi

 hermesjuly

Hermes returns to Portsmouth, 21 July 1982lvii

The campaign to liberate the islands was concluded by 14 June with the surrender of the Island’s garrison.lviii Two Harrier pilots were killed in combat operations. XZ450, 800 NAS stationed on HMS Hermes, pilot Lieutenant Nick Taylor, was shot down by 35mm gunfire 4 May 1982.lix Lt Cdr Batt was killed when ZA192 crashed on take-off in late May.lx 

For their part, the FAA’s 14 Super Etendards sank two RN ships for no losses (Gunston, ed., The Encyclopedia of Modern Warplanes, p 106). The success of the carriers at the Falklands demonstrated the value of naval aviation for the Royal Navy: all the more significant considering the pre-Falkland RN cutbacks (Till, Seapower: A Guide for the Twenty-First Century, London: Frank Cass, 2004, p 194), p 273

ii Kev Darling, Fleet Air Arm Carrier War, South Yorkshire: Pen & Sword Books Ltd., 2009, p 311

iiiDarling, Fleet Air Arm Carrier War, p 311-3, 246; Bill Gunston, ed., The Encyclopedia of Modern Warplanes, Etobicoke, Ontario: Prospero Books, 1998, p 77

ivDarling, Fleet Air Arm Carrier War, p 313

v Longstaff, The Fleet Air Arm, p 240-1

viReginald Longstaff, The Fleet Air Arm: A Pictorial History, London: Robert Hale Ltd., 1981, p 242

viiGunston, ed., The Encyclopedia of Modern Warplanes, p 77

viii J. F. Woodward & Patrick Robinson, One Hundred Days; The Memoirs of the Falklands Battle Group Commander, Annapolis: Naval Institute Press, 1992, p 68

ix Lawrence Freedman, The Official History of the Falklands Campaign, vol., 2, New York: Taylor & Francis Inc., 2005, p 3

x John Jordan, An Illustrated Guide to Modern Naval Aviation and Aircraft Carriers, London: Salamander Books Ltd., 1983, p 40-1

xi Finnis, Airlife – History of the Fleet Air Arm, p 162

xiiADM 53/189407, Ships log of HMS Invincible, 2 April 1982. National Archives, p 8

xiii Freedmen, Official History, vol 2, p 92

xiv Geoffrey Till, Seapower: A Guide for the Twenty-First Century, London: Frank Cass, 2004, p 194

xvDarling, Fleet Air Arm Carrier War, p 243

xvi Bill Finnis, Airlife – History of the Fleet Air Arm – From Kites to Carriers, Shrewsbury: Airlife Publishing Ltd., 2000, p 166

xviiIan Speller, “Limited War and Crisis Management: Naval Aviation in Action from the Korean War to the Falklands Conflict,” in British Naval Aviation: The First 100 Years, edited by Tim Benbow, 151–76, Corbett Centre for Maritime Policy Studies Series, Farnham: Ashgate Publishing Ltd, 2011, p 171

xviii Speller, “Limited War and Crisis Management” p 171

xix Darling, Fleet Air Arm Carrier War, p 263, 244

xxDarling, Fleet Air Arm Carrier War, p 245

xxiDavid Hobbs, “The Empire Strikes Back: The Battle of the Falklands in 1914 and the Falklands War of 1982” in Dreadnought to Daring, edited by Peter Hore, 358–72, Barnsley: Seaforth Publishing, 2012, p 363

xxiii Christopher Chant, Air War in the Falklands: 1982, Osprey Combat Aircraft 28, Botley Oxford: Osprey Publishing, 2001, p 43-5

xxiv Darling, Fleet Air Arm Carrier War, p 248

xxv Andy Evans, The British Aerospace Sea Harrier, Bedford, UK: SAM Publications, 2007, p 23

xxvi Darling, Fleet Air Arm Carrier War, p 264

xxvii Chant, Air War in the Falklands, p 45-7

xxviii Chant, Air War in the Falklands, p 47

xxix Chant, Air War in the Falklands, p 48

xxx Wragg, A Century of British Naval Aviation, p 183

xxxiSpeller, “Limited War and Crisis Management” p 172

xxxii Darling, Fleet Air Arm Carrier War, p 247

xxxiii David Wragg, A Century of British Naval Aviation, 1909-2009, Pen and Sword, 2009, p 182; Darling, Fleet Air Arm Carrier War, p 248

xxxiv Speller, “Limited War and Crisis Management” p 172; see Nigel Ward, Sea Harrier over the Falklands, London: Orion Books, 1993, p 183-6; Wragg, A Century of British Naval Aviation, p 183

xxxvi Freedman, Official History, vol 2, p 259

xxxviii Darling, Fleet Air Arm Carrier War, p 251

xxxix Darling, Fleet Air Arm Carrier War, p 251

xl Darling, Fleet Air Arm Carrier War, p 251

xliDarling, Fleet Air Arm Carrier War, p 252

xliiDarling, Fleet Air Arm Carrier War, p 252

xliii Darling, Fleet Air Arm Carrier War, p 252

xliv Chant, Air War in the Falklands, p 17-8

xlv Darling, Fleet Air Arm Carrier War, p 255

xlvi Darling, Fleet Air Arm Carrier War, p 255

xlvii Darling, Fleet Air Arm Carrier War, p 255

xlviii Darling, Fleet Air Arm Carrier War, p 256

xlix Darling, Fleet Air Arm Carrier War, p 258-9

l Darling, Fleet Air Arm Carrier War, p 260

liDarling, Fleet Air Arm Carrier War, p 260

liii Salvador Huertas, “Super Etendard in the Falklands” in Wings of Fame: The Journal of Classic Combat Aircraft, vol., 8, London: Aerospace Publishing Ltd., 1997, p 25

livDarling, Fleet Air Arm Carrier War, p 259

lv Huertas, “Super Etendard in the Falklands” p 29

lvi Salvador Huertas & David Donald, “A-4 Skyhawk in the Falklands” in Wings of Fame: The Journal of Classic Combat Aircraft, vol., 12, London: Aerospace Publishing Ltd., 1998, p 29

lviii Alexander and Malcolm Swanston, Atlas of Air Warfare, Victoria, Australia: Hinkler Books Pty Ltd, 2009, p 212

lix James Spirit & Martin Paul, “One of Our Aircraft is Missing,” 27 Jan 2005 <http://www.britains-smallwars.com/Falklands/brit-aircraftlosses.htm>

lxDarling, Fleet Air Arm Carrier War, p 257-8

Hawker Sea Fury Korean Operations

Sea Fury1

Sea Fury WE790 [796?] supposedly from HMAS Sydney serviced by USMC mechanics.i

Originally an RAF fighter, the Fury contract was abandoned by the Air Force but pursued by the Admiralty as a Seafire replacement.ii The prototype flew on 21 February 1945.iii The carrier capable prototype flew in October 1945.iv Deck landing trials were carried out on HMS Ocean in August 1946.v

The Sea Fury F10 entered service in August 1947 with 807 Squadron, and the F11 with 802 Squadron in May 1948.vi The Sea Fury was operated by Fleet Air Arm (and RAN) squadrons 801, 802, 803, 804, 805, 806, 807, 808, 811, 871 and 898.vii During the Korean War, Sea Furies operated with squadron nos “802 (Ocean), 807 (Theseus), 801, 804 (Glory), 805 and 808 (Sydney).viii

 Sea Fury2

Sea Fury FB 11, VX642 with ordinance display. Note the two 45 gallon drop tanks which increased the aircraft’s range from 700 to 1040 miles.ix

The aircraft was armed with 4 20mm Hispano Mk V cannons and could carry up to 2,000 lbs of ordinance (1,000 or 500 lb bombs) or 12 76mm (60 lb) rockets.x Empty, the aircraft weighed 9,240 lbs and fully loaded 12,500 lbs. Powered by a Bristol Centaurus XVIIC 18 cylinder twin-row radial engine developing 2,480 horsepower, the aircraft could make 460 mph (400 knots) and ascend to 10,900 meters.xi

 Sea Fury3

Supermarine Seafire.xii

The North Korean People’s Army forced the withdrawal of the Southern government from Seoul on 27 June 1950. Rear-Admiral Sir William G. Andrewes, aboard HMS Belfast, was operating with the carrier HMS Triumph in Japanese waters at the time and moved to respond.xiii Following the UN mandate for assistance to the Republic of Korea on 27 June the commonwealth forces of Australia, New Zealand and Canada joined with the United Kingdom and the United States as the major naval power in the region.xiv USN Vice-Admiral C. Turner Joy assumed overall command and placed Andrewes as commander Task Group 96.8, West Korea Support Group.xv Triumph joined Task Force 77, USN Pacific Fleet, along with USS Valley Forge under command of Rear-Admiral John M. Hoskins USN.xvi The first strikes were carried out on 3 July, and on 28 July the first FAA casualty was suffered when a Seafire from 800 (Triumph) Squadron was mistakenly shot down by a USAF B-29xvii.

 Sea Fury4

A flight of Fireflies and Sea Furies.xviii

The Sea Fury was first used to in combat to support Fairey Firelies on ASW patrols. HMS Theseus arrived in the Yellow Sea carrying 23 Furies and 12 Fireflies from 807 and 813 Squadrons and conducted its first patrols and strikes on 9 October 1950.xix The first Sea Fury strike involved six aircraft (and four Fireflies) carrying mixed ordinance of 500 lb bombs and rockets, led by Lt Cdr Stovin-Bradford against targets at Paengyong-do.xx That afternoon five Sea Furies and four Fireflies attacked the harbour at Chinnampo.xxi Loadouts favoured rockets as the weight of bombs necessitated higher steaming speeds than the Theseus was capable of attaining (21 knots with rockets, 28 with bombs).xxii

 Sea Fury5

A raid in progress on warehouses on the waterfront at Chinnampo in North Korea by Fairey Firefly aircraft from HMS THESEUS.”xxiii

Day two on station, Theseus launched a strike against the Chang-you railway bridge, the flight consisting of Fireflies escorted by a pair of Furies and resulting in significant damage to the bridge.xxiv A simultaneous flight targeting the surrounding area resulted in the destruction of Sea Fury VW628, although the pilot, who ditched the aircraft successfully, was rescued by helicopter.xxv Deteriorating weather on the afternoon of 11 October forced Theseus to leave the area and refuel. Strikes were launched against the Chang-yong area later the following day.xxvi For the next several days attacks were made against targets in the Cinnampo area, including the harbour where the Sea Furies attacked Korean junks believed to be mine layers.xxvii After refuelling at Inchon, Theseus moved to the Sinanju-Chonju-Sonchon area of operations and sortied aircraft on 20 October to attack Chongju.xxviii

Sea Fury6

Source.xxix

By mid-December Theseus‘s Sea Furies were attacking Pyongyang. Weather conditions worsened and snow was regularly cleared from the flight deck.xxx Despite the poor conditions, Sea Fury raids against communications (enemy trucks) were carried out near Chongchon river and the Hangju-Sariwon area.xxxi

Sea Fury7

Sea Fury VW546 aboard HMS Glory.xxxii

In 1951 Rear-Admiral Alan K. Scott-Moncrieff replaced Andrewes (promoted to Vice-Admiral).xxxiii HMS Glory replaced Theseus on 23 April 1951 and continued operations with the 14th Carrier Air Group. Glory‘s arrival coincided with the beginning of the Chinese spring offensive.xxxiv Glory was relieved by HMAS Sydney in September 1951 and the latter flew 2,366 sorties over 43 flying days- interrupted by Typhoon Ruth.xxxv Glory returned in January 1952, and was relieved by Ocean in the summer.xxxvi

During these two tours, Glory‘s air group conducted 5000 sorties.xxxvii Between 1950 and 1953 the four Sea Fury equipped carriers were supported by HMS Unicorn which ferried fresh equipment from the fleet base at Singapore the 2,500 miles to the theatre of operations.xxxviii

 Sea Fury8

HMS Theseus leaving Malta after the war in July 1953.xxxix

Some measure of the intensity of operations can be made by examining the sortie record of HMS Theseus from the beginning of hostilities to the end of March 1951.xl Between 9 October and 5 November 1950, Theseus‘s Furies (avg 19.3) made 492 sorties. From 5 December to 26 December, 423 Fury sorties were flown by an average of 19.6 aircraft. From 7 January 1951 to 23 March, 20.8 Furies flew 718 sorties, for a total of 1634 sorties over 98 days of operation (of which 65 were suitable for flying). All told, Theseus launched 3,500 sorties on 86 days during its seven month deployment.xli During the first six months, Theseus‘s air wing dropped 829,000 lbs of explosives and fired 7,317 rockets and “half a million rounds of 20mm ammunition.”xlii In recognition of these efforts, Theseus and the 17th Carrier Air Group was awarded the Rear-Admiral Sir Denis Boyd trophy for 1950 for “outstanding feat of naval aviation”.xliii

Similar feats were achieved by HMS Glory, for example, in September 1951 the 14th CAG set a record for 66 offensive and 18 defensive sorties in a day, and in March 1953 Glory‘s air group set a record for 123 sorties in one day, equal to that of HMS Ocean, and resulting in the destruction of “seven bridges, 28 buildings , and five oxcarts.”xliv Glory saw the most overall action during the Korean War, totalling 9,500 operational sorties.xlv All told, Glory‘s aircraft dropped 3,818,000 lbs of ordinance, in addition to 24,328 rockets and over 1.4 million rounds of 20mm, resulting in the destruction of 70 bridges, 392 vehicles and 49 railways trucks for the loss of 20 crew.xlvi

Sea Fury9

VR943 of 804 Squadron launches from HMS Glory, June 1951.xlvii

Operations in Korea were strenuous. Briefed the night before, a typical day involved waking at 0400 for flights launching at 0500. An average of 50 sorties were flown each day, though 66 or 68 was not unheard of, each sortie lasting two to two and a half hours.xlviii Flights were over mountainous, difficult terrain against targets often heavily defended and camouflaged.xlix The Fury pilots adapted to these missions: for example, pilots of 804 (Glory) and 802 (Ocean) Squadrons developed 45º dive bombing tactics for bridge strikes.l Weather conditions ranged from extreme heat to intense cold. Snow storms grounded operations, while flying in summer heat resulted in cockpit temperatures of 140º.li During the snowy conditions prevailing in December 1950, Theseus, as part of the Sasebo rescue effort, launched sorties against Chinnampo despite the weather.lii

 Sea Fury10

Combat operations rarely stopped for… minor inconveniences such as snow.”liii

Skilfully handled, the Sea Fury was a match for the jet powered MiG-15, the latter faster by 200 mph, as demonstrated by an engagement at 0600 9 August 1952: “four Sea Furies [commanded by Lt Peter Carmichael, 802 (Ocean) Squadron] were flying north of Chinimpo, returning from a raid on railway lines and trains. They were attacked by eight MiG-15s at 3,500 feet… one MiG-15 was shot down and another two damaged.”liv

 Sea Fury11

Sea Fury WJ288 at 2009 Oshkosh Air Show.lv

The Korean experience demonstrated the flexibility and capability of naval aviation in the era of limited war.lvi The skilled pilots of the FAA rose to the challenge and their combat record attests to their esprit de corps as much as the technical qualities of the Seafire, Sea Fury and Firefly aircraft they flew. All told the FAA flew 23,000 sorties between 1950-3.lvii The FAA dropped 15,000 bombs, fired 57,600 rockets and 3.3 million rounds of 20mm. RAN pilots flew 2,366 sorties, dropped 802 bombs and fired 6,359 rockets and 269,000 rounds of 20mm.lviii It should also be kept in mind that this impressive war-time record was amassed by aircraft believed to be obsolete (the Sea Fury was replaced by the Attacker and then Sea Hawk jet fighters after the Korean War), and during a period of significant cost-cutting at the Admiralty.lix After the Second World War it was expected that only 10% of the FAA would be dedicated to strike aircraft.lx

iiKev Darling, Hawker Typhoon, Tempest and Sea Fury, Ramsbury, Marlborough: The Crowood Press Ltd, 2003, p 121

iiiDarling, Hawker Typhoon, Tempest and Sea Fury, p 122

ivDarling, Hawker Typhoon, Tempest and Sea Fury, p 123

vDarling, Hawker Typhoon, Tempest and Sea Fury, p 124

viReginald Longstaff, The Fleet Air Arm: A Pictorial History, London: Robert Hale Ltd., 1981, p 124

viiKev Darling, Fleet Air Arm Carrier War, South Yorkshire: Pen & Sword Books Ltd., 2009, Appendix 2, p 330-1

viiiLongstaff, The Fleet Air Arm: A Pictorial History, p 124

ixDarling, Fleet Air Arm Carrier War, p 161-2, 331

xDarling, Fleet Air Arm Carrier War, p 331; Longstaff, The Fleet Air Arm: A Pictorial History, p 125

xiDarling, Fleet Air Arm Carrier War, p 331

xiii David Hobbs, “British Commonwealth Carrier Operations in the Korean War” in Air & Space Power Journal 18, no. 4 (Winter 2004), p 63

xivHobbs, “British Commonwealth Carrier Operations in the Korean War” p 63

xvHobbs, “British Commonwealth Carrier Operations in the Korean War” p 63

xviHobbs, “British Commonwealth Carrier Operations in the Korean War” p 63

xviiHobbs, “British Commonwealth Carrier Operations in the Korean War” p 64

xixDarling, Fleet Air Arm Carrier War, p 159, 161

xxDarling, Fleet Air Arm Carrier War, p 162

xxiDarling, Fleet Air Arm Carrier War, p 162

xxiiDarling, Fleet Air Arm Carrier War, p 162

xxivDarling, Fleet Air Arm Carrier War, p 162

xxvDarling, Fleet Air Arm Carrier War, p 163

xxviDarling, Fleet Air Arm Carrier War, p 164

xxviiDarling, Fleet Air Arm Carrier War, p 165-7

xxviiiDarling, Fleet Air Arm Carrier War, p 167

xxxDarling, Fleet Air Arm Carrier War, p 171

xxxiDarling, Fleet Air Arm Carrier War, p 171

xxxiiDarling, Fleet Air Arm Carrier War, p 168

xxxiiiHobbs, “British Commonwealth Carrier Operations in the Korean War” p 65

xxxivHobbs, “British Commonwealth Carrier Operations in the Korean War” p 65

xxxvHobbs, “British Commonwealth Carrier Operations in the Korean War” p 66

xxxviHugh Popham, Into Wind: a History of British Naval Flying, London: Hamilton, 1969, p 227

xxxviiPopham, Into Wind, p 226-7

xxxviii Ian Speller, “Limited War and Crisis Management: Naval Aviation in Action from the Korean War to the Falklands Conflict” in British Naval Aviation: The First 100 Years, 151–76, Corbett Centre for Maritime Policy Studies Series. Farnham: Ashgate Publishing Ltd, 2011, p 155

xlData compiled from ADM 1/2236/4, National Archives

xliHobbs, “British Commonwealth Carrier Operations in the Korean War” p 65

xlii Speller, “Limited War and Crisis Management” p 155

xliii Popham, Into Wind, p 225

xlivHobbs, “British Commonwealth Carrier Operations in the Korean War” Table 1. Examples of sorties flown from HMS Glory, p 67

xlvHobbs, “British Commonwealth Carrier Operations in the Korean War” p 67

xlviHobbs, “British Commonwealth Carrier Operations in the Korean War” p 67

xlviiiDavid Wragg, A Century of British Naval Aviation, 1909-2009, Pen and Sword, 2009, p 156; Darling, Fleet Air Arm Carrier War, p 162, Darling, Fleet Air Arm Carrier War, p 162

xlixDarling, Fleet Air Arm Carrier War, p 161

lPopham, Into Wind, p 227

liWragg, A Century of British Naval Aviation, p 155

liiDarling, Fleet Air Arm Carrier War, p 170

liiiDarling, Fleet Air Arm Carrier War, p 196

livWragg, A Century of British Naval Aviation, p 156

lvi Tim Benbow, “The Post-1945 Struggle for Naval Aviation,” in Dreadnought to Daring, edited by Peter Hore, 128–142, Barnsley: Seaforth Publishing, 2012, p 134

lvii Popham, Into Wind, p 228

lviiiHobbs, “British Commonwealth Carrier Operations in the Korean War” p 71

lix Tim Benbow, “British Naval Aviation and the ‘Radical Review’, 1953-55” in British Naval Aviation: The First 100 Years, edited by Tim Benbow, 125–150, Corbett Centre for Maritime Policy Studies Series. Farnham: Ashgate Publishing Ltd, 2011, p 127 fn

lx Benbow, “British Naval Aviation and the ‘Radical Review’, 1953-55” p 127