
After Trafalgar: The Royal Navy & the Napoleonic Wars, 1806 – 1816
This article examines the operational history of the Royal Navy during the military and geopolitical progress of the Napoleonic Wars, from the Battle of Trafalgar on 21 October 1805 to 27 August 1816 when Lord Exmouth suppressed the Algiers slave trade. This decade begins after Nelson and Collingwood smashed the invasion threat at Trafalgar, subsequent Franco-Spanish sea power thus reduced to mere squadrons, desperately rebuilding at bases scattered around the globe. The British Cabinet and Admiralty could at last concentrate on capturing France’s overseas naval bases and colonial factories. During these tumultuous years the United Kingdom persistently made war on Napoleonic France and captured the fleets and colonies of those nations which were allied to Bonaparte, such as Spain, Denmark, Russia and Italy. In 1812 the Royal Navy overcame the intervention of the United States, a growing power that had won dramatic naval victories against the United Kingdom. While ministries changed, and with them the prospects for peace, Cabinets tended to adopt the traditional strategy: wield the Royal Navy to blockade the enemy’s ports, land the British Army wherever possible, and supply treasure and resources to what became, after Napoleon’s escape from Elba, a total of seven military coalitions.

Napoleon as First Consul, by Jean August Dominique Ingres c. 1803

Bonaparte crowned himself Emperor on December 2nd 1804. He was 35 years old. Painted by the studio of Francois Gerard.

War at Sea during the Georgian period

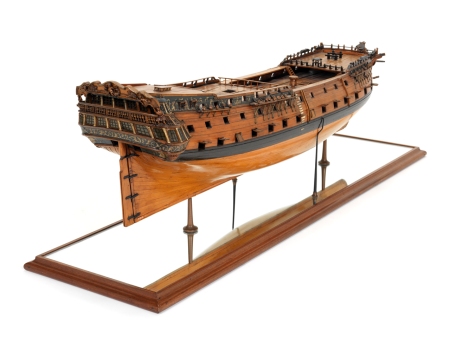
74-gun third rate ship of the line, 1790 pattern
The Royal Navy’s role as strategic implement was to carry out amphibious operations of a vast scale and complexity. The goal was often to influence the situation on the continent by creating military diversions (the Peninsula, Walcheren), capturing the enemy’s naval bases and destroying his fleets (Copenhagen, Mauritius, Basque Roads), or acquiring the enemy’s colonies. Convoying merchants and hunting privateers were vital trade protection responsibilities that regional commanders needed to master.

28-gun frigate c. 1763, 586 tons: 24 9-pdr cannons, four 3-pdrs on the quarterdeck

32 gun fifth rate, c. 1757, 660 tons
When these many global campaigns are considered to have occurred in addition to the nearly round the clock blockadade of European harbours, and by 1813 American ports, not to mention resources dedicated to convoy operations, logistical transportation and anti-privateering, it can be seen what influence an organization manned by not much more than 110,000 men in fact had in terms of executing Britain’s foreign policy and shaping world history.

Part I

The Wooden Walls

Emperor Napoleon I in his coronation robes, 1804, by Jean Louis Charles Pauquet

Late 18th century Western European commercial concentrations, from Fernand Braudel’s Wheels of Commerce. Paris and its environs represent the largest economic concentration

Establishment of the Royal Navy in 1806
The Royal Navy expanded exponentially after 1793 when Revolutionary France declared war upon the United Kingdom and Holland, the latter whom the British were obliged to defend by the treaty of 1788. Mobilization increased the navy’s manpower estimate from the peacetime establishment of 20,000 seamen in 1792 to 73,000 the following year, a figure that continued to increase until it reached 100,000 in 1796. This level was maintained until the peak of 114,000 was reached in 1812. Another 165,000 seamen manned the merchant marine in 1812 (up from 118,000 in 1792). Nor do these figure include the Royal Marines: 5,000 in 1793, 30,000 by 1810, when the art of amphibious warfare had been finely honed.[1] At the beginning of 1806 the Royal Navy possessed 128 ships of the line, 15 fifty-gun cruisers, with another 88 and 19 building, respectively, for a total establishment of 250 ships, discounting frigates, etc.[2]

Displacement tonnage of European fleets during 17th and 18th centuries


Numerical size of fleets during 18th century, ships of the line and frigates
The combined fleets of France and Spain were nearing parity with the Royal Navy when the Revolution broke out.

Chatham Dockyard, c. 1780s, by Joseph Farington

London Docks at Wapping, 1803, by William Daniell
The generation of Royal Navy officers prominent in 1806 emerged from a long tradition of admirals, beginning in the hard school of the Elizabethan age. Prototypical practitioners such as the Earl of Lincoln, the Duke of Northumberland, Howard of Effingham, Sir John Hawkins, Francis Drake, Thomas Seymour, the Earl of Nottingham, the Earl of Essex, the Earl of Cumberland, Walter Raleigh, Richard Grenville, even Martin Frobisher, all illustrious predecessors who set the stage for their 17th century progeny. A new breed of sea generals evolved from the Civil War and Dutch Wars, including William Monson, George Somers, Edward Montagu, William Penn, the Duke of Northumberland, Robert Blake, George Monck, John Chichley, the Duke of York, the Duke of Grafton, and after 1688, Arthur Herbert, John Benbow, George Rooke, Stafford Fairborne, Viscount Torrington, John Leake and Edward Russell, whose 18th century successors were George Anson, George Clinton, Edward Vernon, Edward Hawke, John Byng, Edward Boscawen, John Byron, Samuel Barrington, George Pocock and James Cook, followed by George Rodney, Samuel Hood, John Harvey, Augustus Keppel, Richard Howe, George Darby, Robert Calder, and Charles Middleton.

Officer generations of the Royal Navy, from Elizabeth I to George III, 1558-1815
David Syrett, Nicholas Rodger, Roger Knight and Andrew Lambert are in agreement that the generation of officers who had risen to prominence since the beginning of the Napoleonic Wars were the successors of more than a centuries worth of professional experience.[4] The “service elite” who emerged out of the phase 1740-1792,[5] which included the War of Austrian Succession, the Seven Years War, the American Revolutionary War and the War of the First Coalition, had now produced the penultimate generation of 18th century officers: Alexander Hood, Adam Duncan, John Jervis, William Cornwallis, Hyde Parker, George Keith, John Duckworth, and Cuthbert Collingwood, whose uncompromising understudies and contemporaries, in particular those born between 1753 and 1775, included Horatio Nelson, James Gambier, Edward Pellew, Alan Hyde Gardner, James Saumarez, Thomas Thornbrough, Alexander Cochrane, Richard Strachan, Home Popham, John Warren, Robert Stopford, George Cockburn, Thomas Fremantle, William Sidney Smith, George Vancouver and Charles Stirling. It was these officers who carried Jervis and Nelson’s work through to completion.

Charles Middleton, Lord Barham, First Naval Lord, 1805 – 1806, & Charles Grey, Viscount Howick, Barham’s Whig successor. Middleton, a talented frigate commander and dissembling administrator who cut his teeth reducing privateers in the Caribbean during the Seven Years War, spent forty years of a long career modernizing the navy and improving the quality and scale of dockyard works, a passion he shared with Lord Sandwich

The House of Lords and House of Commons in 1766

The House of Commons in 1793-94, by Karl Anton Hickel
The direction of higher strategy naturally co-mingled with the formulation of government policy. A succession of more or less successful Tory or Whig dominated coalition ministries transitioned in the period after 1805 from the strategic defensive to a global naval offensive, blockading France and intercepting French trade, then conquering Napoleons’ numerous island bases, containing the Americans, and intervening directly on the Continent.

British Cabinet office holders, 1803-1815, from Christopher Hall, British Strategy in the Napoleonic War, 1803-15 (1999)


Somerset House c. 1720. Location of the Navy Board, Victualling and Sick offices after 1789, engraving by Leonard Knyff & Johannes Kip, in 1795 by Joseph Farington & in 1809 by Rudolph Ackermann


Views of London in 1804, by William Daniell
The Great Fleet Battles
Despite being a force of not much more than a hundred thousand men, and with less than 150 ships of the line, the Royal Navy won a string of victories between 1794-1805 that pulverized French, Spanish and Dutch naval power: the Glorious First of June (1794), Cape St. Vincent (1797), Camperdown (1797), the Nile (1798), Copenhagen (1801), Cape Finisterre (1805) and finally Trafalgar (1805), concluded a spectacular series of fleet battles that shifted the maritime initiative to the United Kingdom.[3]

Lord Howe’s victory on the Glorious First of June, three hundred miles off Ushant, 1 June 1794, by Nicholas Pocock

John Jervis’ victory at Cape St. Vincent, 14 February 1797, by Robert Cleveley

Adam Duncan’s victory against the Dutch at Camperdown, 11 October 1797, by Thomas Whitcombe

Rear Admiral Horatio Nelson was in command of the blockade of Cadiz in 1797, by Thomas Buttersworth

Vice Admiral Nelson’s victory at Aboukir Bay, the Nile, 1 August 1798, by Nicholas Pocock

Viscount Nelson captures the Danish fleet at Copenhagen, 2 April 1801, by Nicholas Pocock

Admiral Sir Robert Calder engages the Franco-Spanish fleet off Cape Finisterre, 23 July 1805, by William Anderson

Lord Nelson’s decisive double line approach at Trafalgar, 21 October 1805

Nicholas Pocock’s 1808 painting showing Nelson and Collingwood’s divisions colliding with the Franco-Spanish battle line at Cape Trafalgar

HMS Victory at Trafalgar by Gerald Maurice Burn

Battle of Trafalgar by William Wyllie


The Battle of Trafalgar by Joseph Turner, c. 1822-24, & The Death of Nelson, by Benjamin West, 1806

1805 poster commemorating Nelson’s death and the victory at Trafalgar
The antagonist of the Royal Navy in this violent struggle was the young Marine Nationale, at a low point after Trafalgar and Ortegal: in possession of only 19 solid ships of the line, but Spain could still marshal 57 and Holland would add another 16.[7] With its opponents so reduced the Royal Navy was therefore the largest navy in the world, indeed, outnumbering all of the European fleets combined (239 ships). As Charles Esdaile wrote, “Trafalgar’s significance is a matter of some dispute. In the short term it mattered little: Britain had already escaped the threat of invasion, and it did nothing to affect events in central Europe. Nor did it permanently establish the fact of British naval predominance, for the French shipyards were over the years able to make up Villeneuve’s losses and force the British to continue to commit immense resources to the naval struggle. All that can be said for certain is that, despite much bluster, Napoleon never again attempted to launch a frontal assault against Britain: henceforth victory would have to be attained by some form of economic warfare. In that sense, then, Trafalgar may be said to have changed the whole course of the war…” Napoleon could only commit to fight on the continent, hoping his privateers and detached squadrons would inflict some damage on Britain’s veritable cornucopia of trade.[8]

European alliances and battle locations, 1802-1815
For the United Kingdom the challenge was now to take advantage of the destruction of the enemy fleets by leveraging British seapower to attack the French empire at its exposed flanks. As the editors of the Navy Records Society’s British Naval Documents, 1204-1960 described it, for Britain “the obvious alternative [to subsidizing continental coalitions] was to attack the empires of France and Spain, and disrupt their commerce; increasingly this strategy was used. The ‘blue water’ as opposed to ‘continental’ strategy aimed at defeating France by financial attrition.”[9] Napoleon was eager to do the same and after Trafalgar despatched squadrons to intercept British trade, such as the West Indian imports, which in 1803 were valued at £6.1 million and therefore had to be protected by the British from raiders crossing the Atlantic.[10]

Britain’s maritime strategy against revolutionary and Napoleonic France, from Paul Kennedy, The Rise and Fall of British Naval Mastery (1983), p. 125
For both Britain and France then, as James Davey put it, “… in late 1805, the focus of the naval war moved away from Europe into the wide expanse of the Atlantic Ocean.”[11] Britain’s essential expeditionary strategy came to the fore, and not only on the colonial front. Herbert Richmond and Roger Knight credit Secretary of War Henry Dundas with first advancing the colonial war policy, described by Knight as a “strategy of pre-emptive strikes against French ports”, exemplified first by the Ostend raid, carried out in May 1798 by Captain Sir Home Riggs Popham, a figure who will appear frequently in the various raids recounted below.[12] The expeditionary strategy that followed, as Julian Corbett recognized it, culminated in the Walcheren expedition of 1809: an attempt to leverage “the army to perfect our command of the sea against a fleet acting stubbornly on the defensive.”[13]
The Battle of Cape Ortegal
The Trafalgar campaign concluded when Captain Sir Richard Strachan’s squadron of five, tasked with blockading Ferrol, intercepted the squadron of Rear Admiral Pierre Dumanoir le Pelley, whose four of the line had escaped destruction at Trafalgar. On 4/5 November 1805 off Cape Ortegal, Strachan’s small force made quick work of the French squadron, taking all four of Dumanoir’s ships, but in turn missing Captain Zacharie Allemand, who slipped through to Rochefort having captured 43 merchants and three warships during his cruise.[6]


Views of the Battle of Cape Ortegal, 4/5 November 1805, Captain Sir Richard Strachan completes the destruction of Villeneuve’s fleet, by Thomas Whitcombe.
Part II

Napoleon’s Campaigns against Austria, Prussia and Russia: Ulm and Austerlitz, Jena, Eylau, Friedland & Royal Navy Operations: San Domingo, South Africa, South America, Copenhagen, The Baltic, The Peninsula
The spectacular defeat of the combined fleet at Trafalgar, although decisive in terms of Britain’s security from invasion, for Napoleon was merely in the background: the military action that season took place on Austrian and German soil, and it was here that the future of the Third Coalition was determined. The Austrian advance into Bavaria at Ulm under Mack was encircled by Ney, who had been despatched by Napoleon to hold what he thought was only a minor flank while the French Emperor executed his counter-march. Mack, however, had been totally surrounded between 15 – 17 October and then forced to surrender on the 20th, the day before Trafalgar.[14] The various French corps had inflicted 10,000 casualties and captured a staggering 50,000 prisoners, leaving the route to Vienna open.[15]
Napoleon encircles Mack’s Austrian corps at Ulm, 20 October 1805, by Giuseppe-Pietro Bagetti
The violation of Ansbach by the French on 3 October brought Frederick William III of Prussia around to a compromise with Alexander I Czar of Russia who, on 25 October, met with the Prussian king at Potsdam. By 3 November and the signing of the Treaty of Potsdam Frederick William was brought into the war alongside Russia.[16] After capturing the Austrian capital unopposed on 12/13 November, Napoleon turned against the Russians and Austrians as Kutusov and Buxhowden were combining between Brunn and Olmutz with 90,000 men on 19 November.[17] Napoleon arrived with Murat at Brunn the next day with 40,000 men – the Emperor’s forces were at this time precariously divided between the Hungarian, Viennese, and Italian fronts.[18] With both sides short on supplies, and winter lengthening, a decision had to be reached.

Napoleon issues his orders the morning of 2 December 1805, by Carle Vernet

Views of the Battle of Austerlitz, by Simeon Fort & Giuseppe-Pietro d’apres Bagetti, c. 1834-5
On 2 December, his army now massed at 65,000, Napoleon induced the Allies (commanded jointly by Czar Alexander and Emperor Francis) to attack at Austerlitz, routing both in hard fighting and inflicting 26,000 Allied casualties and taking 180 guns at the cost of only 7,000-8,000 French.[19] Francis II asked Napoleon for a truce on 4 December and on the 26th Austria agreed to the peace settlement known as the Treaty of Pressburg, ceding to Napoleon large portions of Italy and Germany.[20] This series of reversals for the Third Coalition seemed to do in William Pitt, who died on 23 January 1806.[21]

Napoleon meeting with Holy Roman Emperor Francis II on 4 December 1805, by Pierre-Paul Prud’hon
The War in 1806
French foreign minister Talleyrand, meanwhile, employed diplomacy to secure the treaty of Schonbrunn, 15 December 1805, neutralizing Prussia until August 1806.[22] After the New Year the Franco-Prussian alliance was solidified by the Treaty of Berlin, 24 February 1806, as a result of which Prussia annexed Hanover that March. Frederick William was in fact playing both sides and by July had resolved to join with the Russians.[23]
Napoleon at this time, between May and July, was focused on a brief campaign in Dalmatia during which Ragusa was occupied by the French, the Russians landed a force stationed on Corfu to take Cattaro, but Molitor arrived with reinforcements and forced the Russians to withdraw back to the Moldavian frontier.[24]

Terracotta bust of Charles James Fox, by Joseph Nollekens, c. 1791
Republican sympathizer Charles Fox, Foreign Minister in Grenville’s Talents ministry, was attempting to negotiate a way out of the war, as had been arranged previously with Revolutionary France by the Peace of Amiens in 1802. While Fox was willing to accept Napoleon’s suzerainty in Europe he was not willing to suffer French domination of the Mediterranean, where Napoleon was employing Joseph to secure Sicily. This effort was frustrated by Collingwood and Sir Sidney Smith (see below), and even Fox soon exhausted his patience with Napoleon’s machinations. At any rate Fox’s death on 13 September, and subsequent replacement by Lord Howick (Earl Grey), reduced the probability of successful peace negotiations to a small margin.[25]

In August 1806 Francis dissolved the Holy Roman Empire and became Francis I, Emperor of Austria
Napoleon’s next target was the Holy Roman Empire, towards the control of which Talleyrand concluded the treaty of Saint-Cloud on 19 July, prelude to the formation of the Confederation of the Rhine.[26] The Habsburg Holy Roman Emperor Francis II, seeing the writing on the wall and worried that Napoleon would soon usurp the title for himself, took the pre-emptive measure on 6 August 1806 of dissolving the Empire and proclaiming that he was now Francis I of Austria.[27]
Napoleon meanwhile consolidated his position by installing his relatives onto the thrones of the conquered territories: Joseph Bonaparte marched to Naples where, by the end of March 1806, he was declared King of the Two Sicilies; Louis Bonaparte was installed as King of Holland on 5 June, and Caroline Bonaparte (Murat’s wife) gained the Grand Duchy of Berg. Napoleon’s sisters, Elise and Pauline, received various parts of Venetia, Istria and Dalmatia.[28] In 1807 Jerome Bonaparte became King of Westphalia.[29]

Frederick William III, King of Prussia, by Wilhelm Herbig, c. 1818
The Prussians soon realized that they would face the same fate as the Austrians and Russians the year before if they did not take action immediately. Napoleon had 160,000 men in six corps, stretched between Baireuth and Coburg, with which he intended to march on Berlin.[30] The Emperor started his advance on October 8th and quickly routed the divisional strength Prussian forces before him. By evening on the 12th Davout’s 3rd Corps was at Naumburg, Lannes’ 5th Corps at Jena and Augereau’s 7th Corps at Kahla, effectively cutting off from Berlin the King’s 50,000 men.[31]
By the 14th Napoleon’s corps were combining at Jena where he now had 95,000 men, with Davout and Bernadotte in position to attack the Prussian left flank at Auerstadt.[32]

Battle of Jena-Auerstedt, 14 October 1806, by Carle Vernet and Jacques Swebach
Having cleared his lines of communication and smashed the Prussians at Jena, Napoleon continued the advance. Davout took Berlin on 25 October, enabling Napoleon to force the various German princes to surrender one by one, with Frederick William agreeing to Napoleon’s draconian terms on 6 November. This led on the 16th of November to the signing of the convention of Charlottenburg that formally took Prussia out of the war.[33] Napoleon imposed the Continental System as arranged by the Berlin Decree of 21 November.[34]

Slave trade abolished, 1807
The British cabinet took the extraordinary measure of abolishing the slave trade by the Slave Trade Act of March 1807, hoping thus to further weaken Franco-Spanish legitimacy by encouraging their colonial populations to revolt, as had Haiti in 1791, or join with the British. Napoleon responded with the Milan Decree of December 1807, collectively an attempt to isolate Britain through imperial tariffs – but enforcing this trade bloc necessitated strict repression of the European nationalities that were under Napoleon’s control.[35]

Napoleon enters Berlin, 27 October 1806, by Charles Meynier
The continental system was marginally successful in terms of increasing British deficits by restricting her access to the continental markets of Northern Europe. Exports to that region had been valued at £13.6 million in 1809, but fell to only £5.4 million in 1812, before recovering to £22.9 million in 1814. This decrease in European trade was relative, as total British exports and re-exports in 1800 were valued at £52.4 million, £60.9 million in 1810, £50.8 million in in 1812, and in 1814 at £70.3 million.[36] Thus it can be seen that the Continental System imposed some damage on Britain’s overseas trade in the years before Napoleon’s war with Russia and Britain’s war with America, but ultimately failed to cripple the economy of the United Kingdom.
1807, the Turn of Russia

Portrait of Alexander I, by Carl August Schwerdgeburth, c. 1813
The Russians meanwhile marshalled their forces in Poland, Bennigsen with 60,000 men by mid-November 1806 occupied Warsaw and Buxhowden’s 40,000 were moving to join him.[37] Napoleon marched to confront them on 25 November, the Russians withdrew, and Murat entered Warsaw on the 28th, where Napoleon joined him on 18 December.

Marshal Kamenskoi (Mikhail Kamensky)
Marshal Kamenskoi (Mikhail Kamensky) assumed command of the united Russian army. Napoleon advanced with his army of 120,000 foot and 25,000 horse, but the Russians withdrew, and on the 26th Lannes engaged Benningsen at Pultusk, while Davout and Augereau drove the Russians from Golymin, with Kamenskoi withdrawing to Novgorod.[38] Campaigning in the winter conditions was arduous and at the beginning of 1807 Napoleon returned to Warsaw while his corps laid siege to Danzig,

Count Levin August Bennigsen, by George Heitman and Thomas Wright
Bennigsen replaced Kamenskoi as Russian C-in-C, and on 15 January he marshalled his army at Biala. Bennigsen’s intention was to secure Konigsberg, where King Frederick William was then located, and then to march on Danzig and raise the siege. This was an error, as Napoleon quickly realized he could once again cross the Allies’ lines of communication and execute a repeat of his Jena maneuver.
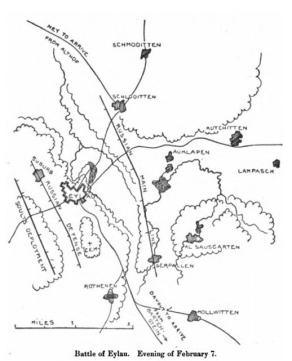
Russian and French deployments before Eylau, from T. A. Dodge, Napoleon, vol. II (1909)
Napoleon’s intention, before taking command of the vanguard, was to have Soult, Ney, Davout, Murat, Augereau, and Bessieres variously surround the Russians before destroying them with a frontal attack.[39] Napoleon marched from Warsaw on 30 January with 75,000, while despatching orders for Ney and Bernadotte to join him with another 34,000.[40] Bennigsen luckily intercepted some of Napoleon’s orders intended for Bernadotte and realized his danger,[41] immediately ordering a concentration at Allenstein, he discovered to his surprise Soult and Murat already there. Benningsen marched north, trying to cross the Alle, but was blocked by the shadowing French. With the French corps closing in Bennigsen now began a series of retreats while Napoleon hastened to turn the Russian flank and attack their rear.

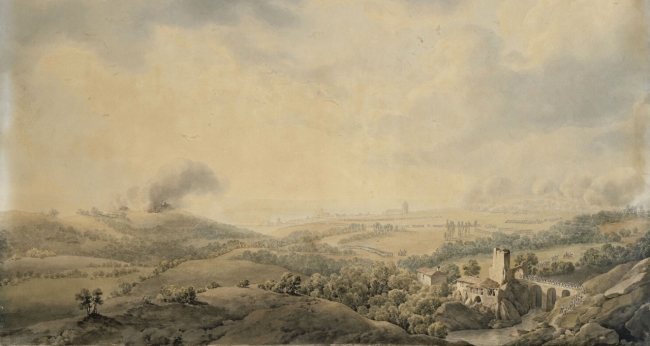
Battle of Eylau, Bennigsen check’s Napoleon’s advance, 7 February 1807, by Giuseppe-Pietro Bagetti
The French closed in on February 6th, fighting some small engagements, and at last forced Bennigsen, with 126 battalions and 195 squadrons (75,000-80,000 men) to fight on the 7th at Eylau, where Soult was waiting, having stormed that place with the bayonet while the rest of the French army closed in. Although the Russians outnumbered the French, and possessed far more artillery, Napoleon’s corps were more mobile and their commanders fully understood their roles in the operational plan: while Murat, Augereau, and Soult held the centre at Eylau with 36,000 men, Davout would then march up on the right flank with 18,000, while Ney took the left flank with 15,000.[42] Bennigsen began shelling Eylau on the 8th, but was unaware of his danger as the French flanks arrived, with Davout intending to cut-off the Russian retreat.[43]
Heavy snow fall now obscured the battlefield, and by dawn on the 9th Napoleon had fought Bennigsen only to a draw, the arrival of the Prussians under L’Estocq amidst the poor weather deflecting Davout’s flank attack.[44] What had at first seemed like a another Jena devolved into a terrible attrition battle, Napoleon’s first serious check: there were 40,000 casualties left in the snow, the Grand Armee having suffered between 20,000 and 25,000 killed and wounded to the Russians’ 11,000, with another 2,500 prisoners destined for French prisons – still, Napoleon held the field after the slaughter and so the Russians withdrew to Konigsberg.[45]

Napoleon after Eylau, 9 February 1807, by Jean-Baptiste Mauzaisse
The carnage at Eylau had been a serious wakeup call for Napoleon, who promptly despatched General Bertrand to meet with Frederick William and try to arrange a peace settlement.[46] Napoleon’s corps required all spring to regain their strength, but then Danzig, which had been under siege since 11 March, surrendered on the 27th of May, and at last this enabled Napoleon time to mass against Bennigsen’s base at Konigsberg.[47]


Louis-Nicolas Davout, perhaps Napoleon’s ablest commander, as a Lieutenant Colonel in 1792 by Alexis-Nicolas Perignon, c. 1834, and Marshal Davout by Pierre Gautherot
Bennigsen took the offensive at once, departing Konigsberg on 5 June with his 50,000 men, but was badly outnumbered by Napoleon, who began once again to concentrate his corps against Bennigsen’s lines. Bennigsen brushed aside Ney’s corps, but soon found himself facing Napoleon’s combined army and so withdrew to his entrenchments at Heilsberg.[48] Here Napoleon’s plan of attack for 10 June was to have Murat, Soult and Lannes pin the Russians, while Ney, Davout and Mortier cut off Bennigsen’s retreat.[49]
Napoleon visited Murat and Soult’s headquarters that afternoon, and in the evening began to develop a frontal attack despite this being strictly contrary to the orders he had given his marshals. The result was a strong repulse of both Murat and Soult.[50] Despite this setback the turning movement continued to develop onto the 11th; Bennigsen realized that Davout was about to turn his flank and he withdrew from Heilsberg that night, reaching Friedland on the 13th.[51]

Battle of Friedland, showing Bennigsen being squeezed back against the Alle river
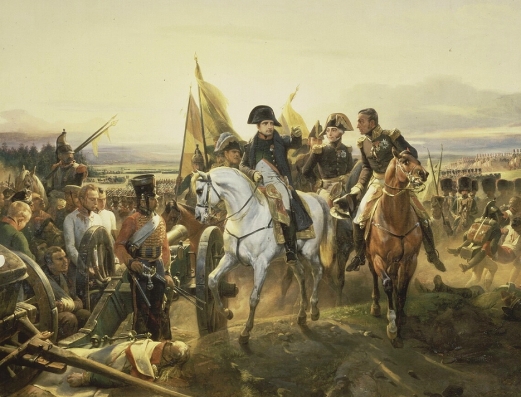
Napoleon commanding at Friedland, 14 June 1807, by Carle Vernet
There on the morning of the 14th Lannes’ corps encountered the Russians first, but Napoleon arrived at noon (having camped the night before at Eylau, site of the bloody winter battle only five months earlier), to support the 35,000 already engaged with another 50,000, pressing his attack before Bennigsen could bring his combined Russo-Prussian force of 90,000 into action.[52] Napoleon stove in Bagration’s corps after which the Russians collapsed, scrambling to get back across the river.[53]

Battle of Friedland, 14 June 1807, by Simeon Fort
The result was 15,000 Russian casualties to 7,500 French, and Bennigsen’s withdrawal to the Niemen, whither Alexander I asked Napoleon for a truce. The following negotiations culminated on 7 July 1807 with the Treaty of Tilsit.[54] This agreement between French Emperor and Russian Czar took the Russians out of the war, dismantled the Fourth Coalition, and left the British isolated. As Kissinger later phrased it: Napoleon arrived at Tilsit “to complete the division of the world.”[55]

After defeating Count von Bennigsen on 14 June, Napoleon and Czar Alexander I met in the middle of the Neman River to sign the Treaty of Tilsit, 7 July 1807

Alexander I and Napoleon meeting on the Neman River, by Francois-Louis Couche
As 1808 dawned the Napoleonic Empire was at its height. Despite Napoleon’s control over the European continent, he did not possess the naval power to confront Britain. The Royal Navy thus continued its long-term naval blockade and began to recapture the various Franco-Spanish overseas colonies.

Europe in July 1807, after the Treaty of Tilsit
The War at Sea Renewed, 1805 – 1808
On 13/14 December 1805, when Admiral Cornwallis’ blockading force withdrew to Torbay for the winter, two French squadrons escaped Brest. The first, under Rear Admiral Jean-Baptiste Willaumez, made for the Cape of Good Hope and the South Atlantic, while the second, under Vice Admiral Corentine de Leissegues, sailed for the West Indies with orders to land 1,000 men at San Domingo and then intercept merchant traffic off Jamaica.[56] At the Admiralty this development was recognized as the transition point: Napoleon’s naval strategy had ceased to revolve around invasion through main action and instead became a prolonged guerre de course.

Prevailing winds in the North Atlantic
Rear Admiral of the Blue William Cornwallis, c. February 1802

The Brest squadrons, commanded by Vice Admiral Corentin Leissegues and Rear Admiral Jean Baptiste Willaumez, escaped Cornwallis’ Channel blockade on 13 December 1805

Vice Admiral Sir John Warren, c. August 1800
Vice Admiral Warren and Rear Admiral Strachan’s squadrons
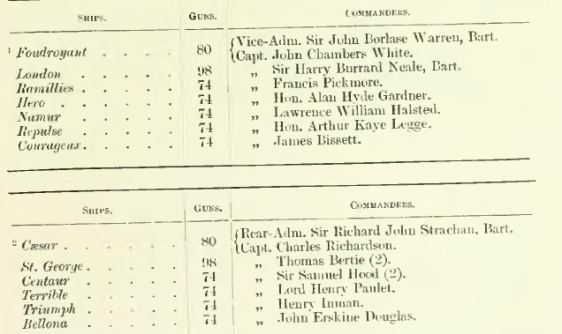
Vice Admiral Sir John Warren, newly promoted on 5 November 1805, and Sir Richard Strachan, likewise promoted to Rear Admiral, were despatched on December 24th with orders to intercept the Brest squadrons and ensure they were not allowed to take prizes amongst Britain’s lucrative West Indian and South American trade.[57] Warren, in his flagship Foudroyant (80, Captain John C. White), with six of the line, sailed south after Willaumez early in January 1806, but could not locate his quarry.

38-gun fifth rate (1794), HMS Diana
Having been joined by Captain Sir Harry Neale in HMS London (98), Warren shifted his flag and on the 13th of March, while they were cruising off the Cape Verde Islands, Foudroyant and the 38-gun frigate Amazon of Captain William Parker, took the 74 or 80-gun Marengo, Rear Admiral Linois’ flagship, along with the frigate Belle Poule (40). Linois had been in the process of returning from the East Indies, where he had been displaced by Rear Admiral Edward Pellew’s efforts.[58]

Vice Admiral Warren’s London (98, Captain Sir Harry Neale), with Amazon (38, Captain William Parker) and Foudroyant (80, Captain John Chambers White) takes Linois’ Marengo and Belle Poule (40) on 13 March 1806
After returning to Spithead with his prizes Warren was ordered to resume the search for Willaumez’ squadron. Again Warren was unable to locate it in North American waters during 1806. In October 1807 Warren was promoted to C-in-C North America.[59] Strachan, for his part, had no more luck, having arrived at Barbados early in August 1806, but had in fact passed not more than 60 miles from Willaumez on the night of the 18th.[60]

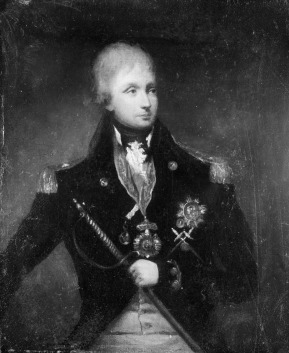
Engraving of Sir Samuel Hood, c. November 1806, after losing his right arm in the September action.
On 25 September 1806 Commodore Samuel Hood, flying his flag in the Centaur (74) and with Monarch, Mars, and three other warships, captured a squadron of five French warships, including four French 40-gun frigates, which had been heading from Rochefort to the West Indies.[61] Hood lost his right arm to a musket ball during the action. Lauded as a naval hero, Hood accompanied Lord Gambier in the Copenhagen expedition in 1807.[62] A similar success story was that of Captain Cochrane in the Imperieuse (40) who, between 13 December 1806 and 7 January 1807, captured or destroyed 15 French ships.[63]

Hood’s action against the Rochefort Squadron, 25 September 1806, engraving by John Heaviside Clark

HMS Leopard detains USS Chesapeake, 21 June 1807, by Irwin John Bevan
Here we must briefly mention the Leopard-Chesapeake incident, a significant development in the prelude to the intervention of the United States in 1812: On 21 June 1807 the 50-gun HMS Leopard, captained by Salusbury Humphreys, intercepted the 38-gun USS Chesapeake with orders to recover deserters known to be aboard.[64] Chesapeake refused to allow a search and so Leopard fired broadsides at the American warship until it surrendered. Four sailors were taken off the frigate, but only one proved to be a Briton; this despite there being 2,500 British seamen serving in the American merchant marine: a major diplomatic embarrassment for the British government that dramatically weakened relations between the two nations.[65]
The West Indies and the Battle of San Domingo, 6 February 1806

Admiral Sir John Duckworth, c. 1809-1810 by William Beechey
The other side of the Brest squadron’s story revolved around the command of Admiral Sir John Duckworth who, after Trafalgar, had been ordered by Collingwood to blockade Cadiz. On Christmas Day 1805 Duckworth encountered Leissengues’ squadron and chased him to the West Indies.[66] Duckworth detached Powerful (74) on January 2nd to join Rear Admiral Pellew in the East Indies, and then steered for Barbados where he arrived on the 12th.

Duckworth’s Cadiz blockade squadron in the chase against Leissengues’ six of the line.
The next week Duckworth was joined by Rear Admiral Alexander Cochrane in the Northumberland (74) and Captain Pym in the Atlas (74). Duckworth at first had no intelligence regarding Leissengues’ deployments and thus intended to re-cross the Atlantic and return to his blockade station, but on February 1st the carronade sloop Kingfisher informed him of French warships near San Domingo. Acting on this intelligence Duckworth made sail for San Domingo and on February 5th arrived at the eastern end of the island. There he was joined by the 36-gun frigate Magicienne, bearing intelligence that further confirmed the reports of nearby French warships. On the morning of the 6th Duckworth sailed for the harbour of San Domingo where his frigates identified Leissengues’ squadron, in fact anchored and deploying troops ashore since 20 January.[67]


John Pitt’s sketchbook of British warships and merchants at Barbados (including the 98-gun Temeraire)
Leissengues immediately realized the danger and at 7:30 am slipped anchors. Duckworth, who had six of the line, mainly cruisers, and two frigates plus his carronade sloops, was outnumbered by Leissengues’ nine warships, including three frigates.

Chart of Battle of San Domingo from J. Davey, In Nelson’s Wake

The Battle of San Domingo, 6 February 1806, by Nicholas Pocock
In the action that followed Duckworth split his squadron into two columns, with a third frigate group cutting off the French escape route, and engaged the French line in two attacks. At the front of the line Duckworth’s flagship Superb engaged the Alexandre at 10:10 am, while the Northumberland (74) engaged the Imperial, the latter mounting 120 or 130 guns, and ultimately held off three RN warships for nearly two hours. Duckworth’s division was sustaining heavy casualties but as planned Rear Admiral Thomas Louis came up leading his division in the Canopus (80) and poured in fire against the French line.[68] This movement swung the battle in Duckworth’s favour, and at 11:30 am Leissengues in Imperial attempted to steer away, only to run aground ten minutes later.

80-gun second rate HMS Canopus, French capture from the Nile

Loss of the Indiaman Bangalore (1802), by Thoomas Tegg
In the event Duckworth captured one 80, two 74s, and forced the Imperial and the Diomede (72) to wreck themselves ashore, and they were subsequently burned. The French frigates and a corvette escaped. The British suffered 64 (or 74) killed and 264 or 294 wounded, the French suffered between 500-760 killed and wounded.[69] Duckworth for his part had justified his movements, although he likely would have faced recrimination had he returned home empty-handed, having abandoned his station in the pursuit.[70] Vice Admiral de Leissegues, for his part, in fact escaped the destruction of his squadron and later returned to Europe.

Caribbean theatre of operations
Rear Admiral Willaumez continued to evade the RN and sailed for the Cape of Good Hope. There he learned of Commodore Home Popham’s success (see below), preventing him from taking any action and so sailed for South America but eventually concentrating at Martinique on June 24th, before departing on 1 July for Montserrat.[71] Willaumez was then spotted on the 6th off Tortola by Rear Admiral Cochrane, whom Duckworth had detached after San Domingo to observe Martinique, but as he was then preparing to escort a merchant convoy, and as Cochrane’s four of the line were outnumbered by Willaumez’s six, with a convoy of 280 merchants to protect, pursuit was impossible.[72]

Willaumez, who had Jerome Bonaparte with him, did not wait around to confront Cochrane and instead made for Jamaica to intercept merchant traffic there, in the process seizing a number of prizes. Jerome in the Veteran (74), for whatever reason, made an ill-advised sortie out of the Caribbean and eventually returned to France. Willaumez was compelled to search north for Napoleon’s youngest brother, failed to locate him, and towards the end of August returned to the Caribbean where he docked at Havana.[73] Willaumez ultimately dispersed his squadron, and his ships variously met their fates along the American seaboard, although the Foudroyant made it back to Brest in February 1807.[74]

Vice Admiral James Dacres, C-in-C Jamaica, by Robert Bowyer, R. Page and Joyce Gold, 31 October 1811
Operations in the Caribbean continued late in 1806: St. Thomas was taken from the Danish on 21 December by Rear Admiral Alexander Cochrane and General Bowyer, and St. Croix was quietly occupied on Christmas Day.[75] This series of successes was immediately followed up by the capture of the Dutch island of Curacao. On 29 November 1806 Vice Admiral James Dacres at Jamaica despatched Captain Charles Brisbane in the Arethusa (38) with Latona (38, Captain James Wood), and Anson (44, Captain Charles Lydiard), with orders to join with the Fishguard (38) when they located it, then reconnoitre the island of Curacao to determine if the Dutch there were willing to join the Allies.[76] Brisbane’s squadron reached Aruba on 22 December, collecting the Fishguard next day. Brisbane relied on surprise and intended to force the Dutch to concede at cannon-point. Besides Fort Republiek and Fort Amsterdam, the latter with 60 cannon, there was a Dutch 36-gun frigate, a 22-gun corvette, and two armed schooners in the harbour.[77]

Captain Sir Charles Brisbane, knighted for the capture of Curacao, engraving by William Greatbach from drawing by James Northcote, c. 1837

The capture of Curacao, 1 January 1807 by Thomas Whitcomb
Arethusa was flying a flag of truce when Brisbane led the squadron into the harbour at 5 am on 1 January 1807. The Dutch wisely ignored the flag and opened fire. The Fishguard at the rear of the line ran ground, and at 6:15 am Brisbane opened fire and moved in alongside the Dutch frigate before Brisbane himself led the boarding action that captured it. Latona and Anson took the Dutch corvette. Brisbane followed up this coup by leading the shore party that stormed Fort Amsterdam at 7:30 am. Afterwards the seaman and officers returned to their ships and engaged Fort Republiek, silencing it by 10 am. At noon the island’s governor, M. Pierre Jean Changuion, surrendered. The British had lost three killed and 14 wounded, while the Dutch suffered nearly 200 casualties, a testament to the value of surprise and swift execution.[78]
The East Indies

Disposition of British squadrons in January 1807, from Christopher Hall, British Strategy in the Napoleonic War, 1803-15 (1999)
Rear Admiral Edward Pellew was appointed C-in-C East Indies in April 1804, and thither he departed that July in the Culloden. For political reasons related to Pellew’s defence of Addington’s ministry, Henry Dundas, Lord Melville, who superseded St. Vincent at the Admiralty, decided to split Pellew’s command in half, with Rear Admiral Thomas Troubridge taking the eastern half. Troubridge departed England on 27 April 1805 in the Blenheim (74). This was a situation guaranteed to produce confusion and the results were far from optimal.[79]

French East Indiaman of 1764, 900 tons, 20-25 guns
Troubridge was escorting a convoy of 11 merchants when, on 6 August 1805, after departing Madagascar, he fell in with Admiral Linois in the Marengo, who however declined to engage, but as we have seen was captured in March the following year by Vice Admiral Warren. Troubridge rendezvoused with Pellew’s squadron at Madras on 22 August and Pellew, ignoring Troubridge’s orders to take half of the East Indies squadron under his command, simply added Troubridge to his existing squadron – to the latter’s outrage.[80]


The BEIC trade from the factory at Canton was exposed to French interception, as Admiral Linois had attempted in the Malacca Strait on 14/15 February 1804. Linois with Marengo (74), Belle Poule (40), and Semillante, plus the corvettes Berceau and Aventurier engaged Captain Nathanial Dance’s convoy of 39 ships, who, with great pluck, turned the tables on Linois and chased him off. Paintings by William Daniell & Thomas Sutherland, September 1804

Large Indiaman, Scaleby Castle (1798), 1,237 tons, 26 18-pdrs
Pellew intended to have Troubridge convoy the China trade, a vital mission given Linois’ presence off Sumatra and the lack of any escort for the BEIC ships in those waters. Indeed, Linois brought five captured BEIC ships into Mauritius between 1804-6, but eventually exhausted his supplies and was thus intercepted and captured on 13 March 1806 by Warren off the Canaries while returning to France.[81] Troubridge, for his part, felt that he was being shuttled off to an unimportant command by Pellew and was so upset that he preferred to stay behind at Penang in the sloop Rattlesnake, presumably sour grapes. The disconnect between Pellew and Troubridge was equalized somewhat on 9 November when Troubridge was promoted to Rear Admiral of the White, the same rank as Pellew, but the situation in London shifted rapidly following the death of Pitt and the return to power of the Whigs under the Talents ministry indicated a change in policy.

Edward Pellew as Captain in 1797, painted by Thomas Lawrence, also engraving by Thomas Lawrence

Rear Admiral Sir Thomas Troubridge, engraving based on drawing by Sir William Beechey
As such Pellew ultimately came out on top and in April 1806 orders were despatched to make Troubridge C-in-C Cape of Good Hope, following on Commodore Popham’s operation (see below). These orders did not arrive until January 1807 and Troubridge then departed from Madras on 12 January in the aged Blenheim (90) with the Java (36), a Dutch prize, and the brig Harrier (18). Tragically Troubridge’s squadron was caught in a storm early in February off Madagascar, with the Blenheim and Java foundering with all hands.[82] Harrier returned to Madras and informed Pellew, who sent Troubridge’s son in the Greyhound to search, the French at Mauritius even offering assistance, but nothing was ever heard from Troubridge’s lost squadron.
Illustration by N. C. Wyeth for the 1911 edition of Robert Louis Stevenson’s Treasure Island
Pellew for his part had his eye on the island of Java, and in June 1807 despatched from Madras Captain Peter Rainier in the Caroline (36) with Commander Fleetwood Pellew, Sir Edward’s son, in the Psyche (36), to observe the the harbour of Griessee where he suspected two Dutch 68-gun ships were located.[83]

Nicholas Pocock’s drawing of Captain Fleetwood Pellew of the Psyche engaging two Dutch frigates at Samarang roadstead, Java, 31 August 1807
Captain Pellew in fact discovered from a prize secured on 30 August that these Dutch warships were present at the harbour of Samarang, but were not in sailing condition. The next morning Pellew despatched Lt. Lambert Kersteman and acting Lt. Charles Sullivan in Psyche’s boats to enter the roadstead. There they found a number of merchants, including the armed merchantmen Resolutie and Ceres, plus the corvette Scipio (24). Psyche’s boatcrew captured an armed schooner and a merchant brig, both of which they burned, while Psyche chased the other merchants and Scipio to ground, the Dutch frigates then surrendering one by one and were taken as prizes.[84]

Rear Admiral Pellew’s squadron for the capture of the Dutch ships at Griessee (Surabaya), Java, 5/6 December 1807
Suitably reinforced, Rear Admiral Pellew sailed to Java and on 5 December and demanded the surrender of the warships at Griessee (Surabaya), an ultimatum that was refused. The next day Pellew sailed in with the Culloden (74) and Powerful (74), defeating a small 12-gun fort. The Rear Admiral compelled the local authorities to acquiesce to his terms, although the senior Dutch officer, Captain Cowell, had already scuttled his ships including the Revolutie (68), Pluto (68), the hulk Kortenaar (68), and two transports.[85] Thus, by the beginning of 1808, the Dutch naval presence in the East Indies had been terminated, if not all its various colonies yet captured.
The South African Expedition

Prevailing winds in the South Atlantic

South Africa and Mauritius, control points on merchant routes from India and China
Cape Town belonged to the Dutch but had been taken in 1801 and then returned in the peace of 1803. With the Netherlands now under Napoleonic occupation the capture of Cape Town once again became a priority. Between August – September 1805 an expedition was outfitted to retake Cape Town, commanded by Commodore Sir Home Riggs Popham and carrying 5,000 troops under Major General Sir David Baird.[86] Popham, flying his flag from the 64-gun Diadem, sailed south from San Salvador on 26 November and on 4 January 1806 anchored at Robben Island, Table Bay, before proceeding to land Baird’s men over the course of the 6th and 7th. The Leda (38), Encounter (14) and Protector (12) carried out a bombardment and landed men to clear the enemy from the area of Blauwberg Bay (Bloubergstrand) while the main landing was underway.[87]

Home Riggs Popham as a 21 year old Lieutenant in 1783

Lieutenant General Sir David Baird, c. 1814 by Thomas Hodgetts
On January 8th the expeditionary force marched towards Cape Town and defeated a Dutch defensive force under Lt. General J. W. Janssens, inflicting 700 casualties and sustaining 15 KIA and 189 WIA. The capital was quickly secured when the Dutch capitulated on the 10th, with Popham and Baird capturing 113 brass and 343 iron cannon. Added to the spoils was the 40-gun French frigate Volontaire, captured on 4 March when it approached the British squadron thinking them Dutch – although the Dutch had burnt their own 68-gun ship Bato on 13 January to prevent capture.[88] With this singular triumph under his belt, the amphibious enthusiast Popham next prepared an expedition to cross the Atlantic and take Buenos Aires: the ambitious objective was to capture all of Spanish South America.

Commodore Popham’s squadron for the Cape of Good Hope operation
1,375-ton 64-gun (1774) third rate

940-ton 38-gun (1780) frigate
The Capture of Buenos Aires: The South American Expedition of 1806
 South America in 1806, organized into conglomerated Spanish and Portuguese Viceroyalties.

Commodore Sir Home Riggs Popham, c. 1807 by Anthony Cardon, copied from Mather Brown;

Major General Williams Carr Beresford
Popham sailed from South Africa on 14 April 1806 with one of Baird’s regiments, 1,200 men from the 71st Regiment under Major General William Beresford, plus an attached Royal Marine battalion of 435.[89] With his flag in the Narcissus Popham made haste for Flores to gather intelligence, arriving there on 8 June, followed by the rest of the squadron and its transports five days later. While the Diadem blockaded Montevideo and Raisonnable and Diomede held the mouth of the Rio de la Plata, Popham with the transports worked their way up the river, arriving off Point Quilmes, 12 miles from Buenos Aires, on 25 June. The task force was put ashore that night and in the morning General Beresford brushed aside the Spanish garrison of 2,000. A capitulation agreement was negotiated on 28 June and signed on 2 July by the governor Don Josef de La Quintana, Viceroy of the Rio de la Plata: Argentina, Uruguay, Paraguay and Bolivia had been seized.[90]

The relief squadron under Rear Admiral Charles Stirling
Popham and Beresford’s triumph was short lived however as 2,000 Argentinians under the command of French general Santiago Liniers retook Buenos Aires between 10-12 August (the British suffering 48 KIA and 107 WIA) and then imprisoned the rest of the garrison, including Major General Beresford.[91] A relief expedition under Rear Admiral Charles Stirling, with Brigadier General Sir Samuel Auchmuty, arrived on 3 December and Popham was sent back to England in disgrace. On 3 February Stirling and Auchmuty captured Montevideo with the loss of 192 killed, 421 wounded and eight missing. Upon returning to England on 20 February Popham was immediately arrested and tried for court martial, although in the event receiving only a sever reprimand and his rank being reduce from Commodore to Captain.[92] A fateful decision as we shall see.


Lieutenant General John Whitelocke, engraving by James Hopwood, based on drawing by Edward Hastings, March 1808
In May Auchmuty was superseded by Brigadier General Crauford who brought 5,000 reinforcements, a figure further reinforced by the arrival of Lt. General John Whitelocke and Rear Admiral George Murray in the Polyphemus (64) on 15 June. The army went ashore at Buenos Aires on 28 June and launched an attack against the city on 5 July. Although they carried the city the cost of 2,500 casualties was excessive. Whitelocke agreed thereafter to evacuate the entire operation and the adventure was terminated as the Talent’s ministry collapsed. Whitelocke was later dismissed from service.[93]
Collingwood in the Mediterranean

Baron Collingwood in 1807, copy by Henry Howard from painting by Giuseppe Politi
In the spring of 1806 Napoleon moved to consolidate his position in Italy, in particular by reducing Ferdinand of Naples. Sicily provided supplies to Britain’s Mediterranean naval base at Malta, much as Reunion supplied Isle de France at Mauritius, and both islands were needed to assemble and victual expeditions, as was done in Egypt and at the Dardanelles.[94]

Rear Admiral Sir William Sidney Smith, by Edward Ball, March 1803
Unable to prevent the loss of Naples, but before the end of March when Napoleon’s forces overran that theatre, the Allies’ mixed Anglo-Russian force of 10,000 was withdrawn to Sicily and Ferdinand himself was evacuated by HMS Excellent.[95] Collingwood, hoping to create some problems for the French, detached Rear Admiral Sir William Sidney Smith, an exceptional intelligence officer, to take command of the small squadron of five of the line and two or three frigates then assembling at Messina. Sidney Smith arrived there on 21 April and from then until the middle of May Smith’s squadron was engaged assisting the Neapolitans: operations that included the capture of the island of Capri on 11 May, a successful action that was followed by the landing at Calabria of Major General John Stuart with between 4,800 – 5,200 men on the night of 30 June / 1 July.[96]

The Island of Capri, by William Wyllie

View of Calabria in the Straits of Messina, by William Wyllie

Major General John Stuart, landed with 4,800 at Calabria, 1 July 1806
Stuart’s forces routed 7,000 French troops in a sharp action on 4 July near the village of Maida, suffering only 45 killed and 280 wounded, but capturing or killing the majority of the French forces, perhaps capturing as many as 4,000.[97] Although one biographer considers the action largely the success of his subordinates, General Stuart was nevertheless promptly knighted and awarded a life pension of £1,000.[98] This minor success however could not change the strategic situation in Naples ,as Gaeta fell to the French on 18 July and the English were at last forced to withdraw to Sicily.[99]
The Naval War in the Baltic & the Capture of Copenhagen, 1807

William Cavendish-Bentinck, 3rd Duke of Portland, Prime Minister 1807-1809, copy by John Powell of Joshua Reynold, c. 1782

George Canning, Secretary for War
By the summer of 1806 Napoleon’s naval potential was 45 French and Spanish warships spread across his Atlantic and Mediterranean ports. He expected another six Dutch and eight French warships to be ready soon from Antwerp, Flushing and Texel, plus perhaps another 11 from Sweden and 16 from Denmark, not to mention the 20 Russian warships at Reval and Kronstadt. The Baltic therefore was liable to become a critical theatre of the war, at precisely the time Napoleon would be campaigning in Germany. To pre-empt Napoleon’s movements in this direction Secretary for War George Canning and Foreign Secretary Viscount Castlereagh determined on 19 July to present an ultimatum to the Danes insisting that they hand over their fleet to the British. When this was predictably rejected an expedition was organized to land troops as part of a combined naval bombardment of Copenhagen with the goal of capturing the Danish fleet and stores.[100]

Robert Stewart, Lord Castlereagh, the 2nd Marquess of Londonderry, Foreign Secretary in Cavendish’s government
The Bombardment of Copenhagen

Admiral James Gambier, Baron Gambier, by William Beechey & William Holl, print c. 1833
The Admiralty wasted no time and Admiral James Gambier’s fleet of 22 warships, with 19,000 troops under Lieutenant General Lord Cathcart, sailed from Yarmouth on 26 July.[101] Gambier’s Captain of the Fleet, despite his court martial in March having concluded only the month prior, was, perhaps unsurprisingly, Home Popham.[102] The Dutch capital was defended in the same fashion as it had been during Nelson’s attack in 1801: 174 guns, more than two dozen mortars, plus 5,500 soldiers, another 4,000 sailors and 3,600 militia, the dismasted Mars (64), five mobile frigates, and 30 gunboats.[103] The rest of the Danish fleet, about 30 warships of various sizes, were to be blockaded inside the port of Copenhagen itself.

Admiral Gambier’s fleet for the Copenhagen expedition

William Cathcart, Earl Cathcart, 1807, by John Hoppner and Henry Meyer
Landings commenced on 16 August, the Danish gunboats offered a token resistance on the 17th, and Gambier established his blockade line on the 18th.[104] A small flotilla of bomb vessels, commanded by Captain Peter Puget in the Goliath (74), prepared to attack the Danish defences, but on the morning of the 23rd the Danes launched a spoiling attack with their gunboats, successfully driving off the British, yet the Danes were in turn driven back by cannon fire from the English beachhead.[105]

Speedwell-type 142 ton sloop of 12 guns, c. 1752

Captain Puget’s bomb flotilla, plus the third-rate Goliath during the attack on 23 August 1807

A 1790 pattern 123-ton shallow draft 12 cannon gunboat of the bomb vessel-type
Repeated sorties to disrupt the British siege works on the 25th, 26th and 27th failed, but the effort was renewed on the 31st. On 1 September the British issued a proclamation to General Peyman commanding the Copenhagen garrison to surrender, but he refused and thus Copenhagen was bombarded with a terrific fire the following evening. The cannonade continued for 48 hours, Peyman finally requesting terms on the 5th and then capitulating on the 7th.[106]


Views of the Bombardment of Copenhagen, by Christian William Eckersberg, c. 1807, Thomas Buttersworth, c. 1813, and 2-5 September 1807 by Jean Laurent Rugendas
The entire Danish fleet at Copenhagen was captured (of which four battleships were eventually added to the Royal Navy), including the various gunboats – as many as 52 smaller vessels and 15 frigates – plus 20,000 tons of naval stores. Gambier returned the fleet to England on October 21st, and was promptly elevated to the peerage as Baron Gambier. The cost for the British was primarily diplomatic, as they had of course attacked what had been a neutral country, thus handing Napoleon a propaganda coup if nothing else. The immediate consequence was to prevent Napoleon from gaining the Danish fleet in the aftermath of Tilsit.[107]

List of Danish warships surrendered at Copenhagen

Breaking up Danish naval stores and ship construction
The Dardanelles and Alexandria, February – March 1807
The Ottoman Empire was also in play during 1806/7, as the Sultan was gravitating towards Napoleon’s sphere. On 2 November 1806 Collingwood despatched Rear Admiral Thomas Louis in Canopus (80), along with Thunderer (74), Standard (64), Active (38) and Nautilus (18) to reconnoitre the Dardanelles, where they arrived and anchored at Tenedos on the 21st. During December Rear Admiral Louis had recourse to collect the British ambassador who had separately departed Constantinople aboard the Endymion, a prudent decision given the deterioration of relations with the Sultan.[108]

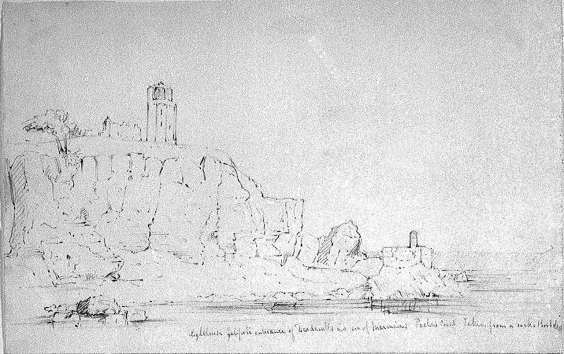
Sketch of the site of Troy, looking towards Tenedos, & Pacha’s Point lighthouse at Gallipoli, July-October 1853 by George Mends
On 22 November the British government sent orders to Collingwood to despatch an expeditionary squadron to anchor off Constantinople and pressure the Porte not to intervene against British interests (the Ottoman Empire declared war against Russia in December 1806).[109] Collingwood did not receive these orders until 12 January 1807, but upon receipt immediately determined upon Vice Admiral Duckworth for the mission. Duckworth departed on the 15th aboard the Royal George (100). His orders were to consult with Mr. Arbuthnot, the British ambassador who was then waiting with Rear Admiral Louis at Tenedos and, if the situation called for it, to sail to Constantinople and induce the Turks to hand over their fleet.[110]

Rear Admiral Thomas Louis of the White, d. 17 May 1807

Vice Admiral Duckworth, by Giovanni Vendramini, December 1809

The Dardanelles expeditionary force
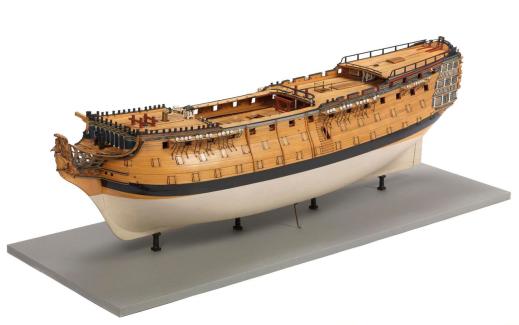
2,278-ton 100-gun first rate Queen Charlotte (1789), the same generation as HMS Royal George (1788
From the start Duckworth was concerned about the operation and could only have become more worried when at 9 pm on 14 February a fire broke out aboard HMS Ajax, quickly got out of hand, causing the ship to drift ashore at Tenedos where it exploded at 5 am the following morning, with the loss of 252 out of 633 officers and men.[111]

1811 chart of the Dardanelles, reproduced in William Laird Clowes, History of the Royal Navy, volume V, p. 223

Duckworth’s anchorage at the entrance of the Dardanelles, 14 February 1807, by Nicholas Pocock
Despite this setback Duckworth was on the move again on the morning of the 19th, his force divided into two divisions, with Rear Admiral Sir Sidney Smith commanding the Pompee, Thunderer, Standard and Active, and carrying orders to defeat the Turkish squadron (one 64, one 40, two 36s, one 32, one 22 corvette, one 18 corvette and two 10 corvettes, two brigs and three gunboats) at Point Pesquies, modern Nara Burnu, if they attempted to intervene.[112]

Rear Admiral Sir William Sidney Smith
The Turkish positions were largely obsolete medieval fortifications and were little threat so long as the British were able to suppress them with naval cannonade. The Turks started firing as soon as Duckworth entered the peninsula, the British suffering six killed and 51 wounded. At about 10 am the Turkish squadron deployed to engage Duckworth, but they were immediately countered by Sidney Smith, whose division anchored alongside the Turkish line and rapidly reduced them – within thirty minutes all but two of the Turkish warships had surrendered.


Thomas Whitcombe’s paintings of Duckworth’s action on 19 February 1807.

Sidney Smith reduces the Turkish fleet.
The Turkish vessels were immediately burned, while landing parties of seamen and Royal Marines secured the Point Pesquies redoubt and spiked the guns at the cost of four killed and 26 wounded.[113] Sidney Smith detached Active as a rear guard and at 5 pm his division hauled in their anchors, setting sail to rejoin Duckworth’s division.
The whole fleet was eight miles from Constantinople by 8 pm on 20 February. The next morning the Endymion was despatched to the city to deliver Mr. Arbuthnot’s declaration – including a 36 hour ultimatum demanding the surrender of the remaining Turkish fleet and its stores.[114] The Porte simply ignored the attempt to deliver the ultimatum, and despite expiration of the original timeline no consequences were imposed. Ambassador Arbuthnot fell sick on the 22nd and the Turks continued to ignore Duckworth’s demands. The essential dilemma for Duckworth was that his goal ultimately was to arrange a peace settlement, not bombard Constantinople, and although there can be no doubt that Duckworth was a fighting Admiral he was perhaps deficient as a diplomat and negotiator.
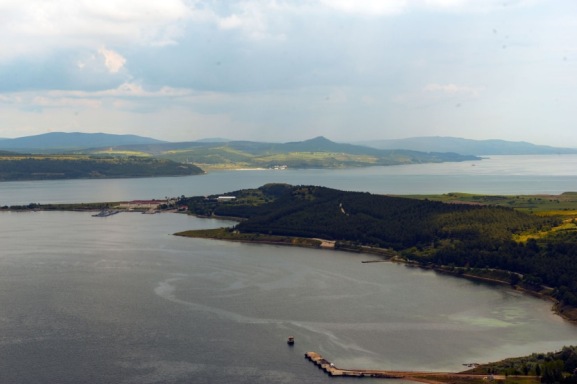

Nara Burnu today, & modern topography of the straits
Lacking a dedicated landing force it was not clear how Duckworth could have convinced the Turks to concede.[115] At any rate, after a series of further shore skirmishes and failed efforts to force negotiations, on 1 March Duckworth gave up. He weighed anchor around 8:30 am and sailed back towards the Mediterranean where he arrived back at Point Pesquies, retrieved the Active at 5 pm on 2 March, and was underway at 7:30 am the next morning. That afternoon Duckworth was engaged by the Turkish redoubt at Point Pesquies, including 800 lb shot from medieval cannons, and it was not until 11:35 pm that the entire fleet had passed the batteries and exited the Dardanelles, the squadron having sustained a further 26 killed and 130 wounded during this withdrawal.[116] It seems evident that the Dardanelles operation, much like the Gallipoli campaign a century later, should have been delayed until a landing force had been assembled – perhaps as little as a month could have made the difference.[117]

Lithograph of Alexandria, c. 1847 by William Delamotte and Charles Chabot
The disjointed planning efforts of the Grenville ministry were demonstrated thoroughly when Duckworth arrived back in the Mediterranean and was shortly thereafter joined by eight Russian battleships under Vice Admiral Seniavine, who was eager to try again, an endeavour Duckworth notably refused to attempt. Worse, the landing force Duckworth actually needed had been arranged and despatched on 6 March in 33 transports, but was not destined for the Dardanelles: escorted by Captain Benjamin Hallowell in the Tigre (74), with the Apollo (38) and the Wizard (16), 5,000 troops under Major General Fraser had departed from Messina bound for Alexandria. The task force arrived off Egypt between the 15th and the 19th, with landings taking place on the 17th and the 18th. Aboukir castle was stormed on the 20th and Alexandria surrendered on the 21st. Duckworth arrived on the 22nd. Major General Fraser attempted to take Rosetta by assault but was repulsed with the loss of 400 men – including the Major General himself.[118]

1 April 1809, HMS Mercury (28), Captain Henry Duncan, cut out the French gunboat Leda from Rovigno harbour, south west of Trieste, by William John Huggins
The operation lingered on until September when the entire force was withdrawn. Duckworth had already departed in the Royal George for England, leaving behind Rear Admiral Sir Thomas Louis who died aboard the Canopus on 17 May. The Russians, however, captured Lemnos and Tenedos, defeating a Turkish fleet off Lemnos, until peace was settled by the Treaty of Tilsit and Vice Admiral Seniavine sailed for the strait of Gibraltar, destined, he hoped, for the Baltic. Later in 1808 Collingwood was called away to attempt with diplomacy what Duckworth had failed to achieve with battleships, and successfully convinced the Turks to abandon the war. The Ottoman Empire signed a peace treaty in January 1809.[119]
The 1807 operations against Denmark and Turkey created new enemies. Worse, Napoleon knocked Prussia and Russia out of the war at the battles of Jena and Friedland with the result, as we have seen, of the signing of the treaty of Tilsit on 7 July. Proposed Royal Navy operations against the Spanish colonies in the Caribbean did not materialize, in part the result of the revolt against Napoleon in Spain, leaving the 18,000 men and more than 80 warships garrisoning Jamaica, plus the Leeward and Windward Islands, with little to do. In December Rear Admiral Alexander Cochrane did however capture the Danish Caribbean colonies of St. Croix, St. Thomas and St. Johns (see above).[120]
The Baltic Campaign, 1808
Napoleon’s efforts to diminish Britain’s trade through privateering resulted in the French taking 559 British merchants in 1807.[121] With the Russian declaration of hostilities on 31 October 1807 the principal theatre of operations for 1808 transitioned to the Baltic, where Britain’s Swedish ally was at risk of attack from the Russians – potentially jeopardizing Britain’s valuable Scandinavian trade.[122]

Henry Phipps, Baron Mulgrave, First Lord of the Admiralty in Portland’s ministry, 1807-10, engraving by Charles Turner from 1807 drawing by Sir Thomas Lawrence, published November 1808
First Lord of the Admiralty the Baron Mulgrave selected Vice Admiral James Saumarez for the Baltic mission. Saumarez was to take a fleet, 12 or 13 sail of the line, and supported by Rear Admirals Hood and Keats, destroy the Russian fleet at Cronstadt.[123] Saumarez and Lt. General Sir John Moore were in the course of preparing this expedition when the Czar pre-empted them by invading Finland.[124]

Vice Admiral James Saumarez, copy of Thomas Phillips portrait, made by Edwin Williams in 1862

Lieutenant General Sir John Moore, by Thomas Lawrence, engraving by Charles Turner, drawn c. 1805, published April 1809
Saumarez departed with Hood on 21 March 1808 for Gothenburg where he would rendezvous with Captain George Parker in the Stately (64), the officer on station there, and then confer with the British envoy at Stockholm regarding the best measures for protecting Sweden from further Russian or French incursion.[125] Ultimately a force of 62 ships, including 16 line of battleships, plus frigates and transports, capable of delivering 10,000 men, was built up and employed blockading the Russians in harbour and protecting merchant trade.[126]

Vice Admiral Saumarez’s flagship during the Baltic campaign of 1808 was HMS Victory, rendered here off Belem Castle, by Thomas Buttersworth in 1797


Victory at the Portsmouth historic dockyard in 2020 & Crew composition.
A brief engagement occurred on 22 March when Captain Parker in the Stately with Captain Robert Campbell in the Nassau (64, ex Holstein captured at Copenhagen 1801), having sailed from Gothenburg on the 19th, engaged Denmark’s only remaining ship of the line, the 64 (or 74) gun Prinds Christian Frederik north of Zealand. After a two hour fight the Danish ship surrendered and ran aground. The crew was removed and the ship set afire afterwards.[127]


Normal trade protection and blockade actions continued until the Russians sortied on 25 August, intent on attacking Stockholm. The Royal Navy in the Baltic was by now divided into several components, and it was Rear Admiral Samuel Hood’s command that spotted the Russian fleet at sea off Hango on the 25th. Hood commanded a combined English and Swedish squadron, although a third of the Swedish seaman were incapacitated with scurvy and therefore of doubtful capacity.[128] Hood made to chase the Russians, who fled, until at 6:45 am on the 26th the Sevolod (or Sewolod, 74), appeared and engaged the British, no doubt hoping to delay them while the rest of the Russians escaped.
During this action the Implacable (74, Captain Byam Martin) and the Centaur (74, Captain William Webley; flag of Rear Admiral Hood), engaged the Sevolod at pistol shot, and by 8 am captured that ship, with six killed and 26 wounded on Implacable, and 48 killed and 80 wounded on the Sevolod. The approach of the rest of the Russian fleet convinced Hood to withdraw. The unmanned Sevolod crashed ashore at Roggersvick, and the Russians were attempting to float her when Hood returned with his two 74s and at 8 pm Captain Webley in the Centaur engaged the Sevolod close, the latter striking for the second time forty minutes later. Centaur had three killed and 27 wounded, the Sevolod 180 killed and wounded. The Russian warship was then burnt, all of which was action enough to convince the Russians not to attempt the crossing to Stockholm, and they were confined to their base at Roggersvik.[129]

To reduce this place Saumarez, on 30 August, arrived with Victory, Mars, Goliath and Africa and maintained the blockade of Roggersvik until October. Although plans were drawn up to launch a fireship attack against the Russian squadron, as was done at the Basque Roads the following year, it was later determined that the Russian harbour defences prevented any such action. Saumarez was compelled to depart with the arrival of winter, and the Russians returned thence to Cronstadt.[130]

James Saumarez’s squadron for the 1808 Baltic expedition
The Baltic squadron continued to intercept French and Danish privateers throughout 1809. On 11 May the Melpomene (38), Captain Peter Parker, located a Danish 6-gun cutter ashore at Huilbo, Jutland. Parker anchored, launched his boats, and then fired broadsides at the cutter until his boats arrived and completed the destruction, this handy operation completed at the cost of only six wounded. Four days later the 18-pdr frigate Tartar (32), under Captain Joseph Baker, chased ashore a small 4-gun privateer of 24 crew near Felixberg, Courland. The frigate’s boats were hoisted out and the diminutive Danish warship easily captured

Captain Peter Parker, by John Hoppner, c. 1808-10
On 7 July 1809 the Implacable (74, Captain Samuel Warren), Melpomene (38 – Parker), and the sloop Prometheus (18, Captain Thomas Forrest), while cruising off the coast of Finland, located a Russian gunboat flotilla of eight vessels at Porcola Point. Bellerophon (74) presently arrived and together 17 boats were assembled under Lieutenant Joseph Hawkey of Implacable, with 270 officers and men. The boat team waited until 9 pm and then rowed in under heavy fire and boarded the Russian flotilla at which point Lt. Hawkey was killed by grape shot, but Lt. Charles Allen took over command and completed the task of capturing the Russian gunboats, with 17 killed and 27 wounded, to the Russian’s 63 killed. A similar action was carried out on 25 July by 17 boats from the Princess Caroline (74), Minotaur (74),Cerberus (32) and the sloop Prometheus (18), against four Russian gunboats and a brig at Fredericksham, gulf of Finland. Once again the crew waited until the evening and then rowed into the anchorage and captured the Russian vessels, at cost of 9 killed and 46 wounded, the Russians losing 28 killed and 59 wounded (W. James, Naval History of Great Britain, vol. V, 1859, p. 38, 40-2).

N. C. Wyeth illustration
Although Sweden was protected for now, ultimately the Baltic campaign failed to prevent the Russians from annexing Finland at the Peace of Frederikshamn, 17 September 1809.[131] Saumarez did however effect the capture of the island of Anholt in May,[132] in addition to his sterling work protecting merchant traffic through the Great Belt strait: between June and December 1809 the Royal Navy escorted 2,210 merchants through those confined Danish waters without loss, however, a Norwegian convoy of 47 was taken by Danish Captain Lorentz Fisker with five brigs during a daring sortie in July 1810.[133] The British position in the Baltic was now tenuous as Sweden was then under Napoleon’s thumb, the Emperor having installed Marshal Bernadotte as monarch in October 1810.[134] He was soon induced to declare war against Britain, and did so in November.
The Peninsular Campaign, 1807 – 1809

The Iberian Campaign
On 18 October 1807 Napoleon despatched General Jean Junot, with 25,000 men, to secure French interests in Spain and prevent British intervention in Portugal. Within a month of crossing the Spanish frontier the French forces were built up to 75,000 in three corps.[135] Junot was soon ordered to secure Lisbon, lest the British intervene, which they were in fact preparing to do.

Rear Admiral Sir William Sidney Smith by Henry Heath, February 1808

The Tagus expedition, November 1807
Sidney Smith was despatched early in November 1807 with a squadron to the mouth of the Tagus, his flag after the Dardanelles and Egyptian operations now in the new Hibernia (120), [136]

HMS Hibernia (120), Sidney Smith’s flagship in 1807-1808
Lord Strangford, the British representative at Lisbon, departed to join Rear Admiral Smith, who was by mid-November blockading Portuguese merchant traffic. Going aboard the Confiance (20), Strangford sailed back to Lisbon on the 27th, under flag of truce, demanding that the Portuguese navy surrender – and if they did so, the blockade would be lifted. The Prince Regent Dom Joao accepted these terms, and on the 29th embarked aboard the Portuguese fleet with Queen Maria II and the rest of the royal family, not to mention the state treasury, for the voyage to Brazil.

Dom Joao, the Prince Regent, later John VI of Portugal, painted in 1803 by Domingos Sequeira

The Embarkation of the Portuguese Royal Family, 29 November 1807

Captain Sir Graham Moore, painted by Sir Thomas Lawrence in 1792
Rear Admiral Smith detached Captain Graham Moore’s squadron, including the Marlborough, London, Monarch and Bedford, as escort to Rio de Janeiro. The flight of the royal family was not a moment too soon, as General Junot entered Lisbon on 30 November.[137] The Portuguese fleet of eight of the line and its frigates was turned over to the Royal Navy. As Herbert Richmond observed this operation, in conjunction with Copenhagen, put Napoleon’s net warship losses to no less than 25 capital ships.[138]


24 gun sixth rate circa 1740, & 22 gun sixth rate c. 1725
As an addendum to this series of events, it should be mentioned that after the British squadron arrived at Rio de Janeiro Captain James Yeo in the Confiance (22, 18-pdrs) was detached to sail to Paraguay where he had orders to consult with the governor there regarding the possibility of an attack upon Cayenne, capital of French Guiana. Yeo in fact landed a small contingent of 400 at Cayenne on 7 January 1809 and carried that place within five weeks despite it being garrisoned by 1,200 men and 200 guns. As a result Yeo received the favours of the prince regent of Portugal and was then knighted by George III on 21 June 1810.[139]

N. C. Wyeth illustration for Robert Louis Stevenson’s Treasure Island

Captain Sir James Yeo captures Cayenne, January 1809: View of Constable Rocks off Cayenne, by T. Conder and Joseph Johnson, 1 December 1791
The other purpose of Rear Admiral Smith off the Portuguese coast was to intercept Vice Admiral Seniavine’s squadron that as we have seen was making for the Baltic after the collapse of the Dardanelles and Alexandrian expeditions, and who Britain was now at war with following the Russian declaration of 31 October. Late in 1807 Smith was reinforced by the arrival of Commodore Peter Halkett in the Ganges (74) who had with him also the Defence (74), Alfred (74) the Ruby (64) and the Agamemnon (64), sailing from Portsmouth on 6 December.[140] While Smith was escorting the Portuguese royals Vice Admiral Seniavine slipped into the Tagus and was there when Smith returned to cruise off Lisbon early in 1808.

Medal commemorating the capture of Cayenne, 1809
The Spanish however were engaged in diplomacy with their British counterparts and on 4 July arranged a cessation of hostilities. Rear Admiral Smith maintained his blockade off the Tagus while minor operations continued along the Portuguese coast. Admiral Sir Charles Cotton, who replaced Smith in charge of the Tagus blockade, on September 3rd signed a surrender agreement with Vice Admiral Seniavine by which the Russians conceded to hand over their warships to the British until relations could be normalized – the crews were repatriated.[141]

Admiral Sir Charles Cotton, c. 1812 by James Ramsay and Henry Meyer

Russian squadron surrendered at the Tagus, 3 September 1808
The situation in Spain had been evolving rapidly since the summer of 1808. In May a Spanish rebellion against French rule broke out in Madrid, and in July 22,000 men of the occupation army were forced to surrender at Baylen. This disaster isolated Junot in Portugal. In June Foreign Secretary Canning stated his intention to support the Portuguese by landing British troops.[142] There were several contingents that could be utilized for this purpose: 9,000 men in Ireland, under Sir Arthur Wellesley, who had been gathering to relieve the South American expedition, and Sir John Moore’s 10,000 with Saumarez in the Baltic, plus another 10,000 Spanish troops who were operating with Rear Admiral Keats against the Danish.[143]

Jean-Andoche Junot, Napoleon’s general in Portugal during 1807-8, by Vincent-Nicolas Raverat, c. 1834
The first 5,000 of Lt. General Wellesley’s 9,000 strong southern Ireland contingent landed at Corunna on 20 July 1808.[144] On 1 August Lt. General Sir John Moore arrived, having been rerouted from the Baltic, and landed his men to support the Portuguese, bringing the British expeditionary force up to 15,000. With this small army Wellesley defeated General Delaborde’s corps at Rolica on 17 August,[145] and was then engaged by Junot’s 14,000 men at the Battle of Vimeira (Vimeiro) on 21 August, the British having arrived at that place to receive reinforcements in the form of two brigades landed by sea.

Sir Arthur Wellesley, who made the initial landing in August 1808 and commanded at Vimeiro on the 21st of August, portrait by Robert Holme, c. 1804

Battle of Vimeiro (Vimeira), Wellesley defeats Junot
In the aftermath of Vimeria the Convention of Cintra was signed (30 August 1808) securing Portugal for the Allies. Wellesley returned to Dublin while the expedition in Portugal was built up to the maximum of 40,000, now under the overall command of General Hew Dalrymple who was supported by Lt. Generals Harry Burrard and Sir John Moore, although Burrard and Dalrymple were presently cashiered following popular resentment that Vimeira had not been fully exploited.[146] On 24 December Rear Admiral Sir Samuel Hood, recently arrived from the Baltic, landed Major General Beresford’s troops at Madeira where that naval base was being developed into a staging area in preparation for further operations in Portugal and at the Cape.[147] By Christmas 1808 Napoleon was committing 305,000 men to Spain, and occupying Madrid.[148]

General Sir Hew Whitefoord Dalrymple, by John Jackson, published by Charles Turner, 1829-31

Lieutenant General Sir John Moore, portrait by Sir Thomas Lawrence
Moore, who had been left in charge while Wellesley, Dalrymple and Burrard were in London answering to government inquiry, marched into Spain and soon found that Madrid had been occupied by the French. His route of retreat was presently cut off by Marshal Soult, and Moore began a punishing withdrawal that terminated at Corunna on 11 January 1809. With French corps converging on his base Moore began preparing for the evacuation by sea during 16/17 January, but was killed on 16 January when he was hit by cannon shot.[149]

Battle of Corunna, 16 January 1809. The white dot indicates the location where Sir John Moore was killed
Part III

The Fifth Coalition: Napoleon’s Austrian War, Aspern-Essling, Wagram & Naval Operations: The Basque Roads, Walcheren Expedition, Martinique & Guadeloupe, Dutch East Indies, Capture of Mauritius, the Peninsula Campaign

Napoleon expands into Italy, Spain and defeats the Austrians
With Napoleon’s attention split between Germany and Spain Francis was once again encouraged to challenge the French Emperor and on 8 February 1809 resolved on war. Britain was at first hesitant to provide monetary support for this endeavour, but by April had supplied £250,000 in silver, with promises of a further £1,000,000 to come.[150] With most of the French army in Spain, Napoleon’s Army of the Rhine at first amounted to only 60,000-80,000 men, against the far larger Austrian force of 280,000 with 312,000 reserves and 742 guns, spread across the various frontiers. Napoleon recalled his marshals from Spain and despatched Berthier, Lannes, Lefebvre, Bessieres, Davout and Massena to the German front.[151] By 9/10 April Archduke Charles felt his forces ready, and began the march simultaneously into Bavaria and Italy. By this point however Napoleon’s forces had largely assembled.

The Archduke Charles, by Thomas Lawrence, c. 1819


Battle of Abensberg & Eggmuhl (Eckmuhl), 20-24 April 1809. Napoleon’s center attack shatters the Austrians, but leaves Davout’s flank open to Charles’ main force.
Charles marched to Ratisbon and Napoleon arrived at Abensberg on the morning of the 20th. Here Napoleon determined upon attack: Davout would hold the northern flank while Lannes, Lefebvre and Vandamme led the main assault. This initial attack on the 20th lasted only an hour and succeeded in dividing the Austrians, costing them 7,000 casualties and many prisoners compared to the French losses of 3,500.[152] The Archduke Charles withdrew to Ratisbon, with Davout in pursuit, and was soon supported by Lefebvre, while Napoleon persecuted his attack against what he assumed was the larger force.[153] As a result it required a further three days to develop the attack against Charles and turn him from his position at Ratisbon. This sharp success Napoleon hailed as a second Jena and put the Austrians to route intending to clear the path to Vienna, which was once again occupied without resistance on 12 May.
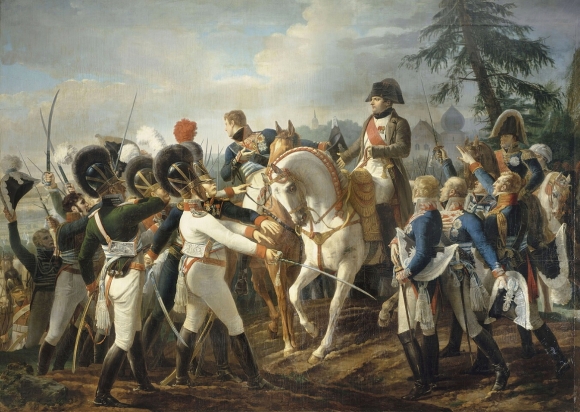
Napoleon at Abensberg, 20 April 1809, by Jean -Baptiste Debret, c. 1810

Battle of Abensberg, by Felix Storelli
Charles reached Bisamberg on 15 May and drew up his remaining force (95,800 and 264 guns) east of Vienna on the 17th. Napoleon crossed the Danube at the Island of Lobau, and was beginning to deploy on the east bank with his smaller force of 82,000. On 20 May Charles realized he had an opportunity to destroy an isolated component of Napoleon’s army and the following afternoon attacked Massena’s corps as it was holding the French left flank at Aspern, the Austrians deploying 80,000 men and 300 guns against a force less than half that size.[154] The Austrians took Aspern, but the village soon changed hands as French reinforcements came up, and at 8 pm Legrand relieved Molitor who commanded Massena’s most hard-pressed division. To the south the Austrians assaulted Essling all day, but likewise the French held.[155] On the 22nd the Austrians renewed the assault, but despite sustained fighting again failed to repulse the French.

Battle of Essling, Napoleon’s effort to cross the Danube is checked, resulting in a costly attrition battle

Marshal Jean Lannes, mortally wounded at Essling on 22 May 1809, painted by Jean Charles Nicaise Perrin

Battle of Aspern-Essling, 21-22 May 1809, by Alexis-Pellegrin-Marie-Vincent Pasquieri

Napoleon at the Island of Lobau after Essling, 23 May 1809, by Charles Meynier

Archduke Charles, victorious after Aspern-Essling, by Johann Peter Krafft
Ultimately Charles fought Napoleon to a draw, the Austrians sustaining 22,000 casualties to the French 19,000.[156] With ammunition nearly exhausted Napoleon withdrew to the Island of Lobau to await reinforcements, which upon arrival increased his force level to between 178,000-180,000.[157] Napoleon established pontoon bridges over the Danube in preparation for attacking Charles, whose army had now been reinforced to between 130,000-140,000 men and 414 guns.[158] Here both sides watched each other for the month of June, and on the night of 4/5 July Napoleon shuttled his corps across the Danube.[159]

French and Austrian corps strengths before Wagram

Wagram. Napoleon halts Archduke Charles’ counteroffensive and claims victory in the Austrian campaign

Opening of Wagram, 5 July 1809, by Alexis-Pellegrin-Marie-Vincent Pasquieri

Napoleon contemplating deployments at Wagram, night of 5 July 1809, by Adolphe-Eugene-Gabriel Roehen.
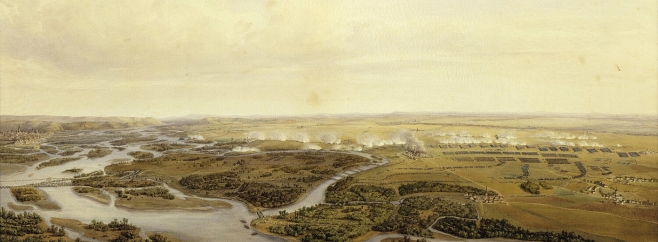
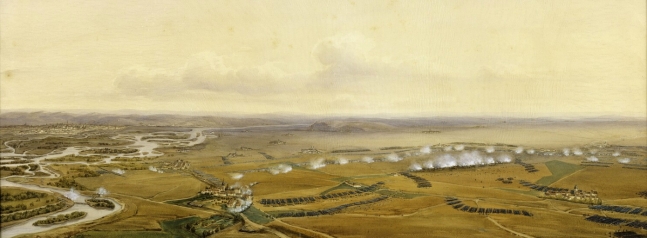
Views of Wagram, 6 July 1809, by Simeon Fort

Napoleon commanding at Wagram, 6 July 1809, by Carle Vernet, c. 1835-6
Napoleon launched his attack about 7 pm the evening of the 5th, with Eugene, Bernadotte and Oudinot leading against Charles’ position at Wagram. This attack was repulsed and Napoleon spent the night planning his next movements.[160] Both sides launched attacks early the following morning and soon a general engagement was underway. By 10 am the Austrians seemed to have the advantage,[161] but Napoleon hurled in his reinforcements and arrested the Austrian advance. Davout and Eugene defeated the Austrian left flank and the Austrians at last withdrew, after both sides had sustained a further 35,000 casualties – the exhausted French were unable to pursue.[162]

Napoleon receives gifts from Alexander I, c. 1809 by Charles-Etienne Motte
Napoleon was content to have won the largest battle in history thus far (320,000 men involved), although demonstrating again the transition from his earlier rapid maneuver victories into what clearly resembled the colossal artillery dominated attritional battles he had fought in 1807, and indeed would become the model for the future. The Peace of Schonbrunn was eventually settled on 14 October, with Austria paying an indemnity of 85 million francs and the army being restricted to a maximum of 150,000 men, thus allowing Napoleon to refocus on Spain.[163] Next, Talleyrand and Napoleon solidified the Emperor’s position as the premier European monarch by arranging his marriage into the Habsburg royal family.

Jean Baptiste Guerin and Francois Gerard’s painting of Marie Louise (1791-1847), who was 19 when she married forty-one year old Napoleon Bonaparte.

Wedding of Napoleon and Marie Louise, 2 April 1810 at the Louvre, painted by Georges Rouget. Josephine had consented to a divorce earlier that year. On 20 March 1811 the new Empress gave birth to Napoleon II (d. 1832 in Vienna)
Amphibious Expeditions: The Basque Roads, the Walcheren Expedition, War in Spain and Portugal

Establishment of the Royal Navy in 1809
By 1809 the Royal Navy had 127 line of battleships in commission, with another 100 building, the total RN establishment including all seaworthy schooners, sloops, frigates and cruisers was close to 700.[164] As Britain tightened its blockade of war supply to the continent, Napoleon was forced by want of tax revenue and as a result of the high cost of his Austrian campaign, to authorize the issuing of licenses for merchant trade, followed by the institution of a high tariff with the Trianon Decree of 5 August 1810.[165] Combined with opening the Spanish and Portuguese markets to the Allies, these measures resulted in the gradual undermining of the continental system.[166]

The Caesar (80), Rear Admiral Strachan’s flagship in 1805-8
Napoleon had been expanding his naval capacity for several years: at Cherbourg the harbour was being deepened to make it a port accessible not only to frigates but also ships of the line, and the port of Spezzia at Venice was also developing. Allemand’s flight from Rochefort was a successful attempt to unite with the French squadrons being assembled around the Mediterranean. There were other squadrons at Cadiz (five sail and a frigate), Toulon (five sail, with three or four building), one 74 at Genoa, and two 74s building at Venice.[167]

Collingwood remained C-in-C Mediterranean until his death early in 1810, engraving by Charles Turner
The Rochefort Squadron and the Basque Roads

Baron Gambier is appointed C-in-C Channel Fleet in March 1808, having completed the highly successful Copenhagen operation, portrait drawn here in 1813 by Joseph Slater
Admiral Gambier, newly minted Baron Gambier, was in March 1808 appointed by the once again Tory ministry of William Cavendish, Duke of Portland, to the position of Channel Fleet C-in-C, replacing Rear Admiral Strachan.[168] Gambier’s mission for the spring of 1809 would be to carry off the Brest squadron, eight sail of the line and four frigates. Isle d’Aix was the point of entrance for Rochefort, and from there Rear Admiral Allemand sailed in January with six of the line and additional frigates, eluding Strachan’s blockade.[169]
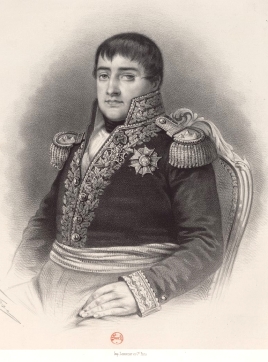
Rear Admiral Zacharia Jacques Theodose Allemand
Rochefort had been blockaded by Rear Admiral Richard Strachan in Caesar (80) since year end 1807. While Strachan was away victualing in January 1808, Admiral Allemand took his squadron, consisting of Majestuenx (120), Ajax (74), Patriote (74), Lion (74), Jemmapes (74), Magnanime (74), Suffren (74), plus a frigate and a brig, out to sea, chasing off the 32-gun frigate and 18-gun brig that Strachan had left behind to observe.[170]

Vice Admiral Sir Edward Thornbrough, by Alexander Huey and William Fry, c. 1818 when Admiral Thornbrough was C-in-C Portsmouth

Vice Admiral Edward Thornbrough and Rear Admiral Richard Strachan’s combined squadron at Palermo, during the chase of Rear Admiral Zacharia Allemand’s Rochefort squadron
On 23 January the 14-gun brig Attack eventually located Strachan with news of the Rochefort squadron’s sailing. Strachan correctly predicted Allemand was heading for the Mediterranean, where in fact Napoleon had sent him as part of a theoretical invasion of Sicily,[171] and so sailed around Gibraltar, arriving at Palermo on 21 February where he joined with Vice Admiral Edward Thornbrough in the Royal Sovereign (100).[172] Allemand for his part had already rounded Gibraltar on 26 January, and then sailed for Toulon to join with Vice Admiral Ganteaume on 6 February.[173] Ganteaume sailed from Toulon the next day with a force destined to reinforce Corfu, where he cruised during the rest of February and March.

Vice Admiral Honore Joseph Antoine Ganteaume, who eluded Thornbrough and Collingwood in the Mediterranean during February – March 1809
During this time Ganteaume was constantly under observation from British frigates, and Collingwood was being informed at Syracuse. Ganteaume was back at Toulon by 10 April. Collingwood’s reputation was somewhat tarnished by this, although he had narrowly missed being informed of the French maneuvers on several occasions, and had in fact been made aware of developments on 2 March when he joined with Thornbrough and Strachan, but despite sailing around Sicily and into the Adriatic, did not encounter Ganteaume.

The Basque Roads, approach to Rochefort
With Strachan at sea he was replaced as Channel Fleet C-in-C by Baron Gambier. Strachan’s next command was blockading the Dutch coast, where he commanded the Walcheren Expedition (see below).[174] Collingwood was not informed that the French had already sailed back to Toulon until 28 April, and when he reached that place on 3 May Ganteaume no longer had any ideas about leaving harbour.[175] Collingwood detached Thornbrough to maintain the blockade of Toulon, while he sailed to Spain to assist in that theatre, notably employing his diplomatic connections with the pretender government to secure the Spanish fleet at Cadiz for the Allies. RN frigate commanders including Lord Cochrane in the Imperieuse, based at Mahon on the island of Minorca raided the Spanish Mediterranean coast and seized enemy trade. Captain Thomas Lord Cochrane, Earl of Dundonald, was the godson of Admiral Sir Alexander Cochrane and a darling of the Duke of Portland’s government, having been elected MP for Westminster in 1807.

Lord Gambier’s fleet for the Basque Roads operation
The Basque Roads, April 1809
In February 1809 the Aix Roads anchorage for the Rochefort squadron had been built up to 11 ships of the line by gradually combing the squadrons at Brest and Lorient. Effecting this combination was both dangerous and difficult as each port was variously blockaded by elements of Lord Gambier’s Channel Fleet. Rear Admiral Willaumez, who was at Brest with nine of the line, three frigates, and three corvettes, was to escape from that port, drive off the British blockade squadron at Lorient to free Commodore Troude who had three of the line and five frigates, and together sail for Aix Road where he would unite with the Rochefort squadron, another three of the line, the Calcutta troopship, and several frigates. Once this force was collected he was to sail to Martinique and intercept British forces known to be operating there.[176]

Aix Roads anchorage from William Clowes, volume V, p. 260-1
Willaumez, in his flagship Ocean (120) with two 80s and five 74s plus two 40 gun frigates, a brig and a schooner, sailed from Brest early in the morning on 21 February 1809. As his line cleared the Passage du Raz they were spotted by HMS Revenge (74, Captain Charles Paget), who then made sail for Lorient to communicate with the nearest British squadron.[177] Captain John Beresford’s Lorient blockaded squadron included the Theseus (74), Triumph (74), and Valiant (74). At 3 pm Captain Pagent signaled to Captain Beresford aboard Theseus, and Beresford made to intercept Willaumez, spotting the French line at about 4:30 pm.[178]
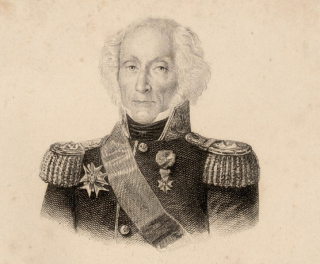
Rear Admiral Jean-Baptiste-Philibert Willaumez

Rear Admiral Willaumez’ Brest squadron
The next morning Willaumez despatched his schooner to Lorient to inform Commodore Troude that he was now free to sail, while he continued to distract Beresford’s squadron. Beresford chased Willaumez towards Isle d’Yeu, and that night was spotted by the Amethyst (36) a frigate attached to the Rochefort blockade squadron under Rear Admiral Robert Stopford (Caesar, 80, Defiance, 74, Donegal, 74). Amethyst fired a rocket to warn Stopford who then sailed and chased Willaumez until the French squadron entered the Basque Roads on the morning of February 24th.

Rear Admiral Robert Stopford, painted by Frederick Say c. 1840
Stopford detached Naiad (38) to inform Lord Gambier, but immediately after this Naiad located three of Commodore Troude’s frigates (Italienne, Calypso, Cybele – all 40 guns, under Commodore Pierre Jurien) from Lorient that had sailed to join Willaumez while Troude himself waited for the tide to come in so he could move out his heavier ships.[179] When Jurien spotted Stopford’s ships he realized he was cut-off from joining Willaumez at Rochefort, and thus put in at the Sables d’Olonne batteries. Stopford chased Jurien under the guns and engaged him at 11 am. Within 50 minutes he had set Italienne and Cybele on fire; the French frigates then cut their cables and ran aground, followed right after by Calypso. Total British casualties for this brief action were three killed and 31 wounded, as against 24 French killed and 51 wounded.[180] Willaumez had essentially achieved his purpose, joining with Commodore Gilbert Faure’s Rochefort squadron, although he lost the Jean Bart (74) as it grounded off Isle Madame.

Captain Lord Cochrane
Lord Gambier arrived on 7 March and took up the blockade, anchoring in the Basque Road on the 17th.[181] Earlier, on March 11th, Gambier proposed in a letter to Lord Mulgrave at the Admiralty that fireships would likely be useful in an attack against the Aix road. First Lord Mulgrave for his part decided as early as the 7th to carry out a fireship attack and on the 19th wrote back to Gambier that twelve fireships and three explosion vessels were being got ready, along with Congreve’s rocket ships, and five bomb vessels.[182] Captain Cochrane meanwhile arrived at Portsmouth on the 19th of March and reached London on the 21st to meet with Mulgrave who immediately appointed him to carry out the fireship attack at Aix road. Mulgrave informed Gambier that he was sending Cochrane for this purpose in a letter of the 25th, Cochrane sailing in the Imperieuse and delivering the letter to Gambier on 3 April.[183] Cochrane and Gambier began to assemble explosion vessels from what materials were on hand, and on 6 April Congreve arrived in the Aetna followed by twelve fireships on the 10th.[184]

The anchorage at Aix Roads, showing positions of French warships on 11/12 April 1809, and Cochrane leading his squadron in the Imperieuse at the upper left.
Meanwhile on 17 March Vice Admiral Allemand superseded Rear Admiral Willaumez as C-in-C of the Rochefort squadron. Allemand’s ships were moored in three parallel lines, two lines of heavy ships and a third of frigates, beyond which lay a long line-boom. The anchorage was covered by 30 guns, mostly on the Isle d’Aix along with 2,000 French conscripts.[185] Allemand had seen the fireships arrive and was under no illusions regarding Gambier’s intentions. Gambier deployed the frigates, bomb and rocket vessels on the 11th, the brigs Redpole and Lyra acted as light vessels, and Gambier kept his heavy ships at anchor about six miles to the north west, behind the fireship screen. At 8:30 pm the fireships and explosion vessels cut their cables and drifted towards the French anchorage. Cochrane himself was aboard one of the explosion vessels containing 1,500 barrels of powder, 350 shells, and some thousands of grenades.[186]

Fireship attack (the Mediator) on the night of 11 April 1809, by Robert Dodd
Two of the explosion vessels blew up on the line-boom itself, but the explosion vessel Mediator (Commander Wooldridge) broke through and exploded amongst the French warships, although doing no real damage. Wooldridge was badly burned and several of his skeleton crew were killed in the process.[187] The fireships mixed in amongst the French frigates, which now cut their cables to escape, and as result the French line was thrown into confusion; the Regulus collided with the Tourville and the Ocean ran around before in turn being rammed by the Tonnerre and Patriote. Only the Foudroyant and the Cassard remained mobile.

Cochrane returned to the Imperieuse and at 5:48 am the morning of the 12th signaled Caledonia to engage and exploit the confusion, then repeated this signal until 9:30 am. Gambier did not actually weigh anchor until 10:45 am, sailing to within six miles of the Aix anchorage whither he re-anchored at 11:30 am and called his captains to a meeting. Gambier was clearly in no hurry, but did send in his bomb vessels supported by the Valiant, Bellona and Revenge, plus all his frigates.[188] The Foudroyant and Cassard, seeing this squadron approaching, now cut their cables and sailed for the entrance to the Charente river delta, where they both ran aground, followed by the other French battleships as they were re-floated by the rising tide and then grounded again by the river mud.

Cochrane engaging the French at the Basque Roads, 12-13 April 1809.
Cochrane, at 1 pm, determined to engage personally and at 2 pm Gambier sent him the Indefatigable with the rest of the frigates and small vessels, then at 2:30 ordered the Valiant and Revenge to follow, although it took until 3:20 pm for these ships to reach Cochrane due to light winds. Cochrane was nevertheless presently joined by the Aigle, Emerald, Unicorn, Valiant, Revenge, Pallas, and Beagle. At 5:30 they were joined by the Theseus, and at about this time the French Varsovie and Aquilon surrendered.[189] Thirty minutes later the Tonnerre’s crew set their ship afire and abandoned it, that warship later exploding at 7:30. The Calcutta troop ship, set aflame by a British boarding party, blew up at 8:30 pm. At this point the Ocean, Cassard, Regulus, Jemmapes, Tourville and Indienne were still engaged but grounded. Rear Admiral Stopford had meanwhile been preparing additional fireships, and at 5:30 pm along with some boats converted into rocket vessels, escorted by the Caesar, maneuvered into position to continue the attack. Stopford’s Caesar however grounded at 7:40 pm – as did the Valiant, Indefatigable and Cochrane’s Imperieuse.[190]
During the early morning of the 13th this confusing situation was somewhat relieved as the Caesar was got free and Captain John Bligh, commanding the fireships, had his men set fire to the captured Varsovie and Aquilon, prompting the French to abandon the Tourville and set it afire in turn, although that warship failed to burn. At 5 am Stopford signaled for Bligh to continue his attack, and the Valiant, Theseus, Revenge, Indefatigable, Unicorn, Aigle and Emerald closed in towards the Little Basque road. Cochrane for his part was intent on attacking the grounded Ocean, having assembled the bombs vessels, the frigate Pallas, the Beagle, and several brigs for this purpose.[191]

British and French orders of battle at the Basque Roads, April 1809
At 8 am Cochrane launched his attack on the Charente delta, but his frigates could not close due to the restrictive river draft. His shallow draft flotilla of ten brigs and bomb vessels, soon joined by three more brigs and the two rocket boats, however, began to engage the Ocean, Regulus and Indienne. This went on for ten hours, the gun brigs being unable to seriously damage the grounded ships of the line, while the French were unable to maneuver to respond, until the tide began to fall and the flotilla was forced to withdraw. Gambier meanwhile sent letters to Cochrane commending him on the attack, but ordering him to return to the flagship.[192]

384 ton 18-gun RN brig, c. 1810
Gambier seemed to believe Cochrane’s role in the operation was finished, and on the 15th he sent him back to England with his dispatches. Gambier instead placed Captain George Wolfe of the Aigle in charge of the gunboats, who carried on the attack on the 14th but with little effect. Although the French burnt the Indienne, they eventually worked their other ships up the river and into relative safety, where they were then joined by the Regulus on the 29th after further futile attempts to destroy that ship with bombs.[193] In sum, the British had destroyed five sail and rendered the Rochefort squadron militarily irrelevant.
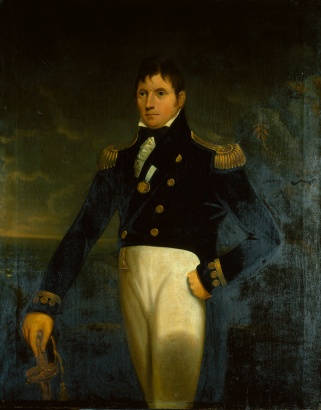
Rear Admiral Eliab Harvey, a fierce critic of Cochrane and Gambier, painted by Lemuel Francis Abbott c. 1806
Rear Admiral Eliab Harvey, Gambier’s second in command then aboard the Caledonia, was so aggravated by Cochrane’s role in the attack that he later launched a public campaign to denounce Gambier, whom he held responsible, and as a result Harvey was court martialled and dismissed from the navy.[194]
Cochrane likewise turned against Gambier, criticising him for failing to destroy the entire Rochefort squadron. Gambier demanded a court martial, which was duly arranged on 26 July 1809 and convened until August 4th. In the ensuing deliberations the admiral was honourably acquitted.[195] Cochrane presented evidence from captured French charts that suggested Gambier had over-estimated the strength of the French fortifications, while Gambier in turn pointed to the strategic imperative of preserving the Channel Fleet for future operations.[196] The consensus seems to be that Gambier certainly could have done more, although at increased risk and with little to gain.[197] Cochrane, for his part in planning and executing this sterling example of irregular warfare, was later knighted, although his career in the Royal Navy was near its end.[198]
The Walcheren Expedition


Middleburg and Walcheren , in 1745, and in the 19th century.

Rear Admiral Edouard-Thomas de Burgues, de Missiessy, painted by Alexandre-Charles Debacq
The other great maritime operation of 1809, and the most complex amphibious operation of the war, was the Walcheren expedition. This operation had the purpose of directly attacking the French fleet in the Scheldt, by the summer of 1809 built up to ten 74s under Rear Admiral Missiessy, with another six 80s and four 74s building at Antwerp and Flushing.[199] The actual threat posed by this fleet was relatively marginal, considering the depletion of French naval stores: it was built with green timbers and even then could not be fully manned, in short, an inviting target for the Royal Navy’s expeditionary warfare.[200] By generating a diversion in Holland furthermore it was hoped by the British government to distract Napoleon from the Austrian campaign then underway.[201]

Lieutenant General John Pitt, 2nd Earl of Chatham, engraving by Valentine Green, after 1799 drawing by John Hoppner
![Illustrated Battles of the Nineteenth Century. [By Archibald Forbes, Major Arthur Griffiths, and others.]](https://cawarstudies.files.wordpress.com/2020/08/eyre-coote.jpg?w=268&h=361)
Sir Eyre Coote, second in command to the Earl of Chatham, engraving by Archibald Forbes, Arthur Griffiths and others.
The audacious combined operation was to be led by Rear Admiral Sir Richard Strachan and Lt. General John Pitt, 2nd Earl of Chatham. Once again it was Captain Sir Home Popham tasked with drawing up the plan, and who also acted as Rear Admiral Strachan’s flag captain aboard Venerable, 74.[202]

Julian Corbett’s Organization of the Walcheren Expedition
The landing force consisted of approximately 40,000 troops (29,715 infantry, 8,219 cavalry, 5,434 artillerymen) including divisions under Sir John Hope and Sir Eyre Coote, convoyed in as many as 400 transports and escorted by 264 warships of all kinds: including 35 or 37 battleships, two 50s, three 44s, 23 or 24 frigates, 31 sloops, 5 bomb vessels, 23 brigs, and 120 smaller craft, under the 2nd Baron Gardner.[203]

Vice Admiral Lord Alan Gardner, C-in-C Channel Fleet, d. 1 January 1809, painting by William Beechey

Henry Edridge and Antoine Cardon’s engraving of Alan Hyde Gardner, Rear Admiral of the Blue, the 2nd Baron Gardner
Alan Hyde Gardner, age 36, had been promoted to Rear Admiral of the Blue on 28 April 1808, and in 1809 inherited the title of Baron Gardner from his late father, Vice Admiral Gardner then C-in-C Channel Fleet, who died on Near Years Day. The younger Rear Admiral Gardner flew his flag in the Bellerophon (74) while blockading the Scheldt.[204]

Chart of the Walcheren theatre of operations
The plan called for the fleet to land Pitt’s expeditionary force, proceed to destroy the naval arsenal at the Scheldt and capture the French fleet there, and then ultimately seize Antwerp and Flushing. The armada departed the morning of 28 July, marked the shoals and sounded the Roompot channel that night, and the following morning the transports were on station.

Vice Admiral Sir Richard Goodwin Keats, painted by John Jackson c. 1817

Sir John Hope, engraving by Giovanni Vendramini after drawing by William Craig, February 1811
Due to poor weather the landings, covered by Rear Admiral William Otway and Admiral Richard Keats, did not begin until 4:30 pm on the 30th: Sir Eyre Coote’s division was in the event the first ashore, followed by Sir John Hope’s division at Zuid Beveland. Some of the bomb vessels moved into position that evening and on the 31st opened bombardment on Veere, although Dutch counter-fire soon sunk three of the gunboats.[205] A naval brigade landed on the 30th under Captain Charles Richardson of the Caesar added to the bombardment of Veere, and that place surrendered on August 1st. General Coote meanwhile quickly surrounded Middleburg and forced its surrender, thus securing Walcheren.[206]

Middleburg and Walcheren in the 17th century
Fort Rammekens was taken on 3 August and Flushing invested, but despite the siege General Rousseau was able to reinforce his garrison up to 7,000 men.[207] Flushing was blockaded on the 6th, and on the 9th Captain Popham took some smaller ships up the West Schelde to sound Baerlandt channel. On the 11th Captain William Stuart took a frigate squadron through the channel between Flushing and Cadzand.[208]

Landing at Walcheren, engraving by A. Lutz after Johannes Jelgerhuis, 1809

The Bombardment of Flushing during the Walcheren Expedition of 1809
During all of this action Rear Admiral Missiessy, pressured by Admiral Keats, gradually moved his squadron up the channel and for good measure behind a line-boom. On 13 August a group of bomb vessels commanded by Captain George Cockburn of the Belleisle (74) opened the bombardment of Flushing, to which weight of cannon the following day was added Rear Admiral Strachan and Rear Admiral Gardner’s fire as their heavy ships moved into position. On 15 August, after 31 hours of shelling, the French at Flushing offered to surrender and that place was captured the next day.[209]
The islands of Schouwen and Duijveland surrendered to Admiral Keats and Lieutenant General the Earl of Rosslyn the next day.[210] Chatham left 10,000 men to hold Walcheren, while he prepared for the next phase of operations leading up to the intended capture of Antwerp.

The squadron Captain William Stuart commanded off Flushing
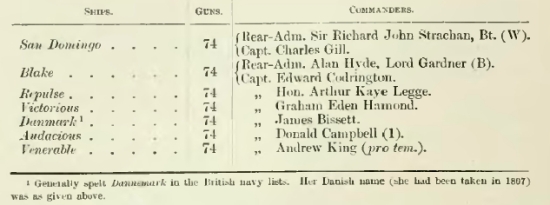
Rear Admiral Strachan and Rear Admiral Gardner’s squadron during the bombardment of Flushing
The French had 35,000 men defending Antwerp. The British however were, from the 19th of August onwards, as William Clowes puts it, being “daily reduced by malarious sickness” which ultimately incapacitated about 14,000 men, of whom about 3,500 died.[211] Chatham, demoralized at reports of the strength of the Antwerp defences, called a council of war on August 26th, and thereupon determined to abandon the campaign – leaving for England on 14 September – although Walcheren was not finally evacuated until December 23rd.[212]

British withdrawal from Walcheren, engraving by Francois Anne David after Charles Monnet

Spencer Perceval, painted here by George Francis Joseph, succeeded the Duke of Portland, who died on 4 October 1809. Lord Spencer was Prime Minister until his assassination on 11 May 1812.
The death of the Duke of Portland on 4 October 1809 ensured that Chatham foisted responsibility for what Hilton describes as “England’s single biggest disaster in the entire war” off on Strachan, a seaman’s admiral considered the equal to, if not superior of, Pellew.[213] The cabinet itself veritably imploded, with Castlereagh challenging Canning to a duel – in which he wounded him with in the thigh – the two antagonists resigning thereafter. The Tory government was thus reconstituted under Spencer Perceval. So much for the Walcheren expedition.
The Relief of Barcelona

The Toulon squadron was commanded by Vice Admiral Honore Ganteaume
While Collingwood was blockading Vice Admiral Ganteaume at Toulon, the Mediterranean C-in-C was not able to prevent detached elements from escaping. One such sortie in April 1809 saw Rear Admiral Francois Baudin escape with five sail, two frigates and sixteen smaller vessels to make for Barcelona in a resupply effort. Successful, Baudin was back at Toulon in May.[214]

Rear Admiral Sir George Martin by Charles Landseer

Rear Admiral Martin’s squadron during the chase of Rear Admiral Francois Baudin, 23 October 1809
To prevent a repeat effort, Collingwood moved to blockade Barcelona, although he then had only 15 sail of the line against the 15 French and six Russian built up at Toulon. Baudin put to sea again on 21 October with one 80, two 74s, and two 40 gun frigates plus transports and smaller craft.[215] He was spotted by Captain Robert Barrie in the Pomone (38), who hastened to inform Collingwood. Collingwood closed to intercept Baudin while he despatched Rear Admiral George Martin to chase. Baudin attempted to draw off Martin by separating from the transports, a gambit that paid off as the convoy escaped, minus a few brigs which were captured by Captain Barrie.[216] Baudin’s warships however variously fled or ran aground, the Robuste and Lion near Frontignan, and their crews set them afire.
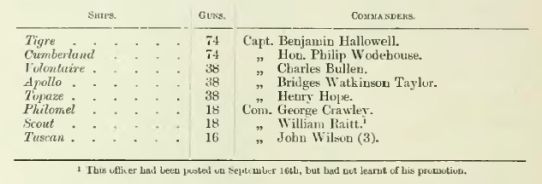
Captain Hallowell’s detached squadron, 31 October 1809
Meanwhile the convoy itself put in at Rosas Bay, and Collingwood soon detached Captain Benjamin Hallowell to destroy it, done on the night of the 31st using their boats to capture or burn every French vessel at anchor. Although costing them 15 killed and 50 wounded, it was worth the price to completely defeat the effort to resupply Barcelona.[217] Ganteaume was then succeeded by Vice Admiral Allemand.[218] Collingwood tragically had been exhausted by his long effort as Mediterranean commander, and died after being granted leave while returning to Britain on February 1810.
West Indies, 1809-1810, Martinique & Guadeloupe

Admiral Alexander Cochrane, engraving by Charles Turner after a drawing by Sir William Beechey, c. 1815-19
Martinique and Guadeloupe were traditional frigate and privateer bases, where French warships were frequently encountered. The former was garrisoned by 2,400 regulars with an additional 2,500 militia, controlling 290 guns.
Rear Admiral Alexander Cochrane, with Lieutenant General Beckwith, were selected to command the Martinique reduction force, Guadeloupe to follow.[219] On 30 January 1809 Major General Frederick Maitland was put ashore at Martinique with 3,000 men landing at Pointe Sainte Luce, and another 6,500 men landing under Lt. General Sir George Prevost at Baie Robert, plus 600 ashore at Cape Solomon.[220]

The Martinique operation force, from William Clowes, volume V
On 22 January the sloop Hazard (18) located the frigate Topaze (40) carrying 1,100 flour barrels bound from Brest for Cayenne, but redirected to the Leeward Islands when Topaze discovered Captain Yeo’s landing at Cayenne underway. Now the frigates Cleopatra (32-gun, 12-pdr, Captain Samuel Pechell) and Jason (38, Captain William Maude) arrived, quickly hounded the Topaze ashore, anchored and then opened a musket-shot cannonade that compelled the French frigate to strike, 12 men were killed and 14 wounded (W. James, Naval History of Great Britain, vol. V, 1859, p. 3/4).
In the face of these sustained amphibious assaults the French retreated to Fort Desaix, while the British bombarded Pigeon Island, capturing that place after 12 hours of shelling and a landing of seamen under Commander George Cockburn.[221] The French on Martinique held out until 24 February, by which time the British had suffered 550 casualties.[222] Rear Admiral Cochrane was promoted Vice Admiral.

The next target was Guadeloupe. Captain John Shortland, painted here c. 1807/8 by Robert Field, in the Junon (58), engaged in a sharp action the French frigates Renommee (40) and Clorinde (40), which were under false Spanish colours escorting troops ships to Guadeloupe on 13 December 1809: Shortland had no choice but to burn the Junon to prevent capture.

Coastal view of Guadeloupe, by John Everett, 19th c.
Vice Admiral Cochrane arrived off Guadeloupe on 27 January 1810.[223] Landings quickly reduced the island, the French garrison surrendering on 6 February, a success that was followed up by the capture of the Dutch islands of St. Martin, St. Eustatius and Saba, completed on 22 February.[224] This series of captures, which cost the British 300 casualties, left only the East Indies, Senegal and Mauritius in French hands.[225]
Dutch East Indies, 1809-1810

The Spice Islands, Moluccas (Maluku Islands, Indonesia), were a source of nutmeg, mace and cloves. The operation to secure this Dutch colony was led by Rear Admiral William O’Brien Drury, C-in-C Madras.

On 16 February 1810 a force composed of Dover (38, Captain Edward Tucker), Cornwallis (44, Captain William Montagu) and Samarang (18) put 400 men ashore at Amboyna (Ambon) Island in the Moluccas, the Dutch surrendering the island the next day.[226] A series of captures in the Celebes Sea followed, shortly thereafter the Sultan of Gorontale accepted British governance in place of the Dutch.[227]
 Amboyna (Ambon) Island, captured by Captain Sir Edward Tucker, 16/17 February 1810, drawing based on art by Lt. Richard Vidal

The Banda Islands were next to fall, the expedition destined for that place under the command of Captain Christopher Cole in the Caroline (36), with Piedmontaise (38, Captain Charles Foote), and the brigs Barraconta (18) and Mandarin (12), sailing from Madras on 10 May, loading artillery at Penang before departing on 10 June and passing through the Strait of Singapore on the 15th.[228]


Fort Belgica, Banda Neira, Indonesia.
The Banda Islands were sighted the evening of August 8th, and a landing quickly organized for 11 pm. Poor weather prevented the immediate landing, but 180 men got ashore the next morning and Castle Belgica was taken by storm, after which the Dutch garrison of 1,500 surrendered.[229] Captain Cole was knighted on 29 May 1812 for this fine work.

Banda Neira under British occupation after its capture on 9 August 1810, painting by Captain Christopher Cole, made by Longman, Hurst, Rees, Orme & Browne
Senegal, 1809

Goree Island off Senegal, by Charles Randle, 15 November 1815
Captain Edward Columbine in the Solebay (32), senior officer at Goree, launched a combined effort with Major Charles Maxwell to reduce Senegal in the summer of 1809.[230] Their small flotilla consisted of the frigate Solebay, two brigs, seven schooners and sloops, plus several transports carrying a mere 166 officers and men for the landing party.[231] They departed on 4 July, arriving off Senegal on the 7th,[232] and the landing took place the following day. Due to the 400 French soldiers defending Senegal it took until the 13th to convince the enemy to surrender.[233]
Capture of Mauritius, 1809-1810

Mauritius was a constant source of irritation as it threatened the security of merchant traffic rounding the Cape of Good Hope or sailing in the Indian Ocean. By the fall of 1810 there were five French frigates, a corvette and two brigs at Port Louis. To blockade this force, Vice Admiral Albemarle Bertie, in command at the Cape,[234] had the Boadicea (38), flag of Commodore Josias Rowley, the Nisus (38, Captain Philip Beaver) and the Nereide (38, Commander George Henderson).[235]
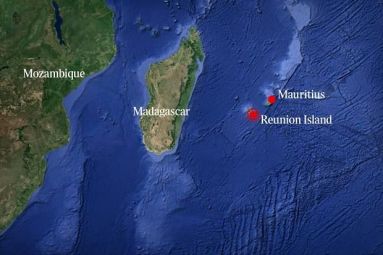
Mauritius and Reunion relative to Madagascar
With Bertie engaged in the blockade, Lord Minto, the Governor General of India, and Admiral Drury C-in-C Madras, determined to reduce the islands, encouraged by Castlereagh who was desirous of protecting the British merchant traffic to India and China.[236] Reunion (Bourbon) was the source of food supply for Mauritius (Isle de France), and thus that latter target had to be reduced first. Reunion fell quickly on 8 July.[237]
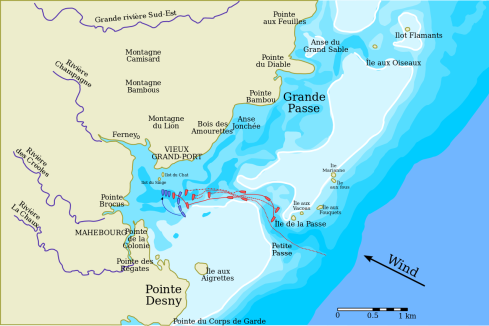
Battle of the Grand Port, 23 August 1809
The main invasion force for Mauritius was assembling at Cape Town, and on August 23rd a small British squadron attempted to penetrate the French anchorage at Grand Port, Mauritius. Captain Nesbit Willoughby led the effort in the Nereide, followed by the frigates Sirius, Magicienne, and Iphigenia. Sirius and Magicienne however ran aground on the local coral reefs, with Nereide and Iphigenia than isolated against four French frigates. During the resulting engagement the British frigates were badly damaged and Sirius and Magicienne had to be burnt to prevent capture, while Nereide was captured, followed by Iphigenia four days later, increasing the French squadron to six frigates.[238] This bloody affair produced 2,000 British casualties, the only significant French naval victory of the Napoleonic War.[239]

September 1809, landing at St. Paul on Reunion, by Thomas Whitcombe
Although the only major French tactical victory of this phase of the war, the result was of little operational significance as the Mauritius invasion force, composed of between 6,800-7,000 troops from India under Vice Admiral Bertie and Major General John Abercromby, departed Cape Town on 22 November 1810 and arrived at its destination six days later.[240] The landing took place on the 29th, with 50 boats carrying 1,555 men under Captain William Montagu of Cornwallis (44) leading the first shore party. General Decaen’s garrison of 3,000 was fought outside Port Louis on 1st December. Having taken heavy casualties Decaen offered terms the next day and then formally surrendered his remaining 1,300 men and 290 guns, not to mention 24 French merchants and several captured British vessels, on the 3rd. British casualties were 28 killed, 94 wounded and 45 missing.[241]

The Mauritius invasion force
The small French garrison at Tamatave, Madagascar, was captured by the 18-gun sloop Eclipse on 12 February 1811, but was retaken by three French frigates from the Brest squadron on 19 May. This small French force was defeated during an engagement between 20-25 May and Tamatave was quickly recaptured, at last clearing the French from the Cape route.[242]
The events of 1809-1810 at sea demonstrated the Royal Navy’s mastery of amphibious operations, and a growing willingness to take risks to secure major strategic targets, such as at the Basque roads and at Walcheren. The reduction of France’s overseas naval bases at Martinique, Guadeloupe, and Mauritius, dramatically improved Britain’s trade security.
The Peninsula, 1809-1814

Sir Arthur Wellesley returns to Portugal, 22 April 1809
Stepping back now to 1809 to examine the situation on the Peninsula: Lt. General Arthur Wellesley returned to Portugal on 22 April 1809, his army at this time numbering 21,000 or 28,000 British and 16,000 Portuguese. He had a daunting task, Soult had 360,000 men in the French Army of Spain and had already won a crushing victory against the Portuguese at Oporto on 28/29 March.[243]

Marshal Jean de Dieu Soult, by Louis-Henri Rudder & Jean d’apres Broc
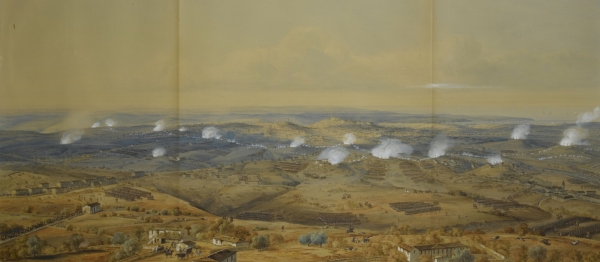
The First Battle of Oporto, 28 March 1809 by Simeon Fort

Marshal Soult commanding at Oporto, 28/29 March 1809, by Joseph Beaume
Wellesley reversed Soult’s victory by crossing the Douro on 12 May, then capturing Oporto, thus forcing Soult to retreat with loss of his baggage and guns.[244]

Wellesley crosses the Douro, 12 May 1809
In June Wellesley advanced into Spain along the Tagus valley, his mission being to locate Victor and bring him to battle while Ney and Soult were distracted in Galicia suppressing partisans.[245]

Despite short supplies and lack of Spanish support,[246] Wellesley won the two-day defensive battle at Talavera, 27/28 July, with his combined army of 52,000 against 46,000 French under King Joseph supported by Victor and Jourdan, the French sustaining 7,200 casualties and losing 17 guns, the British 5,300 men. Afterwards Wellesley withdrew to Lisbon, avoiding the approach of Soult’s northern flank and began to fortify the countryside [247] On 4 September Wellington was made Viscount.

Wellington, by Francisco de Goya, c. 1812-14

Marquess Richard Wellesley, Tory Foreign Secretary 1809-1812, Wellington’s older brother, painted by John Philip Davis
Napoleon meanwhile flooded reinforcements into Spain, enabling Joseph, Soult and Victor to crush Spanish opposition during 1810.[248] This was temporarily to Britain’s benefit as the operations in southern Spain gave Wellington some breathing space.

Andre Massena, who replaced Soult on the Peninsula in 1810
The reprise did not last long however as Massena invaded Portugal that September and forced Wellington, with about 50,000 combined against Massena’s 65,000, to fight a series of defensive battles between 27 September and 10 October.
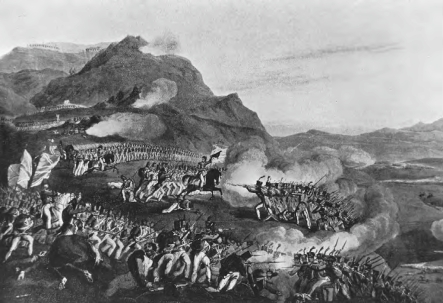
Battle of Busaco, 27 September 1810, the first of the defensive battles Massena fought against Wellington during the fall of 1810 as the French attempted to eject the British from Portugal
Wellington was under orders from Liverpool and Percival to husband his resources, and evacuate if necessary.[249] Massena, however, could not turn Wellington out from his defensive lines, but was content to pin the British until March 1811, at which point, having sustained 25,000 losses from partisans, guerillas, and hunger, he withdrew.
Massena was reinforced over the course of the spring and between 3-5 May 1811 with 48,000 men fought Wellington’s 37,000 to a stalemate at Fuentes de Onoro. Wellington’s supply lines were tenuous, in fact requiring Admiral George Berkeley to manage imports of grain from the United States and cattle from North Africa, all lubricated by silver that was obtained from South America.[250] Between 1808-1811, furthermore, the Navy transported 336,000 muskets, 100,000 pistols, 60 million cartridges and 348 artillery pieces to the Peninsula to aid the Portuguese and Spanish. The monetary cost of the Peninsula campaign was £3 million in 1809, £6 million in 1810, and £11 million in 1811.[251]

Admiral George Berkeley, commanding at the Tagus in 1810, engraving by Miss Paye, William Ridley, and Joyce Gold. Incidentally, Berkeley had been responsible for ordering the Leopard to board USS Chesapeake in 1807.
Wellington proceeded to lay siege to Badajoz from 29 May to 19 June, while Napoleon recalled Massena and replaced him with Marmont. At the end of 1811 however Wellington withdrew to Portugal, without capturing Badajoz. He at last succeeded in capturing Badajoz on 6 April 1812.

Auguste-Frederic-Louis Viesse de Marmont, by Jean-Baptiste-Paulin Guerin
Wellington now marched into Spain, dividing Soult and Marmont from each other, and entertaining Marmont from June until July when French reinforcements forced Wellington back to Portugal. Marmont attempted to outflank him before he could withdraw, but was instead crushed at Salamanca with the loss of 14,000 men. Joseph, panicking, fled Madrid which Wellington then duly entered on 12 August.[252]

Battle of Salamanca, 22 July 1812

Bertrand Clausel by Georges Rouget
This was all ill news for Napoleon, engaged in his Russian misadventure, and Marmont was recalled and replaced by Clauzel, the French now beginning a concentration under Soult and Joseph. Wellington laid siege to the fortress of Burgos between 9 September and 18 October but was forced to lift the siege when French relief arrived. Nevertheless, the steady pressure in Spain was bleeding the French occupation force as Wellington’s combined force gradually increased to 96,000.[253]

Battle of Vittoria, 21 June 1813
By 1813 the situation was critical. On 21 June Wellington with 70,000 defeated Joseph’s 50,000 at Vitoria, capturing 143 guns and much treasure, at which point Napoleon, given some breathing space during the armistice of Plaswitz, put Soult in overall command. Wellington captured San Sebastian on 31 August, and by 10 December had penetrated into France proper, first capturing Boudreaux and then at last taking Toulouse on 10 April 1814.[254]
Part IV

Naval Operations 1811-1812: Battles of Lissa, Pirano, Capture of Java, the United States’ War & Napoleon’s 1812 campaign

Rear Admiral Bernard (Edouard) Dubourdieau
To return now to the east and the situation in the Adriatic. In the spring of 1811 French and Venetian frigates attempted to disrupt Captain William Hoste’s detachment based at Lissa in the Adriatic, hoping to impact supply lines for the Illyrian campaign. On 13 March Rear Admiral Bernard Dubourdieu was killed with loss of four of his 6 frigates (three French, three Venetian, plus two brigs), fighting Captain Hoste’s three frigates and a 22 gun sloop, with Hoste’s flag in the 32 gun Amphion,.[255] The British suffered 45 killed and 145 wounded in this desperate battle but nevertheless defeated the combined Franco-Venetian squadron.[256]

Captain Sir William Hoste, by William Greatbach c. 1833

Battle of Lissa, 13 March 1811
Hoste sailed to Malta for repairs. On 25 March two French 40-gun frigates out of Toulon escorted a 20-gun storeship carrying 15,000 rounds of shot and shells and 90 tons of gunpowder to Corfu. Admiral Sir Charles Cotton detached Ajax (74, Robert Waller Otway) and Unite (36, 18-pdrs, Captain Edwin Henry Chamberlayne) in pursuit. Although the French frigates escaped, the 800-ton ammunition storeship was captured (W. James, Naval History of Great Britain, vol. V, 1859, p. 245/6). In July a French grain convoy destined for Ragusa was captured and in November another French frigate and brig were taken. In 1812 the 74-gun Venetian Rivoli was prevented from impacting operations when it was captured by HMS Victorious (74) at the Battle of Pirano, 22 February 1812.[257]

Battle of Pirano, 22 February 1812

Rear Admiral Thomas Fremantle, commanded in the Adriatic in 1813, engraving by Edmund Bristow and Edward Scriven, c. 1822
Late in 1813 Captain Hoste served under Rear Admiral Thomas Fremantle during the bombardment of Trieste before it was captured by the Austrians on 29 October.[258] On 5 January 1814 Fremantle and Hoste forced Cattaro to surrender and on the 28th they captured Ragusa. By the end of February every French possession in the Adriatic had surrendered.[259] In March they took Spezzia and then Genoa in April before Napoleon abdicated.[260]
Capture of Java

Operations in the Indian Ocean and South China Sea, from Richmond, Statesmen and Sea Power (1946)

Captain Christopher Cole, C-in-C Madras after the death of Vice Admiral William Drury, painted by Margaret Carpenter, c. 1820-1824
By the end of 1809, with operations in the West Indies complete, focus shifted to the East Indies, where the invasion of Java now became a possibility. Java, as we have seen, was an important spice island and base for Dutch merchants and warships. Rear Admiral Pellew had reconnoitered Batavia in 1809 and considered invasion, but the project penultimately became that of Vice Admiral William Drury, who died however on 6 March 1811. Captain Christopher Cole, tasked with carrying out the operation at last, sailed from Madras aboard the Caroline (36) with a landing force under Colonel Robert Gillespie. They anchored at Penang on 18 May, and on the 21st the second force under Captain Fleetwood Pellew arrived in the Phaeton (38), transporting Major General Wetherall.

Captain Fleetwood Pellew, drawing by George Chinnery, May 1807

The expedition sailed on the 24th the two groups aiming for Malacca, and arriving there on June 1st were they were joined by Commodore William Broughton in the Illustrious (74), and Rear Admiral Robert Stopford in the Scipion (74). The invasion force now constituted 11,960 men, of whom 5,344 were European regulars.[261] (W. James, Naval History of Great Britain, vol. V, 1859, p. 295/6)

The Java invasion force

After disembarking 1,200 sick cases the invasion force departed Malacca on 11 June. In the meantime several reconnaissance operations and raids were carried out, such as on 23 May when Captain Harris in Sir Francis Drake (32, 12 pdrs) located 14 felucca and prow rigged Dutch gunboats (a 7-inch howitzer and one 24 pdr carronade, 30 oars), 13 miles north east of Rembang, and silenced them with two broadsides, and then dispatching four six oar cutter and a gig as a boat attack, carried out by Lieutenants James Bradley and Edward Addis, Lt. Knowles, Lt. George Loch, Royal Marines, three or four midshipman and 12 privates from the 14th Regiment, who captured all nine remaining gunboats [262]. On 27 July Captain Sayer of the Leda (36, 18 pdrs), who along with Captain Edward Hoare in the Minden (74) carried orders for Batavia (the Batavian Republican having been annexed by Napoleon in July 1810), landed 21 year old Lieutenant Edmund Lyons with a small force including 19 prisoners to gather intelligence on the island.
On the 29th Lt. Lyons, who had with him only 35 officers and men, determined to carry out an attack against the local strongpoint, Fort Marrack, a colonial stone fort with a garrison of 180 soldiers mounting 54 cannon variously 18, 24 and 32 pdrs, that Captain Sayer originally believed would require a battalion worth of soldiers to capture. Amazingly, Lyons waited until midnight in his flat boats and when the moon cleared landed his small contingent, stormed the fortress walls with ladders, carried the gun batteries and baffled the defenders to the extent that when his 34 men charged the assembled defenders the garrison fled at Lyons’ claims that he had 400 men. Lyons’ men spiked the guns and snatched the fort’s flag before they withdrew to collect their laurels. Lyons, whose long career included being Black Sea Fleet commander during the Crimean War, was here promoted to Commander on the spot (W. James, Naval History of Great Britain, vol. V, 1859, p. 296-300), see also Andrew Lambert, “Lyons, Edmunds, first Baron Lyons” in The Oxford Dictionary of National Biography (Oxford University Press, 2008).

Captain Robert Maunsell cutting out the Dutch gunboats, 30/31 July 1811, painting by John Huggins
Likewise on 30/31 July Captain Robert Maunsell of the Procris (18) anchored at the Indramayo river delta, had located six gunboats (two 32 pdr carronades and one long 18 pdr each), which were protecting a Dutch convoy of about 50 sails. On the night of the 31st a boat assault was carried out, led by Lieutenants Henry Heyland and Oliver Brush with forty soldiers from the 14th and 89th regiments. The gunboat crews fired grapeshot and threw spears at the British before leaping overboard; five of the enemy gunboats were captured as the sixth caught fire and exploded, the only casualties being 11 wounded seamen and soldiers. [263] (W. James, Naval History of Great Britain, vol. V, 1859, p. 300-1)
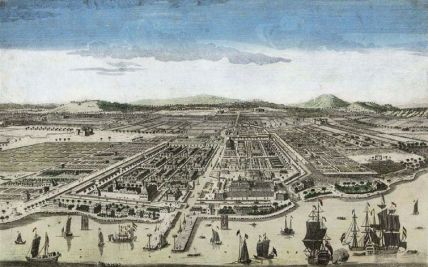

The Java invasion force, destined for Batavia/Jakarta included the 36 gun frigates Leda, Caroline, Modeste, Bucephalus, plus brigs, sloops and schooners, arrived at Chillingching, 12 miles east of Batavia, on the afternoon of August 4th and began to disembark. Before nightfall 8,000 men were ashore. Batavia’s governor General Jansens had 10,000 men garrisoning Java, mostly encamped at the Meester Cornelis fortification (280 guns) outside Batavia. On the 7th the army advanced, with frigates sailing offshore as Colonel Gillespie’s men crossed the Anjole river. They were outside Batavia at dawn on the 8th, when a request for parlay was received and the port surrendered. The next day Rear Admiral Robert Stopford arrived in the Scipion (74) and took charge of operations, the foremost being to exploit the successful capture of the port by taking the colonial works: Fort Cornelis.[264] 20 long 18s, plus eight howitzers and mortars were brought on shore by 500 seaman during the 10th and a small skirmish was fought, with the Dutch withdrawing into the fort.
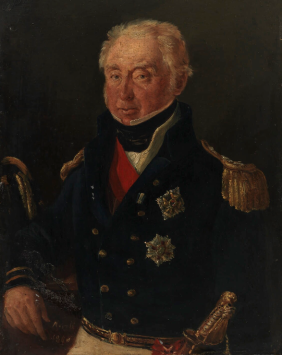
Rear Admiral Robert Stopford, c. 1840

Stopford’s Java task force, September 1811 (W. James, Naval History of Great Britain, vol. V, 1859, p. 303)
Over the next ten days a detachment of Royal Marines was landed and the naval guns were gradually moved in land, gaining range on the fortifications on the 21st. On the 22nd the Dutch sortied and temporarily captured a British battery, but were then repulsed, and a cannonade was opened from the fort’s 34 18, 24, and 32 pdrs. During the day there was a pause, and on the 24th both sides opened an artillery duel that lasted the all day and expended plenty of ammunition such that at midnight the fort was carried by main assault with 5,000 Dutch prisoners taken, including three generals, 34 field officers, 70 captains and 150 subalterns. During the course of the campaign, 4-27 August, the British suffered 141/156 KIA, 733/788 WIA and 13/16 missing. The Royal Navy’s part was 15 killed, 55 wounded and 3 missing.[265] Robert Stopford was promoted to Vice Admiral almost exactly a year later.


The Harbour defences on Batavia, & the garrison at Meester Cornelis Fort
While the siege operations were underway Rear Admiral Stopford tasked Lieutenant Henry Drury in Akbar (44), Captain Fleetwood Pellew in Phaeton (38), plus Bucephalus (36), and Captain George Harris in Sir Francis Drake (32) to guard against French Commodore Francois Raoul, with Nymphe (40) and Meduse (40), based at Sourabaya on the eastern end of the island. On the 3rd however the Commodore took aboard several of Governor Jansen’s staff and aides-de-camp and then fled to sea, but was spotted by Captain Charles Pelly in Bucephalus (36) and the brig Barracouta (18, Commander William Owen) who immediately set to chase. Pelly’s frigate out sailed the brig and closed with the French who steered north and west and then escaped on the 12th, arriving eventually at Brest on 22 December 1811.[266]

Meanwhile Captains Pellew and Harris landed on the island of Madura, east of Java, and took the fort of Sumenap by coup de main on August 31st. In this operation 190 British induced 2,000 Franco-Dutch to surrender at cost of only three killed and 28 wounded. Although a few additional landings were required, by 18 September Java and all the surrounding islands had been captured.[267]
Napoleon Invades Russia

Europe in 1812
In December 1810 Czar Alexander I determined to abandon the ruinous continental system. For Napoleon the Russians represented the last empire that could challenge his military supremacy, and if the Tilsit agreement no longer stood then the Emperor believed it was necessary to bring Russia back into the Napoleonic fold through force.

Portrait of General of the Infantry, Minister of War, Barclay de Tolly, by Louis de Saint-Aubin, 1813
The Czar, realizing Napoleon’s intent, acted quickly to secure peace agreements with Sweden and the Ottomans, freeing up forces to assemble two armies on the Polish frontier totally approximately 220,000 under Minister of War Barclay and Prince Bagration, while a third army of 40,000 under Tormassov assembled to the south.[268] The frontline force thus consisted of at least 175,000 infantry, 18,000 Cossacks and 938 cannon, with reinforcements gradually bringing the total up to 400,000 infantry.[269]

Prince Pyotr Bagration by George Dawe
On 19 March 1812 Russia declared war on France and Napoleon departed Paris in May, taking command of an army of 680,000 men including 100,000 cavalry, 1,242 pieces of artillery and 130 siege guns. The frontline force of between 450,000-500,000 soldiers in eleven corps was drawn from across the Empire and assembled in Germany for the Russian campaign.[270]
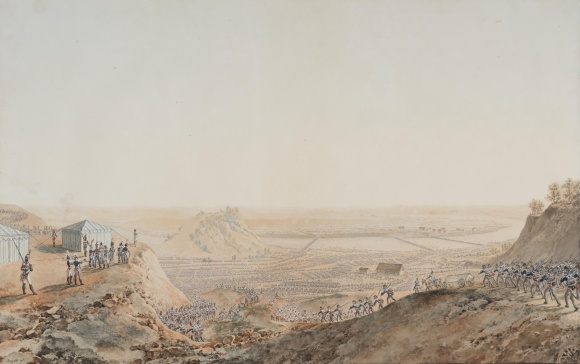
Grande Armee crossing the Neiman, 24 June 1812, by Giuseppe-Pietro Bagetti, c. 1814
Napoleon crossed the Russian frontier on 4 June 1812, intending to draw the Russians in and destroy them in a series of envelopments. Not surprisingly Barclay and Bagration refused to be so lured and presently withdrew to Smolensk where they combined on 2 August.[271] Due to the punishing heat and his long supply lines, Napoleon was forced to halt entirely at Vitebsk where he resupplied and rested between 29 July and 12 August.

Napoleon enters Smolensk, 18 August 1812, by Albrecht Adam, c. 1815-25
With Murat and Ney now leading, the French set out for Smolensk on 13 August and approached the Russian armies there on the 16th. Napoleon prepared for battle but Barclay refused to be drawn, and with Bagration arranging a withdrawal corridor the Russians again slipped away to arrive at Borodino not much more than 100 km from Moscow. So far Alexander had evaded every effort by Napoleon, Murat and Davout to force a decisive battle.[272]
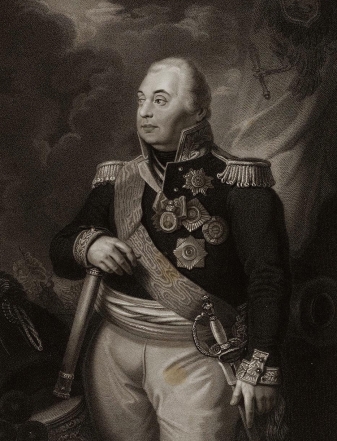
Portrait of Kutuzov by James Godby, early 19th century
By this point Napoleon’s main force been reduced to not more than 130,000 effective troops. The 67 year old Kutuzov meanwhile was appointed by Alexander to the supreme command, with Tormassov continuing operations against Napoleon’s supply lines.[273] Stchepkin believes that Napoleon should have now established a base at Smolensk and continued the campaign the following spring, but the Emperor’s overriding desire to force a decisive battle that year was “perhaps the gravest error of the whole war.”[274] At any rate the Grand Armee crossed the Dnieper on the 19th, with Ney, Murat, Davout and Junot leading, and Napoleon followed on the 25th – the Emperor believing that if he approached Moscow the Russians would be forced to fight, giving him the opportunity he desperately sought to encircle them.

Map of Borodino, 7 September 1812
Kutuzov dropped Barclay (who advocated for an attritional strategy) and prepared for a defensive battle at Borodino. The forces opposed to each other were at this time 103,800 in two Russian armies with 640 guns against 130,000 French infantry with 587 guns.[275]

Battle of Borodino, by Adam Albrecht
At 6 am on 7 September Napoleon ordered a frontal attack, despite Davout’s recommendations for a flanking movement, but ultimately cleared the Russian positions nevertheless after sustaining 28,000-30,000 casualties.[276] On the Russian side Bagration had been badly wounded during the fighting and later died on September 24th. The heavy fighting had exhausted Murat, Ney and Davout’s corps, and Napoleon was unwilling to release their reserves, thus Kutuzov with his remaining 90,000 men retreated, and Napoleon was free to approach Moscow.

Pyotr Bagration wounded during fighting at Borodino, 5 September 1812, by Jean Gerin

Napoleon at Borodino, by Joseph Louis Hippolyte Bellange, c. 1847
Napoleon entered Moscow on 14 September, after nearly the entire population of 250,000 had been evacuated.[277] The Emperor now had only 95,000 soldiers still combat effective, although the Russians had not much more.[278] Napoleon established himself in the Kremlin on 15 September but was forced to withdraw for several days as fires destroyed much of the city.[279] The Emperor remained in the ruins of Moscow for a month, despatching diplomats to entreat for peace on 5 October – and thereby revealing the weakness of his hand – and when this effort proved futile departed on 19 October for the long march back to the frontier. The next day Tormasov arrived at the Russian lines and assumed command of the united army.

Alexander Tormasov, by George Dawe, before 1825
Snow fell on 4 November and Napoleon arrived at Smolensk on the 9th, where he was able to reform his now decimated army up to 49,000 men.[280] Napoleon continued the withdrawal on the 14th, with Kutuzov close on his heels with 90,000 men. The Russian commander was soon joined by Wittgenstein and Tshitshagov, bringing the combined army up to 144,000 while Napoleon sent his marshals ahead of him so that he could make a demonstration of attack with his remaining corps sized force of 37,000.[281]

Napoleon’s retreat from Moscow
With encirclement a real possibility Napoleon had to find some way out, and he eventually did on 26 November by crossing the Beresina river,[282] Oudinot first, followed by Ney, Victor, Junot, Davout and Murat after which the wooden pontoons the French had built were blown up to prevent Russian pursuit.
Napoleon departed for Paris on 5 December, arriving there on the 18th to begin reforming his armies, while Murat managed the last of the retreat from Russia, the Grande Armee now little more than rags; on 2 December it numbered only a pitiful total of 8,800 men, further reduced to 4,300 by the 10th.[283] Ney, commanding the final rearguard, crossed back over the Niemen on 14 December.[284] The campaign had cost Napoleon between 500,000 – 570,000 men, 150,000 horses and 1,000 guns, with anther 150,000 men prisoners in Russia.[285] The Russian losses for the campaign numbered perhaps 200,000.[286] Napoleon and his marshals had escaped the trap in Russia, and a complete debacle had been narrowly avoided, although at enormous cost in manpower and treasure.


General Yorck von Wartenburg, painted by Ernst Gebauer, commander of the Prussian forces sent to Russia, signed the Convention of Tauroggen, 30 December 1812, a preliminary to the formation of the Sixth Coalition; in part negotiated by Carl von Clausewitz
By 1812, despite Napoleon’s reversals on land, he had built the fleet back up to 100 ships of the line with another 42 in the fleets of the Baltic countries, including Russia.[287] Of course, following the treaty of Orebro signed 12 July 1812, the Russians and Swedes were now aligned with the British, making these latter warships inaccessible to Napoleon. Napoleon’s hastily constructed ships, built of green unseasoned timber, were of doubtful quality, with perhaps 55 being actually fit for sea, and of these, only 30 of real value in 1811.[288]
Vice Admiral Allemande at Lorient however did succeed in making to sea the night of 8 March with four of the line, Eylau (80), Guilemar (74), Marengo (74), and Veteran (74) with a pair of corvettes.[289] As was the case with previous efforts to elude the Royal Navy’s blockade the French were soon located, this time within 24 hours by the frigate Diana (38), followed shortly by several 74s of Captain John Gore’s squadron, led by Tonnant (80), with Northumberland (Captain Henry Hotham), Colossus (Cpt. Thomas Alexander) and Bulwark (Cpt. Thomas Browne), who reconnoitred Lorient on the evening of 9 March and found that Allemande was gone and was then joined by his outriders, Pompee (74), Tremendous (74) and Poictiers (74), Captain Gore’s squadron now constituting seven warships. In the event, however, Allemande managed to extricate his squadron from the Royal Navy’s effort to intercept by slipping through a fog bank and returning to Brest on the 29th.[290] Likewise Toulon, base of Vice Admiral Emeriau’s squadron, was blockaded by Vice Admiral Pellew, but with equally little effort from the French that year (W. James, Naval History of Great Britain, vol. V, 1859, p. 312).
War with the United States

After Spencer Perceval’s assassination on 11 May 1812, in June Robert Jenkinson, the 2nd Earl of Liverpool (painted here by Sir Thomas Lawrence, c. 1820) became Prime Minister. He held the office for the next 15 years, until his succession by George Canning in 1827.
The United States Congress declared war upon Britain on 18 June 1812 but the British scored the first success on 17 July when Major General Isaac Brock ordered the capture of Fort Michilimackinac between the Huron and Michigan Great Lakes.[291]

Opening naval actions of the War of 1812, various frigate engagements of the war, from James Bradford, ed., America, Sea Power, and the World (2016), see also, from Andrew Lambert, The Challenge, Britain Against America in the Naval War of 1812 (2012)

HMS Rose replica, 24-guns, 1757 pattern
It was no small concern then that the Royal Navy would be distracted by operations in North America that year. The Americans, however, had chosen war with the United Kingdom precisely when British arms were at their height after a decade of socio-economic mobilization amidst incessant coalition warfare. The small United States Navy (USN) would be hard pressed to prevent the Royal Navy from implementing a punishing blockade: with 92% of federal government income derived from customs revenue, the American coast was particularly susceptible to economic blockade.[294]

Campaign in the North, from Tindall & Shi, America, A Narrative History, vol. I (2004)
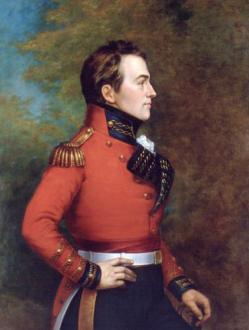
Lieutenant Governor of Upper Canada, Major General Sir Isaac Brock, by George Theodore Berthon, c. 1883
US General William Hull’s 2,000 militia initially advanced into Canada but then withdrew to Detroit where Brock attacked him with 350 regulars, 600 Canadian militia, and 400 volunteers, successfully forcing Hull’s surrender on 16/17 August.[292]

Battle of Queenstown (Queenstown) Heights, from Pierre Berton, Flames Across the Border (1981)

Battle of Queenstown Heights, 13 October 1812, Major General Brock is killed. Painting by John David Kelly, c. 1896
When Major General Stephen van Rensselaer brought his 600 militia into Upper Canada Major General Brock stopped the American advance but was killed on 13 October at Queenstown Heights. Major General Henry Dearborn’s effort to advance on Montreal in November likewise stalled when the American militia refused to advance.[293]

30 April 1812, 38-gun Belle Poule captures the American privateer Gipsy

23 June 1812, John William Huggins painting of HMS Belvidera being chased by American frigates
The war had only just broken out when on 23 June Commodore John Rodger’s frigate squadron attacked Captain Richard Byron’s 36-gun frigate Belvidera. The three US frigates, USS President (44), USS Congress (36), and USS United States, plus the sloops Hornet and Argus, attempted to intercept the British Jamaican convoy while sailing east from New York found instead Captain Byron, who was engaged searching for the French privateer Marengo 100 miles south west of Nantucket Shoals, offshore of New London, Connecticut. Byron avoided the American cannon fire and led the Americans away from the West Indies convoy route while Belvidera slipped into Halifax.[295]

Captain Sir Philip Broke, by Samuel Lane. Captain Broke as Commodore assumed command of the RN forces at Halifax, with the aim of confronting Rodgers’ squadron and destroying it. Broke’s command included HMS Africa (64), and frigates Shannon, Aeolus, Belvidera and Guerriere. Rodgers was still at sea off the Grand Banks seeking the West Indies convoy.

Schooner USS Nautilus (14 guns), captured by HMS Shannon on 15 July 1812
On 15 July HMS Shannon captured the schooner USS Nautilus (14) under Lieutenant William Crane, and on 17 July Broke located but was unable to catch USS Constitution (44, Captain Isaac Hull), which managed to escape on 21 July by sticking close to the shoreline in waters too shallow for the Shannon to pursue.[296] Broke meanwhile sailed for the West Indies convoy, 60 merchants being escorted by HMS Thetis, located them on the 29th and informed Captain Byam that they were now at war with the Americans.[297]

Captain Isaac Hull in USS Constitution, eluded Broke’s squadron between 17-21 July 1812

19 August 1812, USS Constitution captured HMS Guerriere, engraving by Michaele Corne & Abel Bowen
On 19 August Constitution located HMS Guerriere (38, Captain James Dacres), who Broke had detached from his squadron – still escorting the Jamaica convoy – to return to Halifax to replace a badly damaged mast. Outgunned by Constitution, Captain Dacres surrendered after a two hour fight.[298] This minor naval setback however was more than offset when on 16 August General William Hull, Isaac Hull’s uncle, surrendered to the Canadian militia under Brock at Detroit, as we have seen.[299]
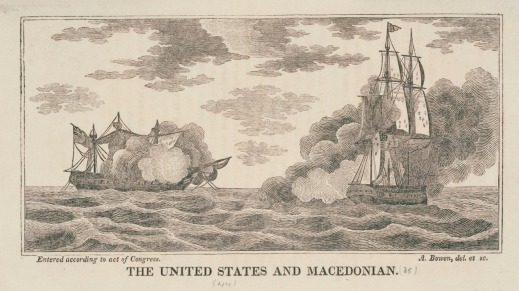
HMS Macedonian captured by USS United States, October 1812 engraving by Abel Bowen. On 25 October 1812 Stephen Decatur in the USS United States (44) took HMS Macedonian (38, Captain John Carden),[300] and on 29 December Constitution took HMS Java (38, Captain Henry Lambert), in the latter engagement the Americans suffering 36 casualties to 124 British.[301]


29 December 1812, Constitution takes the Java, & the same by Patrick O’Brien
This series of dramatic losses caused Lord Melville to pressure Admiral Warren to refocus on the blockade at the expense of engaging the heavy American frigates. Although wary of being micromanaged from London, Warren was relieved when three more battleships, a 50-gun cruiser, and five frigates were sent to his command during the winter of 1812-13.[302]

Admiral John Warren, c. 1820. C-in-C North America 1813-1814. Enforced the blockade of mid-Atlantic states, provided escorts to Britain’s merchant convoys, supplied Commodore Yeo on the Great Lakes, and intercepted American privateers during the initial defensive phase of the North American war. By July 1813 Warren was able to deploy 57 vessels on blockade, up from 19 the year before.[303]

A frigate escorting a convoy off St. John’s Newfoundland

HMS Shannon captures USS Chesapeake, 1 June 1813, painted by Robert Dodd
The next major duel took place in the summer of 1813 when on 1 June Captain Broke in Shannon, armed with 18-pdr guns, challenged Captain James Lawrence of Chesapeake to fight a singular ship to ship combat. Lawrence agreed and they fought off Boston, with Broke taking Chesapeake although being badly wounded in the process. James Lawrence was killed by a sniper’s ball, along with 70 others KIA and 100 WIA.[304] Although heroic, these frigate actions were hardly significant when compared to the overall blockade effort, in fact expanded in 1813 to include Virginia and New England.[305]

Brig USS Enterprise captures the 12-gun brig HMS Boxer off the coast of Maine, September 1813, by Frederick Hill
Part V

North American Theatre & The Wars of the Sixth and Seventh Coalitions


US campaign plan for 1813, from Pierre Berton, Flames Across the Border (1981), & operations on the Great Lakes, from James Bradford, ed., America, Sea Power, and the World (2016)
The Great Lakes
For President Madison the campaign in Upper Canada in 1813 was the decisive theatre of the war, revolved around sea control on the Great Lakes, in particular Lake Ontario.[306] Towards this end the British were building warships at Kingston, York, and Amherstburg, while the Americans were building ships at Sacketts Harbor, Black Rock and Presque Isle. Major General Dearborn moved camp from Plattsburgh to Sackets, where he waited with Commodore Isaac Chauncey for the opportunity to capture Kingston, the gateway to the St. Lawrence and Montreal. Concern that there were overwhelming forces at Kingston, however, waylaid the Americans into attacking the less well protected shipbuilding facilities at York instead, which they captured in April 1813 after the British blew up the fort’s magazine.[307]

Captain Sir James Yeo c. 1810, engraving by Adam Buck, Henry R. Cook, & Joyce Gold
In March Commodore Sir James Yeo was appointed C-in-C Great Lakes and given the objective of securing Lake Ontario. While the Americans were engaged looting York, Yeo conducted raids along the coast attempting to burn or capture the enemy’s naval stores and shipbuilding facilities. He raided Sackets Harbor on 29 May,[308] and captured two American schooners near Niagara on 10 August.[309] These operations, in conjunction with the defensive-minded Governor General Prevost, were a drain on the resources of Admiral Warren’s North American command at Bermuda, but were vital to for the defence of Kingston; to prevent the frontier from collapsing into American hands.[310]

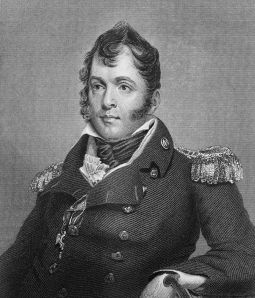
On Lake Erie USN Commander Oliver Hazard Perry with a squadron of nine small ships, his flag in the 20-gun Lawrence, supported by the 20-gun Niagara, won a victory on 10 September 1813 against Commander Robert Barclay’s squadron of six sloops (the largest being Queen Charlotte, 16, and Detroit, 12), corvettes and schooners, and suffered 123 American casualties to 135 British.[311]


Battle of Lake Erie, 10 September 1813, from Pierre Berton, Flames Across the Border (1981)
This battle secured the lake for the Americans and isolated Britain from reinforcing its Indian allies to the west.[312] As a result the Americans were able to recapture Detroit and Major General William Harrison then advanced into Upper Canada, confronting the British at the Battle of the Thames, 5 October 1813, where Tecumseh was killed.

William Henry Harrison, by Rembrandt Peale, c. 1813

Shawnee Chief Tecumseh, attributed to Owen Staples, based on Lossing’s engraving

Battle of the Thames, 5 October 1813, death of Tecumseh
Operations on the Great Lakes continued in 1814. On 6 May on Lake Ontario Commodore Yeo led a raid against Fort Oswego (Fort Ontario), burning a quantity of naval stores, and then proceeded to blockade Sackett’s Harbor until the end of July at which point the Americans drove him back to Kingston with a superior naval force. On 15 October however Yeo at last launched the 110-gun St Lawrence, while the USN heavy ships were still under construction, and put the Americans back under blockade.[313]

Commodore Yeo’s raid on Raid at Fort Oswego, 6 May 1814, engraving by I Hewett and Robert Havell
Meanwhile on 11 September on Lake Champlain the USN won a significant victory at the Battle of Plattsburgh in which Commodore Thomas Macdonough destroyed the squadron of Captain George Downie. Captain Downie’s squadron, composed of the frigate Confiance (36 – launched 25 August), plus a brig, two sloops and between 12 and 14 gunboats, was supporting the 8,000-11,000 strong army of Peninsular campaign veterans commanded by Governor General Sir George Prevost who was attempting to seize Plattsburgh and reduce the American naval base there.[314]

Prevost’s advance on Plattsburgh, from Pierre Berton, Flames Across the Border (1981)

Commodore Thomas Macdonough, USN, engraving by John Wesley Jarvis
Captain Macdonough, acting in the capacity of Commodore for the USN forces at Plattsburgh, had under his command the Saratoga (26), a heavy corvette, a schooner, a sloop and about 10 gunboats, plus the brig Eagle (20) the latter having just been launched on 16 August.[315]

Macdonough’s anchorage at Plattsburgh, and Downie’s failed attack, from Pierre Berton, Flames Across the Border (1981)
As Prevost moved against Plattsburgh, where General Macomb had less than 2,000 Americans, Downie sailed from Isle-aux-Noix on 8 September and entered the Plattsburgh harbor on the 11th, where Captain Macdonough was waiting for him. Downie lined up Confiance to engage Saratoga but was killed early in the battle and the Americans gradually out-gunned the remaining British warships, which were all taken.[316] After this disaster Prevost retreated back into Canada, ending the British land offensive for that year.

Battle of Lake Champlain (Battle of Plattsburgh), 11 September 1814, painted by Commander Eric Tufnell, RN.

Lieutenant General Sir George Prevost, Governor General of Canada, painted by Robert Field
On 24 December the Treaty of Ghent was signed, ending the war based on the status quo ante bellum, although it took several months for this news to reach the various theatres of operation.[317] On 2 March 1815 Lieutenant General Sir George Murray arrived in Canada and ordered Prevost to return to London to explain the failure of the Plattsburgh campaign, but Prevost died on 5 January 1816 before his court martial took place.[318]

Vice Admiral Sir Thomas Alexander Cochrane, C-in-C North American, 1814, painted by Robert Field in 1809
On the Atlantic seaboard meanwhile Rear Admiral Sir Alexander Cochrane, who had been aboard HMS Northumberland in Duckworth’s squadron at the Battle of San Domingo and then governor of Guadeloupe from 1810-1813, was promoted to Vice Admiral as C-in-C North America, replacing Warren at the beginning of 1814. With Napoleon exiled to Elba, Cochrane was soon supported by 2,500 of Wellington’s troops under Major General Ross for operations in the Chesapeake.

The Chesapeake Campaign, August-September 1814, from James Bradford, ed., America, Sea Power, and the World (2016)

Battle of Bladensburg, 24 August 1814
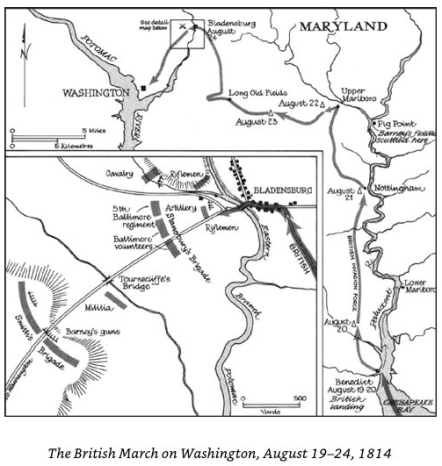
Advance on Washington, from Pierre Berton, Flames Across the Border (1981)

Rear Admiral Sir George Cockburn, painting by John Halls c. 1817. Note burning Washington, D.C., in background
Rear Admiral Sir George Cockburn (who later escorted Napoleon to St. Helena in 1815), and Major General Ross won the battle of Bladensburg, 24 August, and then seized Washington – almost capturing President Madison in the process – before burning the city.[319] Ross however was killed on 12 September when the army advanced to Baltimore, being replaced by Major General Edward Pakenham, and on the 13th Cochrane shelled Fort McHenry, before withdrawing.[320]

Major General Sir Edward Pakenham, by Thomas Heaphy, c. 1813-1814
The Pacific, 1814 & New Orleans, 1815

Map of the Pacific North West, 1818-1846, from Barry Gough’s Britannia’s Navy (2016)
In the Pacific Captain James Hillyar in the frigate Phoebe (36: 26 18-pdr, four 9-pdr and 14 32-pdr carronades), along with the sloop Cherub (28, Captain Thomas Tucker) was despatched to intercept the carronade frigate USS Essex (rated 32 but actually carrying 40 32-pdr carronades and six 12-pdrs), commanded by Captain David Porter, USN. In September 1812 Porter had narrowly avoided being engaged by Broke in the Shannon (W. James, Naval History of Great Britain, vol. V, 1859, p. 367-8).

Captain James Hillyar of HMS Phoebe (36), despatched to the Pacific in 1813 to intercept USS Essex (40)
Essex, now operating in the Pacific, seized 12 out of the 20 British whalers operating around the Galapagos Islands between April – October 1813.[321] USS Essex was eventually captured, with 58 dead and 66 wounded, on 28 March 1814 at the Battle of Valparaiso Bay.[322]


Capture of the USS Essex by HMS Phoebe & Cherub, 28 March 1814, Battle of Valparaiso, engraving based on Abel Bowen.

N. C. Wyeth illustration
Vice Admiral Cochrane meanwhile redeployed his forces to the southern United States and in preparation for operations against New Orleans landed 7,500 men under General Pakenham at Lake Borgne, where RN gunboats destroyed a smaller USN gunboat detachment under Lieutenant Thomas ap Catesby Jones.[323]
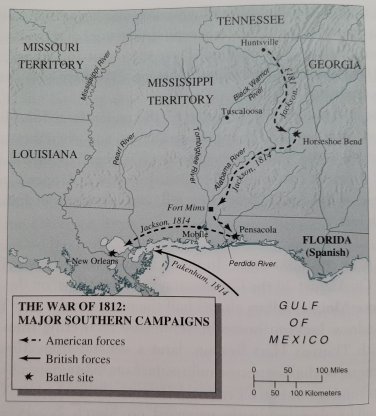

Campaign in the South, from Tindall & Shi, America, A Narrative History, vol. I (2004) & detail of same from James Bradford, ed., America, Sea Power, and the World (2016)

USN and RN gunboats engaged on Lake Borgne, 14 December 1814, by Thomas Hornbrook
Major General Andrew Jackson prepared for the defence of New Orleans, that culminated in the battle of the Plains of Chalmette on 8 January 1815, during which the British sustained between 2,000-3,000 casualties, including the death of General Pakenham, thus stalling the offensive until news arrived on 13 February of the signing of the Treaty of Ghent.[324]
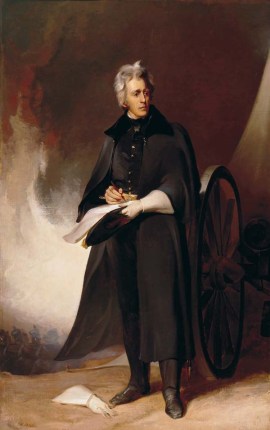

Andrew Jackson commanding at New Orleans, by Thomas Sully c. 1845, & by Ralph Eleaser Whiteside Earl, c. 1817

Battle of New Orleans and Death of Major General Pakenham
By the beginning of 1815 the American privateers operating in the Atlantic, of which there were in total 515 variously commissioned,[325] had done significant damaged to Britain’s mercantile trade, having captured 1,175 ships (of which only 373 were recaptured before the end of the war).[326] In a final embarrassment for the Americans, USS President was captured early in January 1815 by HMS Endymion, Captain Henry Hope, supported by Tenedos and Pomone.[327]

Sloop USS Hornet (20) captures brig HMS Penguin (18), 23 March 1815

Launching of the Great Lakes schooners Newash and Tecumseh, c. August 1815
European Cataclysm: The War of the Sixth Coalition
Napoleon’s 1812 campaign had been an undeniable disaster although, like Stalingrad for the Third Reich 130 years later, not the fatal blow. The strategic initiative now passed to the Allies. Early in 1813 both Austria and Prussia changed sides, joining the new Sixth Coalition with Austria assuming a temporary armed neutrality while Prussia joined with the Russians. Berlin was liberated on 4 March, and this prompted the Prussians to declare war against France on the 17th.[328]

Kutuzov rejects Napoleon’s peace offer, by Ivan Ivanov, c. 1813
Napoleon wasted no time making preparations to recover his military power, having levied 137,000 in January 1813, and thus in April joined the army on the German frontier with 226,000 men and 457 guns. By August this force had been built up to 400,000, although mainly composed of conscripts with limited if any experience given the demise of most of his veterans in Russia – however one authority considers the infantry and artillery of sound quality with only the cavalry lacking in horses and material.[329] The situation amongst the Allies, luckily for Napoleon, was not much better: the combined Russo-Prussian army accounted for only 110,000, of which 30,000 were cavalry, with Wittgenstein commanding the Russians and Blucher the Prussians under King Frederick William.

First phase of the 1813 campaign, 5 April to 4 June
The King left Potsdam on 22 February, committed to retrieving his kingdom, and was anticipated by his ambassador in Moscow who had been instructed to form a coalition with the Russians, which was quickly done, the Sixth Coalition coming into existence by the treaty of Kalish, 27 February 1813.[330] The Allies would await the Austrians, who were not yet willing to commit as their dynastic interests now tied them to Napoleon’s fortunes: Napoleon had in fact divorced Josephine in January 1810 and in the spring married Emperor Francis’ daughter, the Habsburg princess Marie Louise.[331] The British meanwhile funnelled money to Napoleon’s enemies, providing £2 million for Russia and Prussia with another £1.6 million set aside for Austria, the total British war financing to the alliance between March and November 1813 amounting to £11 million, plus another £2 million in arms and equipment.[332]

Marshal Peter Wittgenstein, by George Dawe
For the 1813 campaign Napoleon intended a rapid stroke aimed at the Prussians, who had switched sides in the aftermath of 1812, before refocusing on the Russians. Both sides mobilized their forces early in April, with Blucher and Wittgenstien fielding 65,000 as they marched on Magdeburg where they outnumbered Eugene.[333] On the 16th of April Napoleon left Paris and moved to Mainz where he stayed until the 24th, issuing his orders. Napoleon deployed the Army of the Elbe on the defensive at the Thuringian forest, and took command of the Army of the Main with 105,000 men. The Italians and Bavarians were marching to join him with 40,000 men, the combined army including 10,000 cavalry and 400 guns.[334]


Views of the Battle of Lützen, 3 May 1813, Napoleon opens the 1813 campaign in Saxony.
Kutuzov, the most senior commander, died in April and the combined Russo-Prussian army constituted only 80,000 men currently at Leipzig. Napoleon was confident he could shatter them before their strength grew, expecting just such a demonstration to swing the Austrians back onto his side.[335] Napoleon crossed the Saale river into Saxony on 1 May and forced the Allies to withdraw from Leipzig, which the French then occupied. On May 3rd Wittgenstein attacked Napoleon’s wing at Gross-Gorschen (Luetzen), where within a matter of hours Napoleon reinforced 45,000 French up to 110,000, outnumbering the allies’ 75,000.[336] The Allies suffered 10,000 losses and withdrew to Dresden, re-crossing the Elbe, but Napoleon lost 18,000 men and more deserted as he advanced.

French Dragoon, from Theodore Dodge, Napoleon: a History of the Art of War, vol. IV, (1909)
Reinforcements continued to arrive and the French soon took Dresden, when the Allies – paralyzed at first by internal disunity – withdrew to Bautzen. Napoleon reorganized the army at Dresden until 17 May, by which time his force marshalled 150,000-120,000, with 150 guns, with Ney adding two corps, 85,000 men, and Davout another 30,000.[337] Napoleon now marched towards Bautzen and as he began surrounding that place on the 19th, Wittgenstien with his 96,000 launched an evening spoiling attack against Ney before falling back. The Allies now had approximately 122,000 men on the field. Between 20-21 May Napoleon attacked the Allied centre while Ney maneuvered on their flank and forced the Allies again to withdraw, but not until after Napoleon had sustained 20,000 casualties.[338] Wittgenstein resigned in protest and was replaced by Barclay, and together with Blucher the Allies withdrew to Berlin.

Bust of Alexander I by Henri-Joseph Rutxhiel

Map of Bautzen, 20-21 May 1813
By punishing the Russian and Prussian armies Napoleon seemed to be achieving his aim, and after Bautzen Francis I felt concerned enough about the prospects of Frederick William and Alexander I to have Metternich despatch ambassadors to Napoleon as peace feelers.[339]

Austrian Foreign Minister Klemens von Metternich,
With peace in the offing, and desirous to buy time, Napoleon now proposed an armistice which was duly arranged at Pleiswitz on 4 June, scheduled to last until 20 July, but ultimately lasting until 12 August.[340] The war could have ended during this time, but Bonaparte refused to accept the proffered terms as they would have dismantled most if not all of Napoleon’s system and, since every day he was gaining reinforcements and supplies, he simply delayed until the Austrians turned against him, as Metternich intended, after which there was no going back.[341]
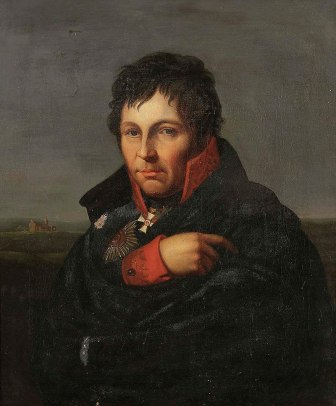

Von Scharnhorst, and Von Gneisenau, Blucher’s Chiefs of Staff. Scharnhorst was wounded during the retreat from Dresden and died at Prague on 28 June 1813. He was succeeded by Gneisenau, who introduced modernized organizational methods in the Prussian army and played a key role developing operational plans for the Battle of Leipzig and the 1814 and 1815 campaigns.
By stopping after Bautzen Napoleon allowed the Russo-Prussian armies to reinforce, when with greater effort they might have been scattered before Austria finished mobilizing.[342] Metternich, since the spring, had been steadily pressuring Francis to expand his army in preparation for intervention and on 14 June took the fateful step of authorizing full mobilization.[343] The Austrians added an army of nearly 200,000 under Schwarzenberg and Radetzky, the former becoming C-in-C, and by the end of August the Austrians had mobilized 479,000 of which 298,000 were frontline troops.[344] The Swedes, meanwhile, lubricated with British financing, also joined the Allies.[345]

Karel Schwarzenberg, Allied C-in-C after the armistice of Plaswitz (4 June – 13 August 1813)
On 19 June Metternich met with Czar Alexander at Opotschna and conveyed his objective to arrange a restorative peace now, followed by a European conference to settle affairs later.[346] The result of this meeting produced the proposed Treaty of Reichenbach that Metternich than personally delivered to Napoleon at Dresden on 26 June: essentially an ultimatum demanding territorial concessions, including the dissolution of the Duchy of Warsaw and the Confederation of the Rhine. Napoleon could now see that the cards were on the table, that his belief that he had been holding a winning hand was mistaken, and that Austria was committed to go to war against France unless he acceded to the Allied terms.[347] On 30 June Napoleon nevertheless agreed to Metternich’s offer for mediation, extending the armistice until 10 August.

Foreign Secretary Castlereagh clarified Britain’s position on 5 July when he demanded a much harsher peace than Metternich had proposed, including an independent Holland and the dissolution of the Kingdom of Italy.[348] Metternich took the additional time to complete mobilization and convince Emperor Franz that he was now the centre of the coalition that could defeat Napoleon.[349] Of course Metternich’s greatest concern was that Napoleon would accept the Austrian offer and thereby compel Austria to side with France against the Sixth Coalition, indeed, perhaps accepting the terms would have been Napoleon’s best course of action if he desired to remain a component of the European state system. After further posturing, Napoleon did not despatch a plenipotentiary to what would have been the Congress of Prague until 25 July, Austria issued a final ultimatum on 8 August and then duly declared war on the 12th.[350]

By now the Coalition could boast of a substantial reserve of manpower, approximately 800,000 under arms, with Schwarzenberg in unified command. Napoleon, however, had summoned as many as 600,000, representing 570,000 versus 410,000 frontline troops.[351] The actual structure of the Allied armies after the armistice of Plaswitz was as follows: Russia, with 184,000 and 639 guns, Prussia with 162,000 and 362 guns, and the Austrians with 127,000 and 290 guns, with additional contingents supplied by Sweden, England, and the other German states accounting for an additional 39,000 men and 90 guns.[352]

Marshal Nicolas-Charles Oudinot, Napoleon’s field commander during the unsuccessful Berlin operation, painted by Robert Lefevre
Keenly aware of Napoleon’s intention to divide the Allies, Schwarzenberg adopted the Trachenberg or Reichenbach plan, closely aligned with what Von Gneisenau was proposing, by which one army would pin Napoleon, draw him in while retreating, and thus enable the others to close in and develop an encirclement. Napoleon, for his part, intended to march first on Berlin, hoping to defeat the smaller Prussian army, before turning to confront the Austrians. Napoleon placed Oudinot in overall command – a mistake according to Rothenberg who greatly favours Davout.[353]

Battle of Dresden, 27/28 August 1813, by Carle Verne
At any rate Oudinot succeeded in pushing Bernadotte out of Berlin, although von Bulow refused to give up the capital and on 23 August won a small victory at Grossbeeren, while Napoleon concentrated against Blucher.[354] Blucher, playing his part, refused to engaged Napoleon, while Schwarzenberg moved against Napoleon’s base of supply at Dresden. Napoleon immediately reversed course and marched against Schwarzenberg, defeating him at Dresden on 27/28 August with 120,000 against 150,000, with the Allies suffering as many as 30,000 losses.[355] Blucher, however, stopped Macdonald in Silesia,[356] while Ney and Oudinot failed against von Bulow at Dennewitz, 6 September, and thus were unable clear the road to Berlin.[357] Likewise, Vandamme was mauled by Kleist at Kulm, these defeats together a series of reversals that largely mitigated Napoleon’s success at Dresden.[358]

Austrian Emperor Franz I, Prussian King Friedrich Wilhelm III and Czar Alexander I at Leipzig, by John Scott, after Johann Peter Krafft
Napoleon was now in an unusual situation. He had planned to enter Berlin about the 9th or 10th of September, yet although he had been victorious against the Allies at Dresden, his detached commands had all been defeated individually, and his total losses since the recommencement of hostilities amounted to 150,000 men and 300 guns.[359] Napoleon waited most of September at Dresden, rebuilding his army up to 267,000 men, before marching against Blucher on the 5th of October, while the Allies concentrated at Leipzig. Napoleon was unable to catch Blucher and the Emperor too was forced to march towards Leipzig, arriving there on the 14th, a decisive battle now inevitable as the Allies were completing their concentration.[360]
On 8 October the Bavarians joined the Allies, and Napoleon was faced with a situation in which he could not inflict enough punishment on any one of the Allies to weaken the coalition, while they steadily grew in numbers and tightened their net. The Battle of the Nations thus fought at Leipzig between 16 and 19 October now surpassed Wagram as the largest battle in history.

Map of Leipzig, 16 October 1813

The Battle of the Nations at Leipzig, situation at 3 pm, 16 October 1813, by Theodore Jung
At Leipzig on 16 October Napoleon’s 160,000-190,000 and 734 guns faced between 250,00-300,000 Coalition soldiers with 1335 guns.[361] Schwarzenberg and Blucher opened simultaneous attacks, and although the Coalition attacks lacked coordination and Napoleon succeeded in defeating components of the Coalition armies, he was slowly being surrounded. Napoleon now desperately entreated for peace, but the Allies no longer had any intention of negotiations.
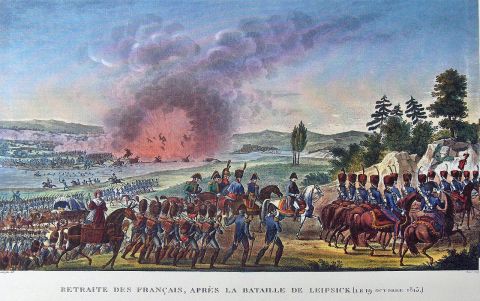
Napoleon retreats after Leipzig, blowing up the bridges behind him, 19 October 1813, by Carle Vernet
Over the next three days the French suffered 25,000-38,000 casualties as the superior Coalition armies attempted to surround him. Napoleon began withdrawing on the 19th, during which another 30,000 men were either killed of captured. The Allies sustained 40,000-50,000 casualties. One estimate has 120,000 men of all nations killed and wounded over the course of the battle, and if all French losses since the collapse of the Russian campaign of 1812 are counted, Napoleon had by this point in November 1813 lost about a million men in a little over a year.[362]


Allies meeting in Leipzig after the battle, and the same by John Hill
At any rate, Napoleon now retreated, the Emperor pushing through Wrede’s attempt to intercept him at Hanau on 29/31 October, defeating his 40,000 Bavarians and, with 70,000 soldiers left, on 2 November crossed the Rhine at Mainz, the Allies marching up behind him.[363] With Wellington pinning down another 100,000 troops in southern France, Napoleon’s situation was at its most desperate. Still, the Allies were temperamentally slow to move and with winter approaching the Coalition leadership retired to Frankfurt, requiring all of November and most of December to prepare for their next offensive.[364] On 22 December the Allies at last attacked, but Napoleon, as Clausewitz observed, feigned resistance at the Rhine crossing and stalled the Allied armies for another six weeks as he continued to reinforce. The Allies at last crossed the Rhine, in the last week of January 1814, and began the invasion of France, the offensive Napoleon now had to interrupt.[365]
Napoleon’s 1814 Campaign

The 1814 Campaign, by Ernest Meissonier, c. 1864
As 1814 dawned Napoleon was at war with Great Britain, Spain, Portugal, Russia, Prussia, Austria, Denmark, Sweden and the United Netherlands. On 11 January Murat, King of Naples, signed a separate peace with the Allies, adding his name to that of Bernadotte who had also abandoned the Bonapartist system. Napoleon tempestuously assembled yet another army by plumbing Carnot’s 1793 national conscription system. While his paper figures represented an enormous force of 963,000, he had perhaps only 110,000 campaigning troops left.[366] Napoleon deployed 70,000 to hold Paris, hoping to again inflict individual defeats on the Allies despite his effective army at the beginning of 1814 amounting to only 30-40,000, the troops having suffered from typhus over the hard winter.

Map of the Battles during the 1814 campaign, Napoleon defends while the Allies converge on Paris.
The Allies on the other hand possessed a large force of about 620,000 men and 1,310 guns, divided into five armies with a reserve. The largest army was still the Austrians under Schwarzenberg, with 200,000 men and 682 guns.[367] In the final weeks of December the Allies launched two spearheads, one to liberate Holland, the other to cross the Meuse on a broad-front, with Blucher in the lead. By the end of January Blucher was at Brienne, where he and Gneisenau were furiously writing to Schwarzenberg to encourage him to march on Paris.[368] Peace negotiations, led by Metternich, Castlereagh and Talleyrand, were already under way.

The Battle of Brienne, 29 January 1814, Napoleon heads off Blucher’s vanguard

Brienne, by Simeon Fort, c. 1840
Napoleon departed Paris on 25 January with 42,000 men and, expecting another 30,000 to arrive shortly, on the 29th repulsed Blucher after dividing him from Yorck at Brienne.[369] Blucher fell back on Schwarzenberg’s 100,000 men and then on February 1st 1814 at La Rothiere in heavy snow, counter-attacked at La Rothiere and checked Napoleon’s advance at the price of 6,000 men and 70 guns which he could ill afford.[370]

Champaubert, 10 February 1814, by Jean Fort


Battle of Montmirail, 11 February 1814, by Simeon Fort & by Louis Stanislas Marine-Lavigne
Napoleon now fought with energetic desperation and shortly gave the Allies pause. He rejected the Allied offer of 7 February – essentially Castlereagh’s harsh 1791 terms – and resolved to defeat Blucher before confronting Schwarzenberg. During the first two weeks of February he countered Blucher at Champaubert 9/10 February, at Montmirail on the 11th, and at Vauchamps on the 14th he dealt the Allies reversals.[371] Napoleon’s best hope at this point was the disintegration of the coalition, something Metternich and Castlereagh were struggling incessantly to prevent, while also acting as agents of delay: Metternich on 8 January had told Schwarzenberg to slow his approach while diplomatic negotiations were ongoing.[372]

Battle of Monterau, 17/18 February 1814, by Jean Antoine Simeon Fort
Schwarzenberg was indeed slowly advancing but Napoleon intercepted him with 56,000 men on 17/18 February at Monterau and repulsed the Crown Prince of Wurtemberg, inflicting 5,000 casualties.[373] The Allies were willing even now to accept Napoleon in power, offering terms on the 1792 borders, a proposal that the Emperor again rejected. Schwarzenberg withdrew, but detached Blucher to attack Marmont and draw him from Napoleon’s army.

Battle of Laon, 9 March 1814, Blucher defeats Napoleon
The Allies at this point signed the Treaty of Chaumont, negotiated 1-9 March, promising not to sign any separate peace with Napoleon.[374] While Napoleon continued to maneuver around Paris Schwarzenberg on the 7th designated the French capital as his objective. Blucher at last caught the Emperor off-guard at Laon on the 9th, Blucher’s 100,000-85,000 defeated Napoleon’s remaining 37,000. Napoleon blamed Marmont for failing to have arrived with reinforcements in time (although Marmont’s corps was badly mauled in the fighting) yet continued to maneuver.

Battle of Arcis, 20/21 March 1814, Schwarzenberg defeats Napoleon, from David Chandler, The Campaigns of Napoleon (1973)
On 20 March Napoleon attacked Schwarzenberg’s army with his mere 30,000 remaining forces, and with Napoleon materially exhausted Schwarzenberg detached 10,000 cavalry to watch Bonaparte, who was at Orleans rallying forces, while the Austrian supreme commander took the main army, now 180,000 strong, to Paris, entering on the 31st after the city capitulated.[376]
In the west Wellington continued his offensive against Soult and entered Bordeaux on 12 March.[375]


10 April, Toulouse, Wellington defeats Soult
Characteristically Napoleon refused to accept defeat and intended to continue fighting, but on 3 April Talleyrand, who had been negotiating with the Allies for some time, declared a provisional government. The next day Macdonald, Oudinot, Lefebvre, led by Ney, confronted Napoleon and refused to continue the war.

Napoleon signs the Treaty of Fontainebleau, 11 April 1814, by Francois Bouchot, et al., c. 1840-5
Napoleon at last threw in the towel, agreeing to abdicate on the 6th, and signed the Treaty of Fontainebleau with the Allies between the 11th and the 13th before departing for Elba aboard HMS Undaunted (38).[377] Louis XVIII landed at Calais on 24 April after having been transported to that place from Dover by the Royal Sovereign

Napoleon bids farewell to the Old Guard at Fontainebleau, 20 April 1814, by Antoine-Alphonse Montfort and Carle Vernet, c. 1834-42
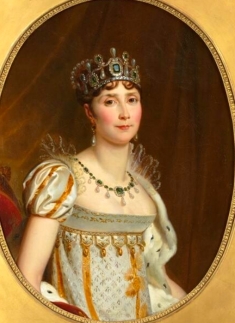
Empress Josephine, contemporaneous portrait by Marie-Eleonore Godefroid and Francois Gerrard
Josephine Bonaparte died suddenly of diphtheria 29 May 1814 in company of Alexander I at Malmaison.[378] The Duchess of Parma, with Napoleon’s son, fled Paris on the 29th, before the Allies arrived,[379] and now returned to Schonbrunn palace in Vienna.


Arrival at Elba, May 1814; & Napoleon on Elba
With Napoleon confined to Elba, and the Treaty of Ghent having concluded the war with the United States, it seemed at the beginning of 1815 that a new era of peace was at last dawning after 23 years of European war.


The Hofburg Palace, Winter Residence,

Schonbrunn palace, Vienna, Summer Residence


Inside the Hofburg palace complex today
Pellew’s Blockade, 1813-1814

Edward Pellew by James Northcote, 1804
While the war in North America and Europe played out, Royal Navy blockade and trade protection operations continued apace during the year leading up to Napoleon’s capitulation. Edward Pellew, now promoted Vice Admiral and given charge of the Mediterranean in 1811, had orders to watch Toulon, where Vice Admiral Maurice Emeriau consolidated his warships.[380] Although Vice Admiral Emeriau sortied on several occasions, he never engaged Pellew and presumably was under order to create distractions only.

Vice Admiral Maurice-Julien Emeriau, commander of the Toulon squadron in 1813
By autumn 1813 the Toulon fleet had been built up to 21 sail and ten 40 gun frigates.[381] Pellew, still blockading Toulon, briefly engaged elements of this fleet on 5 November when Vice Admiral Emeriau sortied with between 12 or 14 sail of the line plus six frigates and a schooner. Pellew’s inshore squadron of four 74s led by Captain Henry Heathcote in Scipion attempted to block their return to port. The French vanguard was commanded by Rear Admiral Cosmao-Kerjulien with five sail of the line, including his flagship the Wagram (130), plus four frigates. Pellew soon arrived in the Caledonia (120), bringing three more heavy ships with him (Pompee, 74, Boyne, 98, and San Josef, 112).

Frigates at sea by Patrick O’Brien

Emeriau’s sortie on 5 May (November) 1813, by Auguste-Etienne-Francois Mayer
A brief exchange of gunfire took place before 1 pm, but the French quickly made their way back to port with minimal casualties (not more than 17 French wounded; 1 killed and 14 wounded for the British).[382] Pellew returned to Minorca and Vice Admiral Emeriau made no further efforts to sortie that year, although did so again briefly in February 1814 to allow another 74 from Genoa to slip into Toulon.[383]

5 November 1813 while blockading Toulon, Vice Admiral Pellew’s engagement by Thomas Luny, made in 1830
The Hundred Days: War of the Seventh Coalition

The Congress of Vienna in 1815, interrupted by the Hundred Days campaign, by Jean-Baptiste Isabey, c. 1819
In 1815, with France recovering after the Treaty of Paris, Napoleon now saw his chance to regain his throne and thus sailed from Elba bound for France on 26 February. He landed near Cannes on 1 March with 1,100 men and four guns. Ney, who had been sent by the King to arrest Napoleon, changed sides on 17 March and soon Louis XVIII fled into exile as Napoleon entered Paris on 20 March.[384] On the 25th the Allies formed the Seventh Coalition to once again expel Napoleon from Europe, quickly building up their combined force to between 650,000-700,000 against which the Emperor could marshal only 224,000, including 50,000 veterans who had returned from Allied POW camps (there had been 27,000 French sailors in British prisons).[385] Furthermore, Britain secured first £5 million, and then £7 million, for the allies to finance the 1815 campaign.[386]

Marshal Prince von Blucher, Napoleon’s most tenacious opponent by George Dawe
With Brune, Davout, Moriter, Ney, Soult, Suchet, and Grouchy once again at his call the Emperor marched against the Anglo-Dutch army that was assembling in Belgium under Wellington, hoping to defeat this weakest Allied force before Blucher, Alexander or Schwarzenberg could intervene. Napoleon installed Carnot as Minister of the Interior and left Davout in Paris as Minister of War,[387] then sent Rapp to take command on the Rhine, Suchet the Alps, Brune the Var, while Clausel took the Spanish front.[388]

The Duke of Wellington, c. 1820 by Peter Stroehling
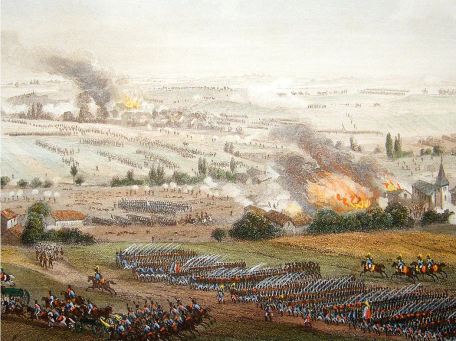
Rothenberg is extremely critical of Napoleon’s choices for army command, noting that leaving Davout in Paris and Suchet on the Rhine took his two best lieutenants out of the game.[389] Undoubtedly Napoleon had his reasons, presumably that these were men he could trust to hold his flank and rear, allowing the Emperor to keep a closer eye on Ney and Grouchy. Later at St. Helena the Emperor uncharitably mused that “if Murat had been there [at Waterloo] when Grouchy was in command, in all probability the Prussians would have been defeated.”[390]
Accoridng to Dodge, Napoleon’s two options were to repeat the 1814 campaign, which had the advantage of not requiring him to invade anyone, or to march against the nearest Allied concentration, which was in Belgium.[391] In the event Napoleon took 125,000 men in five corps plus the Guard and 358 guns, and marched into Belgium where Blucher had 149,000 men and 296 guns, supported by Wellington with 107,000 men, and 197 guns.[392]
Napoleon crossed the frontier on 15 June, intending to divide Wellington and Blucher and then destroy both in detail, beginning with the stronger partner. The French took Charleroi and then Napoleon, with Ney in the lead, marched against Blucher. Ney detached Wellington from Blucher at Quatre-Bras and Napoleon had a hard fight against the Prussian field marshal, who was in command of a force composed mainly of Russians. Napoleon succeeded in repulsing him at Ligny, at cost to Blucher’s Russians of 16,000-20,000 men and 21 or 24 guns, although Napoelon’s losses, at 11,000 casualties, had also not been light.[393]

On the 18th Napoleon with 74,000 then developed the attack against Wellington’s 67,000 (24,000 British) at Waterloo, but was unable to break Wellington’s defensive line and lost most of his cavalry in the desperate struggle before Blucher arrived and turned Napoleon’s flank. In the final effort after 6 pm Napoleon threw in his Guard but their assault failed by 7 pm and Napoleon knew that he was finished – having failed to scatter the English and Dutch, how could he dream of defeating the Prussians, Austrians and the Russians?[394]

The gambit had failed, Napoleon had lost all his artillery, 250 pieces, not to mentioned having suffered 30,000 casualties, the survivors now harried by Prussian cavalry as the army fled across the Sambre. Napoleon ordered the army to reform at Laon while he hurried to Paris, arriving there on 21 June.[395] Although Davout by now had raised another army of more than 100,000, Napoleon no longer believed victory possible against both his domestic and international opponents, including Lafayette who championed the Republican cause,[396] and on the 22nd as Wellington and Blucher closed in on Paris Bonaparte once again accepted abdication, intending to flee to the United States.[397]

The Battle of Waterloo by William Sadler
On 15 July Napoleon surrendered to Captain Frederick Maitland of HMS Bellerophon, then at the Basque Road. The Emperor was conveyed to Plymouth, arriving there on the 26th. On 7 August he was transferred to the Northumberland, under the protection of Rear Admiral George Cockburn, who made certain Napoleon was transported to St. Helena where they arrived on 16 October. France was returned to its 1792 borders, minus the overseas possessions of Tobago, St. Lucia, Mauritius, Rodriquez and the Seychelles, and was indemnified to the tune of £28 million.[398]
There were few naval actions during this time, although some did in fact take place: notably, Rear Admiral Philip Durham landed Lt. General Sir James Leith on Martinique to secure it for Louis XVIII, a similar operation taking place in August when another landing was carried out to secure Guadeloupe, then under the control of the Comte de Linois, who had made the unfortunate decision of declaring in favour of Napoleon and on 10 August had no choice but surrender.[399]

Meeting of the Monarchs who Defeated Napoleon at the 1818 Congress of Aachen, copy of original by William Heath

The new international order: Europe as arranged at the Congress of Vienna

Saint Helena, c. 1785, by Adam Callander


Epilogue: Nelson’s Touch, Pellew at Algiers

Viscount Pellew, Lord Exmouth in September 1817, drawn by Samuel Drummond and Henry Meyer
The final naval battle of the Napoleonic era took place the year after Waterloo and against a very different kind of enemy. In 1816 Sir Edward Pellew, now Baron Exmouth at 59 years old, was still the C-in-C Mediterranean. Pellew’s mission, since the conclusion of the Napoleonic Wars, had been primarily the task of suppressing piracy originating from the Dey of Algiers, who had captured a number of Christian slaves including British, Italian and Spanish subjects – a lucrative source of ransom for the North African satrap of the Ottoman Empire.[400] Abolition of the slave trade had been enforced by the Royal Navy since 1807 and was a subject of international discussion at Vienna, championed by Castlereagh. Indeed the treaty of Paris, 30 May 1814, added France to the list of signatories agreeing to the abolition of the slave trade.


Pellew’s fleet for the Algerian operation & Dutch contribution
Pellew had already visited Algiers in 1815 to negotiate the liberation of the European slaves, but in 1816 sought clarification from Lord Liverpool regarding his mission. Liverpool was eager to set Pellew loose on the Algerians and on July 28th Pellew sailed from Plymouth with his squadron of five of the line, three frigates and ten brigs and bomb vessels. He was joined by Dutch Vice Admiral Baron Frederik van de Cappellen at Gibraltar with another five frigates and a sloop.[401]

Mole and fortifications at the harbour of Algiers
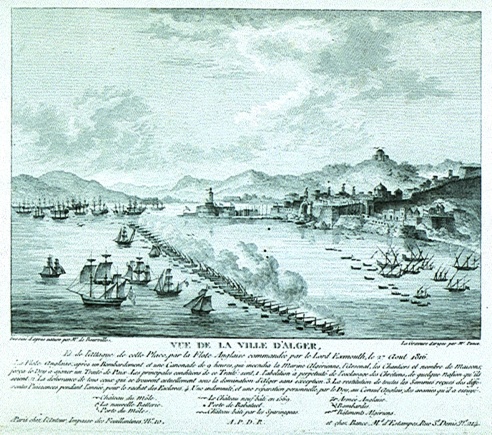

Bombardment of Algiers by William Craig (below) & a French illustration of the same, by de Bourville
Arriving off Algiers on 27 August Pellew confronted the defensive works that included more than 1,000 guns: 318 cannon and eight mortars not to mention two 68-pdr guns actually covering the harbour. Therein were nine frigates and corvettes, plus abut 50 gunboats. Pellew immediately sent ashore a party to negotiate the Dey’s surrender, giving only two hours’ grace. When this offer was rejected Pellew closed with the Queen Charlotte, followed by Implacable and Superb. Slightly after 2:30 pm the Algerian defences opened fire and a general cannoned commenced.

Harbour of Algiers defences, showing Pellew’s approach

The Bombardment of Algiers, 27 August 1816

Royal Navy casualties at Algiers
As evening fell Pellew sent in boat crews to torch the Algerian fleet, supported by bomb and rocket attack. After nine hours, and with Algiers being consumed by the conflagration, Pellew moved back out to sea where he anchored at 2 am on the 28th. The operation thus far had cost the expedition 141 dead and 742 wounded.[402]

Painting of Viscount Pellew c. 1817, by William Owen
The next day Pellew’s flag captain, James Brisbane, met with the Dey of Algiers, who this time promptly surrendered and released his 1,200 Christian slaves. Pellew sailed for Britain where he arrived on 3 September 1816 and was promptly made Viscount.

Medal commemorating the Algiers operation, c. 1816-20
Conclusion: Pax Britannica
Between 1793 and 1815 the Royal Navy captured 113 ships of the line and 205 frigates, of these they commissioned 83 ships of the line and 162 frigates back into the Royal Navy.[403] Moreover, by the end of the Napoleonic Wars Britain was paying to support 425,000 coalition troops, in addition to fielding an army of 150,000 of its own citizens, having captured every French overseas territory and held onto Canada, the latter despite the best efforts of the Americans.[404] French efforts to interdict Britain’s trade, although lucrative, did not significantly impact Britain’s ability to conduct the war: since the passing of the Convoy Act of 1803 and the end of the Napoleonic Wars in 1815, only 0.6% of merchants sailing in convoy were lost, while the higher but by no means threatening figure of 6.8% represented British merchants sailing outside of convoy.[405]

A Frigate Running Before the Wind, by Edward Hoyer
In the years after Trafalgar the Royal Navy demonstrated how a seapower, utilizing amphibious operations in a global maritime war, could not only greatly constrain multiple continental adversaries, but could defeat them by gradual pressure, with the assistance of coalitions. As the forgoing has demonstrated, once the totality of the global effort is laid out, it should be obvious, as Charles Fedorak has put it, that, “to win the war and obtain an acceptable peace, the British had to attack the French on the Continent and help the allies drive them back across their prewar boundaries. Although unreliable, amphibious operations were the only possible means of achieving these ends.”[406]

The 50 gun Grampus as a Seaman’s Hospital Society ship in 1821, moored between Greenwich and Deptford
Beyond the many strictly military success and setbacks, by 1816 the Royal Navy had in fact laid the foundation for a new international maritime order led by the United Kingdom, that great enabler of socio-economic modernization over the course of the ensuing long 19th century. It is thus very true that the modern age lies, as historians from Andrew Gordon to Robert Massie have framed it, in the lee of Trafalgar. The officers and seamen of the Royal Navy ensured that the legacy of Nelson’s Touch was not forgotten, and paved the way for the Pax Britannica to come.

The Post Office packet brig Sheldrake in 1834, painting by Nicolas Matthew Condy,

Models at the Royal Naval Museum, Somerset House on the Strand, early 19th C., by Thomas Shephard, Henry Melville, and J. Mead

The Admiralty Boardroom, mid-19th century, by Thomas Rowlandson & Henry Melville

The old Admiralty building built 1786-8, rendered in the 1830s

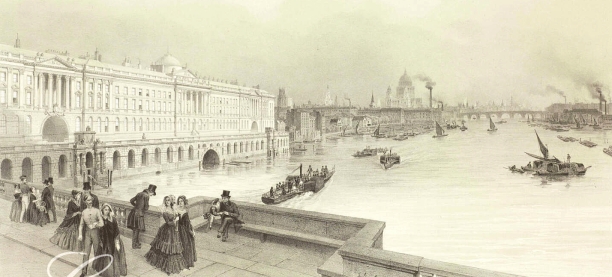
Somerset House, mid 19th century, by T. Allom, Thomas Prior, J. & W. Robins & in 1847 by Jules Arnout

The Treasury Office at Whitehall, looking towards Nelson’s column, by Thomas Prior, 1848

Horatio Nelson, by William Beechey, c. 1800


HMS Victory in 1900, at Portsmouth, & Holland boat No. 3 in front of Victory, c. 1903

Type 23 frigate HMS Northumberland and Trafalgar-class submarine in 2001
Appendix I: Royal Navy Ship Losses, 1805-1815

Apenddix II: Maps of Central London


Maps of London & Somerset House from Roger Knight’s Britain Against Napoleon, and N. A. M. Rodger’s Command of the Ocean
Appendix III: Size of European fleets, 1680-1815


Notes
[1] Herbert Richmond, Statesmen and Sea Power (Oxford: The Clarendon Press, 1946)., p. 173-4, Elie Halevy, England in 1815, trans. E. I. Watkin and D. A. Barker, vol. 1, 6 vols. (London: Ernest Benn Limited, 1964)., p. 52
[2] Halevy, England in 1815., p. 46
[3] David Syrett, “The Role of the Royal Navy in the Napoleonic Wars after Trafalgar, 1805-1814,” Naval War College Review 32, no. 5 (September 1979): 71–84.
[4] Syrett., p. 71, & Roger Knight, Britain Against Napoleon: The Organization of Victory, 1793 – 1815 (St Ives plc: Penguin Books, 2014)., p. 93-4, Andrew Lambert, Admirals (London: Faber and Faber Limited, 2009)., p. 198-200
[5] N. A. M. Rodger, The Command of the Ocean (New York: W. W. Norton & Company, 2006)., p. 513
[6] John D. Grainger, Dictionary of British Naval Battles (Woodbridge: The Boydell Press, 2016)., p. 438, Rodger, Command of the Ocean., p. 542-3
[7] Halevy, England in 1815., p. 46
[8] Charles Esdaile, Napoleon’s Wars: An International History, 1803-1815 (New York: Viking Penguin, 2007)., p. 214-5
[9] John B. Hattendorf et al., British Naval Documents, 1204-1960, Navy Records Society 131 (London: Scolar Press, 1993)., p. 317
[10] James Davey, In Nelson’s Wake: The Navy and the Napoleonic Wars (Greenwich: Royal Museums Greenwich, 2015)., p. 114
[11] Davey., p. 114
[12] Knight, Britain Against Napoleon., p. 88, and Richmond, Statesmen and Sea Power., p. 175
[13] Julian Corbett, Principles of Maritime Strategy (Mineola: Dover Publications, Inc., 2004)., p. 64-5
[14] E. M. Lloyd, “The Third Coalition, I. 1805-6,” in The Cambridge Modern History: Napoleon, ed. A. W. Ward, G. W. Prothero, and Stanley Leathers, vol. IX, 13 vols. (Cambridge: Cambridge University Press, 1907), 244–64., p. 254-5
[15] Esdaile, Napoleon’s Wars., p. 225; Lloyd, “The Third Coalition, I.”, p. 254-5
[16] Esdaile, Napoleon’s Wars., p. 222-3
[17] Lloyd, “The Third Coalition, I.”, p. 257
[18] Lloyd., p. 258-9
[19] Esdaile, Napoleon’s Wars., p. 226; Lloyd, “The Third Coalition, I.”, p. 260-1
[20] Esdaile, Napoleon’s Wars., p. 227
[21] Esdaile., p. 227
[22] Lloyd, “The Third Coalition, I.”, p. 262
[23] E. M. Lloyd, “The Third Coalition, II. 1806-7,” in The Cambridge Modern History: Napoleon, ed. A. W. Ward, G. W. Prothero, and Stanley Leathers, vol. IX, 13 vols. (Cambridge: Cambridge University Press, 1907), 265–93., p. 266, Esdaile, Napoleon’s Wars., p. 240
[24] Esdaile, Napoleon’s Wars., p. 241, Lloyd, “The Third Coalition, II.”, p. 269
[25] Lloyd, “The Third Coalition, II.”, p. 270-2
[26] Esdaile, Napoleon’s Wars., p. 256
[27] Esdaile., p. 232-3, Hans Kohn, The Habsburg Empire, 1804-1918 (Princeton, New Jersey: D. Van Nostrand Company, Inc., 1961)., p. 14, Lloyd, “The Third Coalition, II.”, p. 269
[28] Lloyd, “The Third Coalition, II.”, p. 267
[29] Esdaile, Napoleon’s Wars., p. 234
[30] Lloyd, “The Third Coalition, II.”, p. 274-5
[31] Lloyd., p. 275
[32] Gunther E. Rothenberg, The Napoleonic Wars (London: Smithsonian Books, 2006)., p. 96-9
[33] Lloyd, “The Third Coalition, II.”, p. 281-2
[34] Lloyd., p. 283
[35] Rothenberg, The Napoleonic Wars., p. 100, Rodger, Command of the Ocean., p. 552
[36] Paul M. Kennedy, The Rise and Fall of British Naval Mastery (New York: Humanity Books, 1976)., p. 145
[37] Lloyd, “The Third Coalition, II.”, p. 283
[38] Lloyd., p. 284
[39] T. A. Dodge, Napoleon: A History of the Art of War, Vol. II, Kindle ebook, vol. 2, 4 vols. (Pickle Partners Publishing, 2014)., chapter 36, loc. 6290
[40] Lloyd, “The Third Coalition, II.”, p. 285
[41] Dodge, Napoleon, Vol. II., chapter 36, loc. 6326
[42] Dodge., chapter 36, loc. 6420-36
[43] Dodge., chapter 36, loc. 6459
[44] Esdaile, Napoleon’s Wars., p. 283; Lloyd, “The Third Coalition, II.”, p. 286
[45] Rothenberg, The Napoleonic Wars., p. 102-3
[46] Lloyd, “The Third Coalition, II.”, p. 287
[47] Lloyd., p. 289
[48] Dodge, Napoleon, Vol. II., chapter 37, loc. 6832
[49] Dodge., chapter 37, loc. 6970
[50] Dodge., chapter 37, loc. 7001
[51] Dodge., chapter 37, loc. 7050
[52] Dodge., chapter 37, loc. 7097
[53] Lloyd, “The Third Coalition, II.”, p. 290-1
[54] Rothenberg, The Napoleonic Wars., p. 106
[55] Henry Kissinger, A World Restored: Metternich, Castlereagh, and the Problems of Peace, 1812-22, Kindle ebook (Friedland Books, 2017)., chapter 2, sec. 3, loc. 416
[56] Davey, In Nelson’s Wake., p. 113-4, William Laird Clowes, The Royal Navy, A History From the Earliest Times to the Present, vol. V, 7 vols. (London: Sampson Low, Marston and Company, 1900)., p. 184
[57] Clowes, The Royal Navy, V., p. 185
[58] Grainger, Dictionary of British Naval Battles., p. 271-2
[59] Malcolm Lester, “Warren, Sir John Borlase, Baronet (1753-1822),” in The Oxford Dictionary of National Biography (Oxford University Press, 2008).
[60] Clowes, The Royal Navy, V., p. 196
[61] Martin Robson, A History of the Royal Navy: The Napoleonic Wars (London: I. B. Tauris & Co. Ltd., 2014)., Chapter 8, loc. 3030
[62] Robson., Chapter 8, loc. 3030, J. K. Laughton and Michael Duffy, “Hood, Sir Samuel, First Baronet (1762-1814),” in The Oxford Dictionary of National Biography (Oxford University Press, 2007)., Grainger, Dictionary of British Naval Battles., p. 302
[63] James Stanier Clarke and John McArthur, eds., The Naval Chronicle, July-December 1809, vol. 22, 40 vols. (New York: Cambridge University Press, 2010)., p. 12
[64] Grainger, Dictionary of British Naval Battles., p. 265
[65] Richmond, Statesmen and Sea Power., p. 244-5
[66] Clowes, The Royal Navy, V., p. 187
[67] Clowes., p. 187-8
[68] Davey, In Nelson’s Wake., p. 119
[69] https://collections.rmg.co.uk/collections/objects/12063.html, Davey., p. 120, Clowes, The Royal Navy, V., p. 191-2
[70] Davey, In Nelson’s Wake., p. 121
[71] Clowes, The Royal Navy, V., p. 193
[72] Rodger, Command of the Ocean., p. 546
[73] Clowes, The Royal Navy, V., p. 195
[74] Clowes., p. 197
[75] Clowes., p. 239
[76] Clowes., p. 236
[77] Clowes., p. 237
[78] Clowes., p. 238
[79] Christopher D. Hall, “Pellew, Edward, First Viscount Exmouth (1757-1833),” in The Oxford Dictionary of National Biography (Oxford University Press, 2009)., Rodger, Command of the Ocean., p. 547
[80] P. K. Crimmin, “Troubridge, Sir Thomas, First Baronet (c. 1758-1807),” in The Oxford Dictionary of National Biography (Oxford University Press, 2009).
[81] Rodger, Command of the Ocean., p. 547, Grainger, Dictionary of British Naval Battles., p. 271-2
[82] Rodger, Command of the Ocean., p. 547-8
[83] Clowes, The Royal Navy, V., p. 239
[84] Grainger, Dictionary of British Naval Battles., p. 373, Clowes, The Royal Navy, V., p. 239
[85] Clowes, The Royal Navy, V., p. 240
[86] Davey, In Nelson’s Wake., p. 122
[87] Clowes, The Royal Navy, V., p. 202
[88] Hugh Popham, “Popham, Sir Home Riggs (1762-1820),” in The Oxford Dictionary of National Biography (Oxford University Press, 2008). Clowes, The Royal Navy, V., p. 202-3
[89] Clowes, The Royal Navy, V., p. 204
[90] Clowes., p. 205, Popham, “Popham, Sir Home Riggs (1762-1820).”
[91] Clowes, The Royal Navy, V., p. 205-6
[92] Popham, “Popham, Sir Home Riggs (1762-1820).”, Clowes, The Royal Navy, V., p. 206-7
[93] Rodger, Command of the Ocean., p. 548-9, Robson, A History of the Royal Navy: The Napoleonic Wars., Chapter 8, loc. 3012, Clowes, The Royal Navy, V., p. 234-6
[94] Richmond, Statesmen and Sea Power., p. 222
[95] Clowes, The Royal Navy, V., p. 198
[96] Desmond Gregory, “Stuart, Sir John (1761-1815),” in The Oxford Dictionary of National Biography (Oxford University Press, 2008). Rodger says 3,000 men, Rodger, Command of the Ocean., p. 550
[97] Clowes, The Royal Navy, V., p. 199-200
[98] Gregory, “Stuart, Sir John (1761-1815).”
[99] Lloyd, “The Third Coalition, II.”, p. 270
[100] Clowes, The Royal Navy, V., p. 209. Interestingly, Canning fought a duel against Castlereagh in 1809.
[101] Clowes., p. 209
[102] Popham, “Popham, Sir Home Riggs (1762-1820).”
[103] Clowes, The Royal Navy, V., p. 211
[104] Clowes., p. 213
[105] Clowes., p. 213-4
[106] Clowes., p. 214-5
[107] Rodger, Command of the Ocean., p. 549, Robson, A History of the Royal Navy: The Napoleonic Wars., Chapter 6, loc. 2391
[108] Clowes, The Royal Navy, V., p. 218-9
[109] Richmond, Statesmen and Sea Power., p. 231
[110] Clowes, The Royal Navy, V., p. 219
[111] Clowes., p. 221
[112] Clowes., p. 222
[113] Clowes., p. 224
[114] Clowes., p. 225
[115] Rodger, Command of the Ocean., p. 550-1, Clowes, The Royal Navy, V., p. 226, A. B. Sainsbury, “Duckworth, Sir John Thomas, First Baronet (1748-1817),” in The Oxford Dictionary of National Biography (Oxford University Press, 2009).
[116] Clowes, The Royal Navy, V., p. 228
[117] Clowes., p. 230
[118] Clowes., p. 231
[119] Rodger, Command of the Ocean., p. 554
[120] Christopher D. Hall, British Strategy in the Napoleonic War, 1803-15, Special Edition (Manchester: Manchester University Press, 1999)., p. 184-5; Robson, A History of the Royal Navy: The Napoleonic Wars., chapter 8, loc. 3038
[121] Davey, In Nelson’s Wake., p. 232
[122] Richmond, Statesmen and Sea Power., p. 235-6
[123] Mulgrave to Saumarez, 20 February 1808, #3 in A. N. Ryan, ed., The Saumarez Papers: Selections from the Baltic Correspondence of Vice-Admiral Sir James Saumarez, 1808-1812, Navy Records Society 110 (London: Spottiswoode, Ballantyne and Co. Ltd., 1968)., p. 7
[124] Rodger, Command of the Ocean., p. 553
[125] Admiralty to Saumarez, 21 March 1808, #6 in Ryan, The Saumarez Papers., p. 8-9
[126] Richmond, Statesmen and Sea Power., p. 236
[127] Ryan, The Saumarez Papers., p. 9 fn, Grainger, Dictionary of British Naval Battles., p. 436
[128] Rodger, Command of the Ocean., p. 553, Clowes, The Royal Navy, V., p. 248
[129] Grainger, Dictionary of British Naval Battles., p. 235, Clowes, The Royal Navy, V., p. 248-50
[130] Clowes, The Royal Navy, V., p. 250
[131] Nicholas V. Riasanovsky and Mark D. Steinberg, A History of Russia, 7th ed. (New York: Oxford University Press, 2005)., p. 288
[132] Clowes, The Royal Navy, V., p. 270
[133] Rodger, Command of the Ocean., p. 557-8
[134] Esdaile, Napoleon’s Wars., p. 416
[135] Esdaile., p. 326, 330
[136] Clowes, The Royal Navy, V., p. 232
[137] Clowes., p. 232-3, Esdaile, Napoleon’s Wars., p. 330
[138] Richmond, Statesmen and Sea Power., p. 234
[139] J. K. Laughton and Michael Duffy, “Yeo, Sir James Lucas (1782-1818),” in The Oxford Dictionary of National Biography (Oxford University Press, 2008).
[140] Clowes, The Royal Navy, V., p. 233-4
[141] Clowes., p. 247
[142] Charles W. C. Oman, A History of the Peninsular War, vol. I, 7 vols. (Oxford: Clarendon Press, 1902)., p. 222
[143] Clowes, The Royal Navy, V., p. 251
[144] Oman, History of the Peninsular War, I., p. 227; Norman Gash, “Wellesley [Formerly Wesley], Arthur, First Duke of Wellington (1769-1852),” in The Oxford Dictionary of National Biography (Oxford University Press, 2011).
[145] Gash, “Wellesley [Formerly Wesley], Arthur, First Duke of Wellington (1769-1852).”
[146] Gash., Rodger, Command of the Ocean., p. 553, Rothenberg, The Napoleonic Wars., p. 140
[147] Clowes, The Royal Navy, V., p. 234; Richmond, Statesmen and Sea Power., p. 234
[148] Rothenberg, The Napoleonic Wars., p. 115, 118
[149] John Sweetman, “Moore, Sir John (1761-1809),” in The Oxford Dictionary of National Biography (Oxford University Press, 2011).
[150] Esdaile, Napoleon’s Wars., p. 391
[151] Rothenberg, The Napoleonic Wars., p. 118-9
[152] T. A. Dodge, Napoleon: A History of the Art of War, Vol. III, Kindle ebook, vol. 3, 4 vols. (Pickle Partners Publishing, 2014)., chapter 42, loc., 2684-2713
[153] Dodge., chapter 42, loc., 2791
[154] Dodge., chapter 44, loc., 3609
[155] Dodge., chapter 44, loc., 3644-3667
[156] Dodge., chapter 45, loc., 3829
[157] Dodge., chapter 45, loc., 4197
[158] Dodge., chapter 45, loc., 4215
[159] Dodge., chapter 45, loc., 4153
[160] Dodge., chapter 46, loc., 4265
[161] Dodge., chapter 46, loc., 4320
[162] Rothenberg, The Napoleonic Wars., p. 122-32; Dodge, Napoleon, Vol. III., chapter 46, loc., 4415
[163] Esdaile, Napoleon’s Wars., p. 395
[164] William James, The Naval History of Great Britain, from the Declaration of War by France in 1793, to the Accession of George IV, ed. Frederick Chamier, New ed., vol. IV, 6 vols. (New York: Cambridge University Press, 2010)., p. 389-90
[165] Rodger, Command of the Ocean., p. 559
[166] https://www.americanforeignrelations.com/A-D/The-Continental-System-The-continental-system-undermined.html
[167] Clowes, The Royal Navy, V., p. 241
[168] Clowes., p. 241
[169] J. K. Laughton and Michael Duffy, “Strachan, Sir Richard John, Fourth Baronet (1760-1828),” in The Oxford Dictionary of National Biography (Oxford University Press, 2008).
[170] Clowes, The Royal Navy, V., p. 241
[171] Rodger, Command of the Ocean., p. 554
[172] Clowes, The Royal Navy, V., p. 242
[173] Clowes., p. 243
[174] Laughton and Duffy, “Strachan, Sir Richard John, Fourth Baronet (1760-1828).”
[175] Clowes, The Royal Navy, V., p. 244-5
[176] Clowes., p. 252
[177] Clowes., p. 252
[178] Clowes., p. 253
[179] Clowes., p. 253-4
[180] Clowes., p. 254
[181] Clowes., p. 255
[182] Andrew Lambert, “Cochrane, Thomas, Tenth Earl of Dundonald (1775-1860),” in Oxford Dictionary of National Biography (Oxford University Press, January 2012)., Clowes, The Royal Navy, V., p. 256
[183] Clowes, The Royal Navy, V., p. 257
[184] Clowes., p. 258
[185] Clowes., p. 259-60
[186] Clowes., p. 261
[187] Clowes., p. 261-2
[188] Clowes., p. 263-4
[189] Clowes., p. 265
[190] Clowes., p. 265
[191] Clowes., p. 266
[192] Clowes., p. 267
[193] Clowes., p. 268
[194] Richard C. Blake, “Gambier, James, Baron Gambier (1756-1833),” in The Oxford Dictionary of National Biography (Oxford University Press, 2008)., see also, Clowes, The Royal Navy, V., p. 257 fn
[195] Clowes, The Royal Navy, V., p. 269
[196] Blake, “Gambier, James, Baron Gambier (1756-1833).”
[197] Rodger, Command of the Ocean., p. 555-6
[198] Clowes, The Royal Navy, V., p. 270, Robson, A History of the Royal Navy: The Napoleonic Wars., chapter 6, loc. 2556
[199] Clowes, The Royal Navy, V., p. 271
[200] Robson, A History of the Royal Navy: The Napoleonic Wars., chapter 6, loc. 2568
[201] Richmond, Statesmen and Sea Power., p. 240-1
[202] Clowes, The Royal Navy, V., p. 272
[203] Julian Corbett, Syllabus of Lecture on “Walcheren Expedition 1809”, 4 November 1913, Liddell Hart Centre for Military Archives (LHCMA), Box 2. & Laughton and Duffy, “Strachan, Sir Richard John, Fourth Baronet (1760-1828).” See also, Clowes, The Royal Navy, V., p. 271
[204] J. K. Laughton and Christopher Doorne, “Gardner, Alan, First Baron Gardner (1742-1808/9),” in The Oxford Dictionary of National Biography (Oxford University Press, 2008). James Stanier Clarke and John McArthur, eds., The Naval Chronicle, January-June 1809, vol. 21, 40 vols. (New York: Cambridge University Press, 2010)., p. 365
[205] Clowes, The Royal Navy, V., p. 272
[206] Clowes., p. 272
[207] Clowes., p. 274
[208] Clowes., p. 275
[209] Robson, A History of the Royal Navy: The Napoleonic Wars., chapter 6, loc. 2584
[210] Clowes, The Royal Navy, V., p. 276-7
[211] Clowes., p. 277
[212] Clowes., p. 277, Christopher Doorne, “Pitt, John, Second Earl of Chatham (1756-1835),” in The Oxford Dictionary of National Biography (Oxford University Press, 2008)., Robson, A History of the Royal Navy: The Napoleonic Wars., chapter 6, loc. 2584
[213] Laughton and Duffy, “Strachan, Sir Richard John, Fourth Baronet (1760-1828).” Boyd Hilton, A Mad, Bad, & Dangerous People? England 1783-1846, The New Oxford History of England (Oxford: Clarendon Press, 2006)., p. 218
[214] Clowes, The Royal Navy, V., p. 278
[215] Clowes., p. 278
[216] Clowes., p. 279
[217] Clowes., p. 280
[218] Clowes., p. 288
[219] Clowes., p. 283
[220] Clowes., p. 283-4
[221] Clowes., p. 284
[222] Clowes., p. 284; Hall, British Strategy., p. 185
[223] Clowes, The Royal Navy, V., p. 290
[224] Clowes., p. 290
[225] Rodger, Command of the Ocean., p. 556; Hall, British Strategy., p. 185
[226] Clowes, The Royal Navy, V., p. 290
[227] Clowes., p. 290
[228] Clowes., p. 292
[229] Clowes., p. 293
[230] Clowes., p. 282
[231] Hall, British Strategy., p. 186
[232] Clowes, The Royal Navy, V., p. 282
[233] Clowes., p. 282-3
[234] Clowes., p. 293
[235] Clowes., p. 294
[236] Richmond, Statesmen and Sea Power., p. 242-3
[237] Robson, A History of the Royal Navy: The Napoleonic Wars., chapter 8, loc. 3102
[238] Robson., chapter 8, loc. 3110
[239] Rodger, Command of the Ocean., p. 557
[240] Rodger., p. 557
[241] Clowes, The Royal Navy, V., p. 294-5
[242] Robson, A History of the Royal Navy: The Napoleonic Wars., chapter 8, loc. 3137
[243] Rothenberg, The Napoleonic Wars., p. 143; Gash, “Wellesley [Formerly Wesley], Arthur, First Duke of Wellington (1769-1852).”
[244] Rothenberg, The Napoleonic Wars., p. 145; Charles W. C. Oman, “The Peninsular War, 1808-14,” in The Cambridge Modern History: Napoleon, ed. A. W. Ward, G. W. Prothero, and Stanley Leathers, vol. IX, 13 vols. (Cambridge: Cambridge University Press, 1907), 428–82., p. 451
[245] Oman, “The Peninsular War.”, p. 452
[246] Gash, “Wellesley [Formerly Wesley], Arthur, First Duke of Wellington (1769-1852).”
[247] Rodger, Command of the Ocean., p. 556; Oman, “The Peninsular War.”, p. 452
[248] Rothenberg, The Napoleonic Wars., p. 146
[249] Hall, British Strategy., p. 190
[250] Rodger, Command of the Ocean., p. 561
[251] Rodger., p. 564
[252] Rothenberg, The Napoleonic Wars., p. 148-50
[253] Rothenberg., p. 152
[254] Rothenberg., p. 152-3
[255] Rodger, Command of the Ocean., p. 562
[256] Robson, A History of the Royal Navy: The Napoleonic Wars., chapter 7, loc. 2892
[257] Robson., chapter 7, loc. 2902
[258] Robson., chapter 7, loc. 2912
[259] Clowes, The Royal Navy, V., p. 307
[260] Clowes., p. 306
[261] Clowes., p. 297-8
[262] Clowes., p. 298
[263] Clowes., p. 299
[264] Clowes., p. 300
[265] Clowes., p. 300
[266] Clowes., p. 301
[267] Clowes., p. 302
[268] Rothenberg, The Napoleonic Wars., p. 161
[269] Eugen Stchepkin, “Russia Under Alexander I, and the Invasion of 1812,” in The Cambridge Modern History: Napoleon, ed. A. W. Ward, G. W. Prothero, and Stanley Leathers, vol. IX, 13 vols. (Cambridge: Cambridge University Press, 1907), 483–505., p. 489
[270] Stchepkin., p. 488
[271] Stchepkin., p. 492
[272] Rothenberg, The Napoleonic Wars., p. 168; Stchepkin, “The Invasion of 1812.”, p. 493
[273] Rothenberg, The Napoleonic Wars., p. 162-3
[274] Stchepkin, “The Invasion of 1812.”, p. 493
[275] Stchepkin., p. 494
[276] Stchepkin., p. 496
[277] Stchepkin., p. 496
[278] Stchepkin., p. 497
[279] Stchepkin., p. 496
[280] Stchepkin., p. 500
[281] Rothenberg, The Napoleonic Wars., p. 171
[282] Stchepkin, “The Invasion of 1812.”, p. 502-3
[283] Stchepkin., p. 504
[284] Rothenberg, The Napoleonic Wars., p. 172-3
[285] Rodger, Command of the Ocean., p. 563
[286] Stchepkin, “The Invasion of 1812.”, p. 505
[287] Halevy, England in 1815., p. 46
[288] Rodger, Command of the Ocean., p. 562
[289] Clowes, The Royal Navy, V., p. 303
[290] Clowes., p. 304
[291] Andrew Lambert, The Challenge, Britain Against America in the Naval War of 1812 (London: Faber and Faber Limited, 2012)., p. 65
[292] John Sweetman, “Brock, Sir Isaac (1769-1812),” in The Oxford Dictionary of National Biography (Oxford University Press, 2004).; Gene Allen Smith, “The Naval War of 1812 and the Confirmation of Independence, 1807-1815,” in America, Sea Power, and the World, ed. James C. Bradford (Chichester, West Sussex: John Wiley & Sons, Inc., 2016), 42–57., p. 46
[293] Smith, “The Naval War of 1812.”, p. 46
[294] Lambert, The Challenge., p. 62-3
[295] Lambert., p. 67, Grainger, Dictionary of British Naval Battles., p. 75
[296] Lambert, The Challenge., p. 71-2
[297] Lambert., p. 73
[298] Grainger, Dictionary of British Naval Battles., p. 216
[299] Rodger, Command of the Ocean., p. 567
[300] Grainger, Dictionary of British Naval Battles., p. 275
[301] Grainger., p. 245; Smith, “The Naval War of 1812.”, p. 48
[302] Lambert, The Challenge., p. 114-5
[303] Smith, “The Naval War of 1812.”, p. 49
[304] Smith., p. 50
[305] Richmond, Statesmen and Sea Power., p. 252
[306] Rodger, Command of the Ocean., p. 568-9
[307] Pierre Berton, Flames Across the Border, 1813-1814, vol. II, 2 vols. (Toronto: McClelland and Stewart, 1981)., p. 28-30 ; Benjamin Armstrong, Small Boats and Daring Men: Maritime Raiding, Irregular Warfare, and the Early American Navy (University of Oklahoma Press, 2019), chapter 4
[308] A. T. Mahan, Sea Power in Its Relations to the War of 1812, Kindle ebook, vol. 2, 2 vols. (Boston: Little, Brown, and Company, 1905)., p. 23
[309] Laughton and Duffy, “Yeo, Sir James Lucas (1782-1818).”
[310] Lambert, The Challenge., p. 130
[311] Smith, “The Naval War of 1812.”, p. 50-1
[312] Mahan, Sea Power in Its Relations to the War of 1812, II., p. 55; Berton, Flames Across the Border, II., p. 157 et seq
[313] Laughton and Duffy, “Yeo, Sir James Lucas (1782-1818).”
[314] Theodore Roosevelt, The Naval War of 1812, Kindle ebook (Pantianos Classics, 1882)., p. 231
[315] Roosevelt., p. 232
[316] Smith, “The Naval War of 1812.”, p. 54
[317] Smith., p. 55
[318] C. A. Harris and F. Murray Greenwood, “Prevost, Sir George, First Baronet (1767-1816),” in The Oxford Dictionary of National Biography (Oxford University Press, 2004).
[319] Rodger, Command of the Ocean., p. 572
[320] H. M. Chichester and Roger T. Stearn, “Pakenham, Sir Edward Michael (1778-1815),” in The Oxford Dictionary of National Biography (Oxford University Press, 2006).; Smith, “The Naval War of 1812.”, p. 51-2
[321] Barry Gough, Britannia’s Navy on the West Coast of North America, 1812-1914 (Toronto: Heritage House Publishing Company, Ltd., 2016)., p. 44-5; Rodger, Command of the Ocean., p. 568
[322] Grainger, Dictionary of British Naval Battles., p. 356
[323] Smith, “The Naval War of 1812.”, p. 55
[324] Smith., p. 56
[325] Richmond, Statesmen and Sea Power., p. 249
[326] Rodger, Command of the Ocean., p. 569
[327] Grainger, Dictionary of British Naval Battles., p. 170
[328] Rothenberg, The Napoleonic Wars., p. 174
[329] Rothenberg., p. 176; Julius von Pflugk-Harttung, “The War of Liberation, 1813-4,” in The Cambridge Modern History: Napoleon, ed. A. W. Ward, G. W. Prothero, and Stanley Leathers, vol. IX, 13 vols. (Cambridge: Cambridge University Press, 1907), 506–54., p. 508
[330] T. A. Dodge, Napoleon: A History of the Art of War, Vol. IV, Kindle ebook, vol. 4, 4 vols. (Pickle Partners Publishing, 2014)., chapter 57, loc. 192
[331] von Pflugk-Harttung, “The War of Liberation.”, p. 509, 512-13
[332] Hall, British Strategy., p. 200
[333] von Pflugk-Harttung, “The War of Liberation.”, p. 516
[334] von Pflugk-Harttung., p. 517
[335] Kissinger, A World Restored., p. 62
[336] Rothenberg, The Napoleonic Wars., p. 177; von Pflugk-Harttung, “The War of Liberation.”, p. 517
[337] von Pflugk-Harttung, “The War of Liberation.”, p. 518
[338] von Pflugk-Harttung., p. 518-9
[339] Kissinger, A World Restored., p. 70
[340] Kissinger., p. 72 et seq
[341] Esdaile, Napoleon’s Wars., p. 504 et seq
[342] von Pflugk-Harttung, “The War of Liberation.”, p. 521
[343] Kissinger, A World Restored., p. 64 et seq
[344] Rothenberg, The Napoleonic Wars., p. 178
[345] Rothenberg., p. 178
[346] Kissinger, A World Restored., p. 75
[347] Kissinger., p. 75-7
[348] Esdaile, Napoleon’s Wars., p. 508
[349] Kissinger, A World Restored., p. 79
[350] Kissinger., p. 81-2
[351] Rothenberg, The Napoleonic Wars., p. 178-9
[352] von Pflugk-Harttung, “The War of Liberation.”, p. 522
[353] Rothenberg, The Napoleonic Wars., p. 179
[354] von Pflugk-Harttung, “The War of Liberation.”, p. 524-5
[355] Rothenberg, The Napoleonic Wars., p. 181
[356] von Pflugk-Harttung, “The War of Liberation.”, p. 524
[357] von Pflugk-Harttung., p. 530
[358] von Pflugk-Harttung., p. 528
[359] von Pflugk-Harttung., p. 530
[360] von Pflugk-Harttung., p. 532-3
[361] Carl von Clausewitz, On War, trans. Michael Howard and Peter Paret (Princeton, New Jersey: Princeton University Press, 1984)., p. 195; Esdaile, Napoleon’s Wars., p. 514; von Pflugk-Harttung, “The War of Liberation.”, p. 534
[362] Esdaile, Napoleon’s Wars., p. 514-16; von Pflugk-Harttung, “The War of Liberation.”, p. 537-41
[363] von Pflugk-Harttung, “The War of Liberation.”, p. 540
[364] von Pflugk-Harttung., p. 542
[365] Rothenberg, The Napoleonic Wars., p. 184; Clausewitz, On War., p. 443-4
[366] Rothenberg, The Napoleonic Wars., p. 184
[367] von Pflugk-Harttung, “The War of Liberation.”, p. 543
[368] von Pflugk-Harttung., p. 544-5
[369] von Pflugk-Harttung., p. 545
[370] von Pflugk-Harttung., p. 545-6
[371] Rothenberg, The Napoleonic Wars., p. 185
[372] von Pflugk-Harttung, “The War of Liberation.”, p. 546, Kissinger, A World Restored., p. 112
[373] von Pflugk-Harttung, “The War of Liberation.”, p. 548-9
[374] Esdaile, Napoleon’s Wars., p. 530
[375] von Pflugk-Harttung, “The War of Liberation.”, p. 550
[376] von Pflugk-Harttung., p. 552-4
[377] Rothenberg, The Napoleonic Wars., p. 191
[378] L. Muhlbach, Empress Josephine: An Historical Sketch of the Days of Napoleon, trans. W. Binet (New York: McClure Co., 1910)., p. 522 et seq ; Philip Dwyer, Citizen Emperor: Napoleon in Power, 1799-1815, kind ebook, vol. 2, 2 vols. (London: Bloomsbury, 2014). Chapter 24, loc. 11722
[379] David G. Chandler, The Campaigns of Napoleon, ebook (Scribner, 1973)., loc. 3471
[380] Clowes, The Royal Navy, V., p. 295-6
[381] Clowes., p. 304
[382] Clowes., p. 305
[383] Robson, A History of the Royal Navy: The Napoleonic Wars., chapter 7, loc. 2875, Clowes, The Royal Navy, V., p. 306
[384] Dodge, Napoleon, Vol. IV., chapter 71, loc. 6849-86
[385] Rothenberg, The Napoleonic Wars., p. 195; Charles W. C. Oman, “The Hundred Days, 1815,” in The Cambridge Modern History: Napoleon, ed. A. W. Ward, G. W. Prothero, and Stanley Leathers, vol. IX, 13 vols. (Cambridge: Cambridge University Press, 1907), 616–45., p. 618; Rodger, Command of the Ocean., p. 560
[386] Hall, British Strategy., p. 203
[387] Oman, “The Hundred Days.”, p. 616
[388] Rothenberg, The Napoleonic Wars., p. 198
[389] Rothenberg., p. 200
[390] Henri-Gratien Bertrand, Napoleon at St. Helena, trans. Francis Hume (Garden City, New York: Doubleday & Company, Inc., 1952)., p. 32
[391] Dodge, Napoleon, Vol. IV., chapter 71, loc. 6972
[392] Rothenberg, The Napoleonic Wars., p. 199; see also, Oman, “The Hundred Days.”, p. 634
[393] Rothenberg, The Napoleonic Wars., p. 206; Oman, “The Hundred Days.”, p. 628
[394] Oman, “The Hundred Days.”, p. 628
[395] Oman., p. 641
[396] Dwyer, Citizen Emperor: Napoleon in Power, 1799-1815., chapter 26, loc. 12778
[397] Oman, “The Hundred Days.”, p. 644
[398] Clowes, The Royal Navy, V., p. 309
[399] Clowes., p. 309
[400] Alexander Howlett, “Nelson’s Touch: Lord Exmouth and the Bombardment of Algiers, 1816,” Airspace Historian (blog), November 2013, https://airspacehistorian.wordpress.com/2013/11/16/nelsons-touch-lord-exmouth-and-the-bombardment-of-algiers-1816/.
[401] Howlett.
[402] Hall, “Pellew, Edward, First Viscount Exmouth (1757-1833).”
[403] Halevy, England in 1815., p. 47-8
[404] Rodger, Command of the Ocean., p. 572
[405] Davey, In Nelson’s Wake., p. 233;
Lt. Edward Bamfylde Eagles sketchbook, c. 1805, Convoy escort and anti-privateering by frigates at sea, island geography, landscapes
[406] Charles John Fedorak, “The Royal Navy and British Amphibious Operations during the Revolutionary and Napoleonic Wars,” Military Affairs 52, no. 3 (July 1988): 141–46., p. 142


 The Smoking Room, HMS Ambrose,
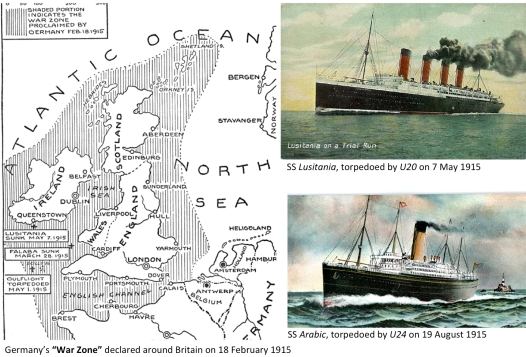
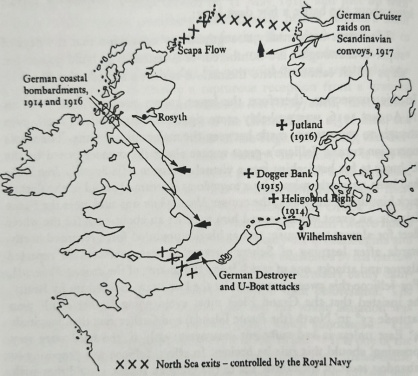

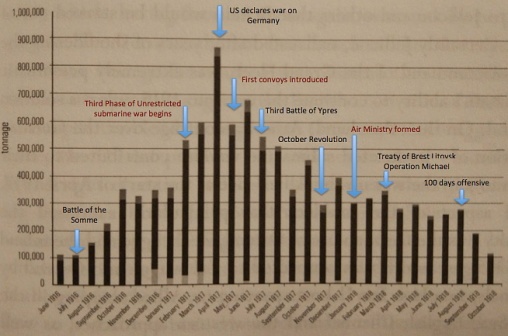

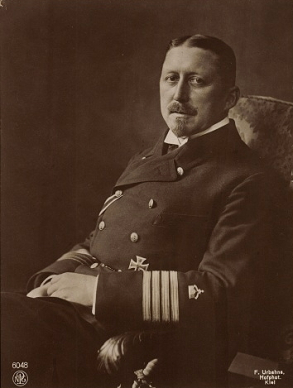

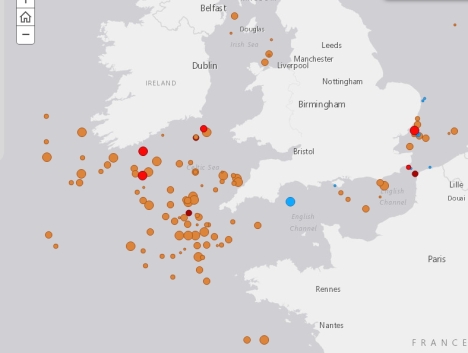
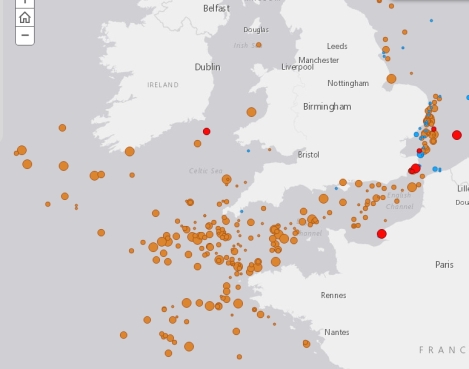


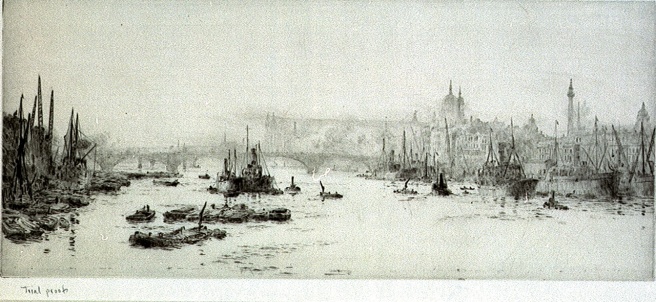
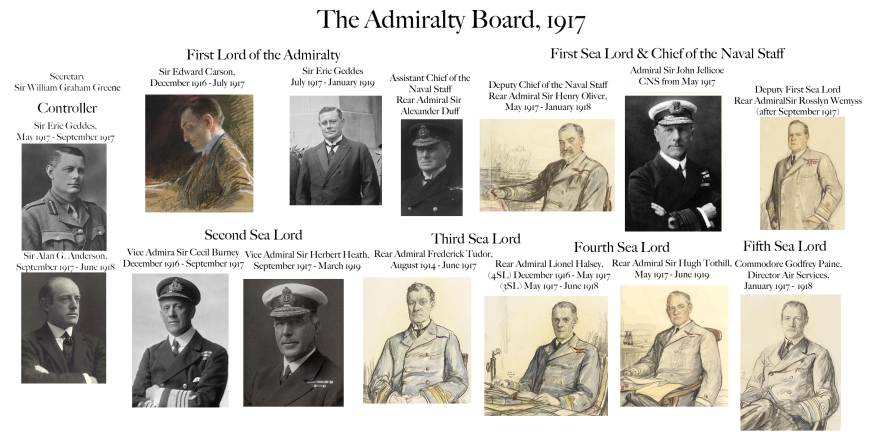
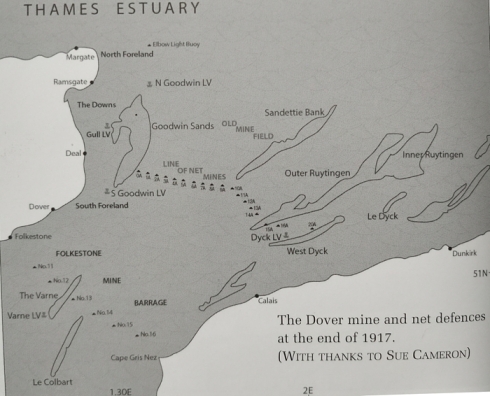


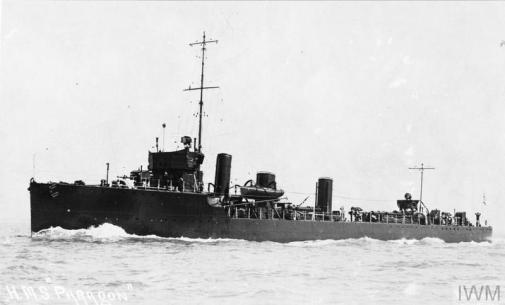
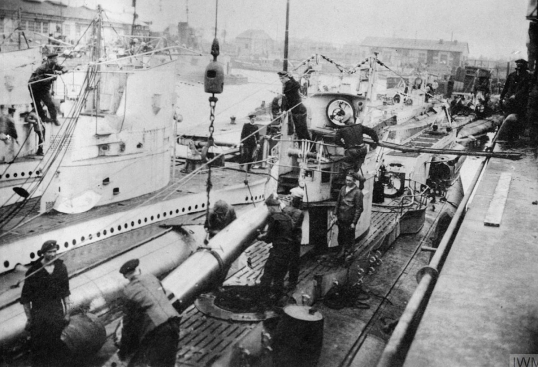
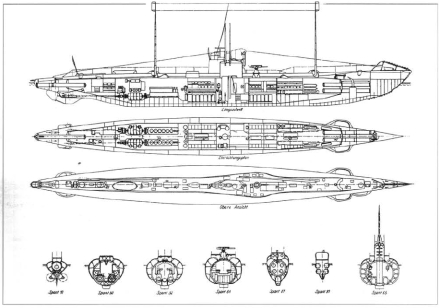


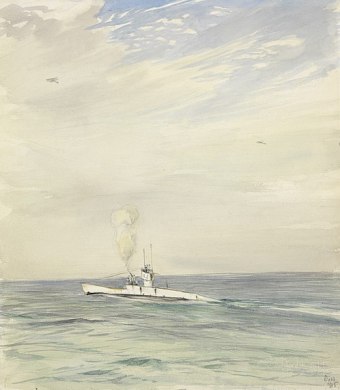
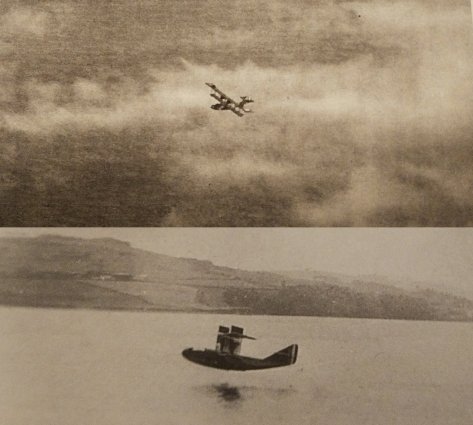

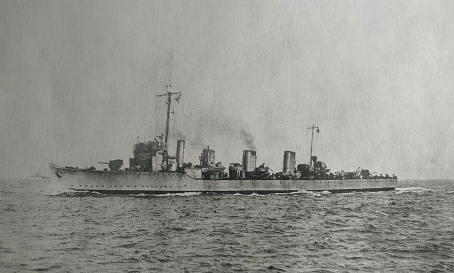

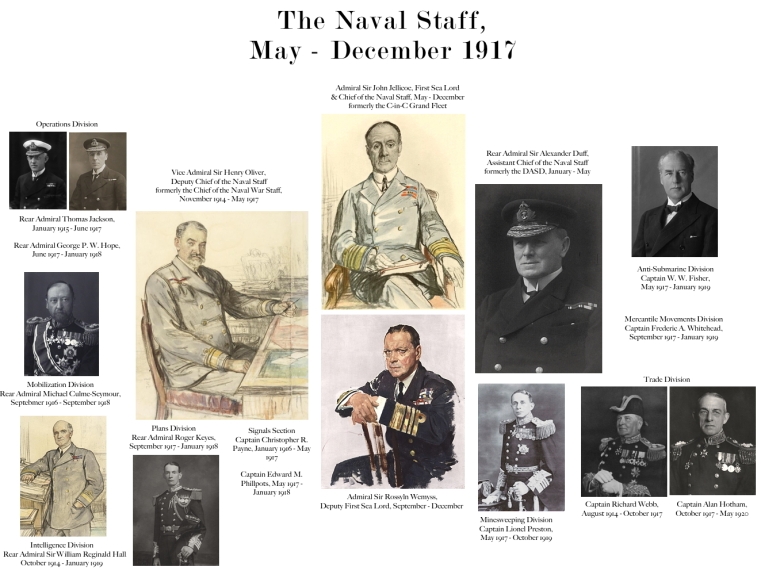
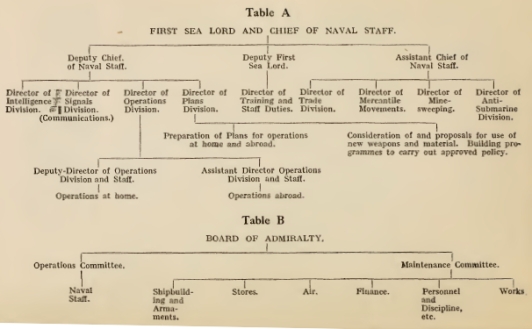
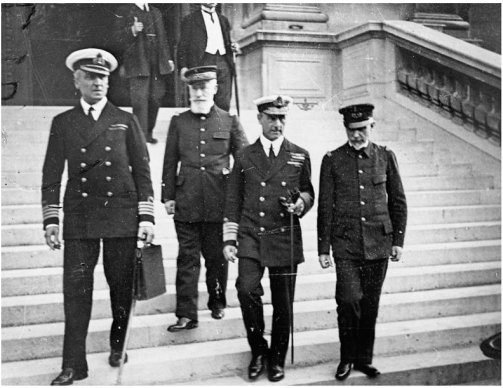
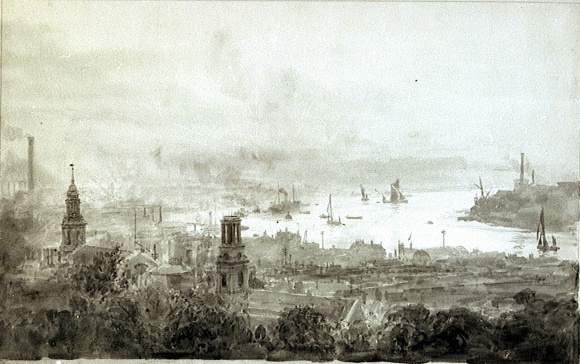
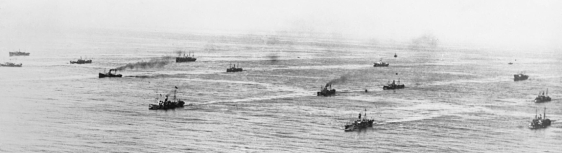
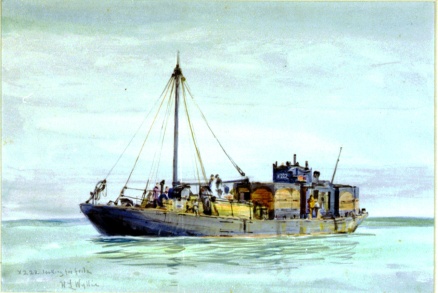

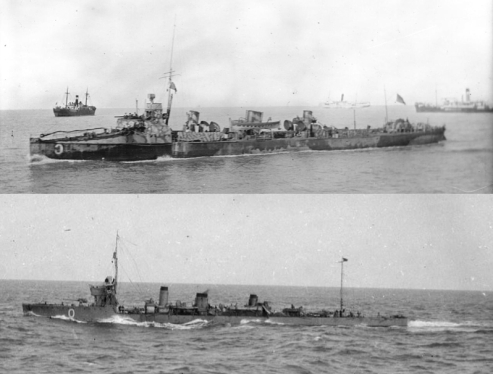

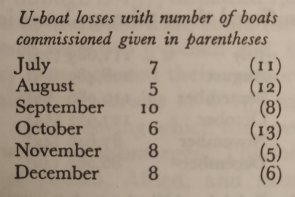
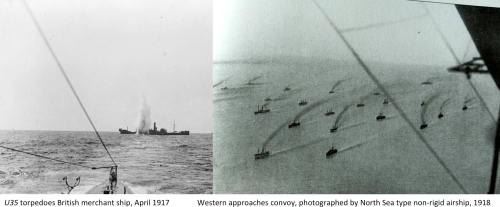

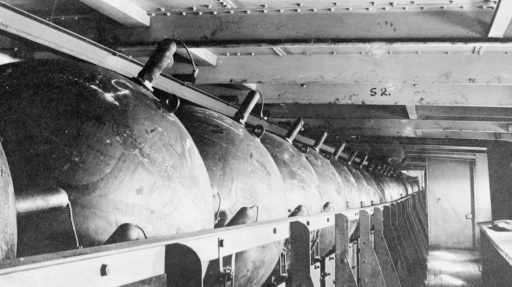
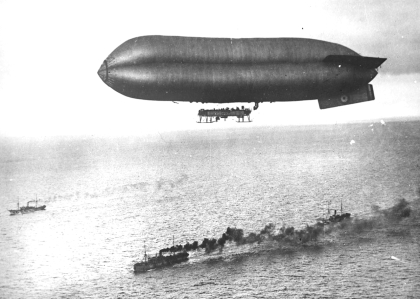
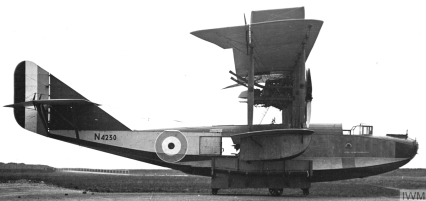

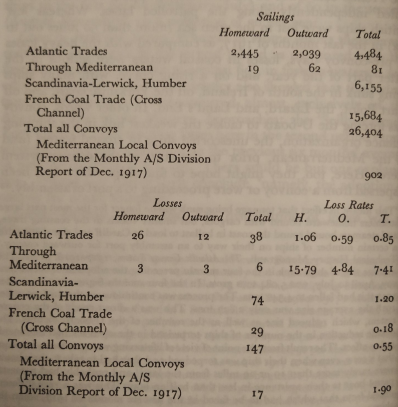
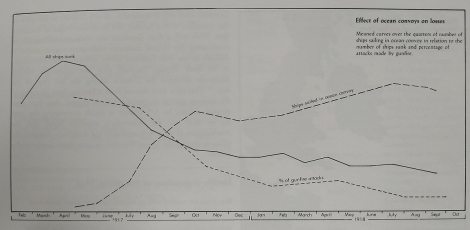
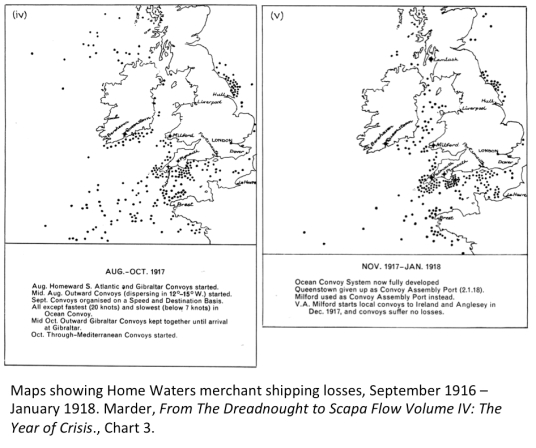

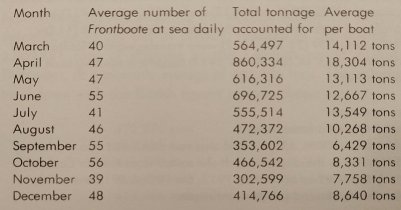
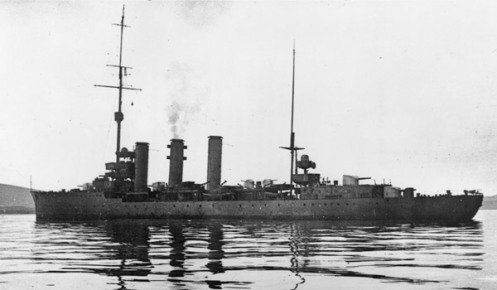
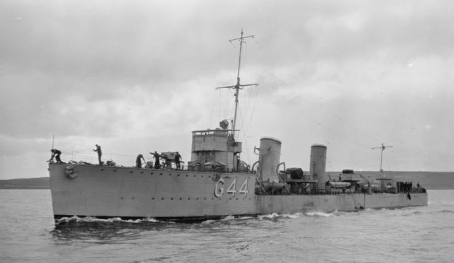


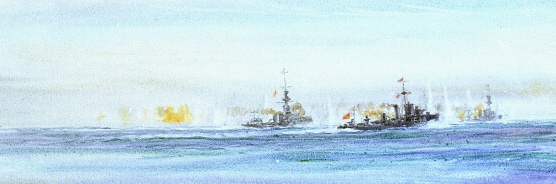
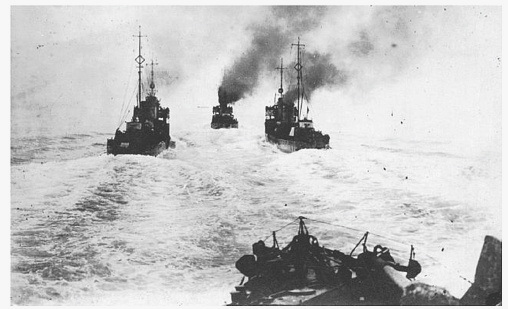
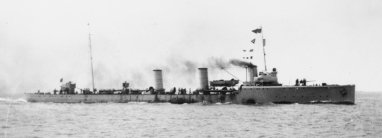
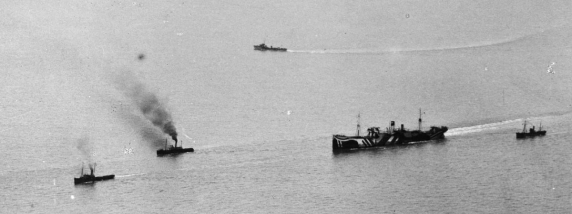


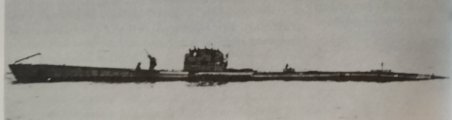
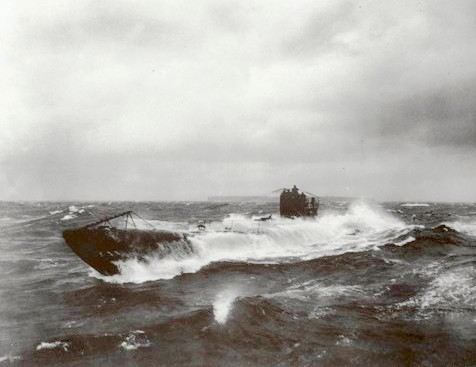
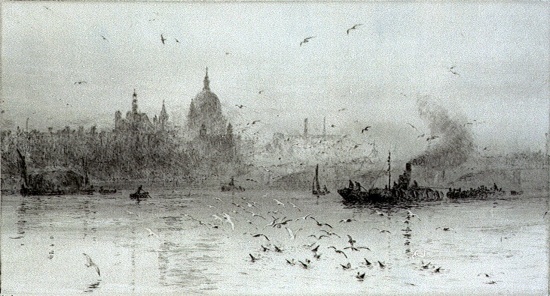
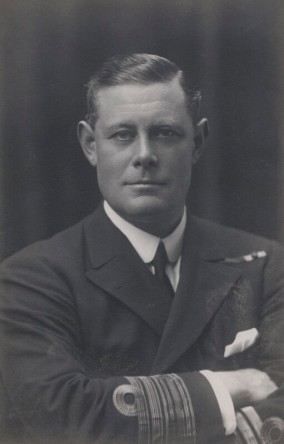
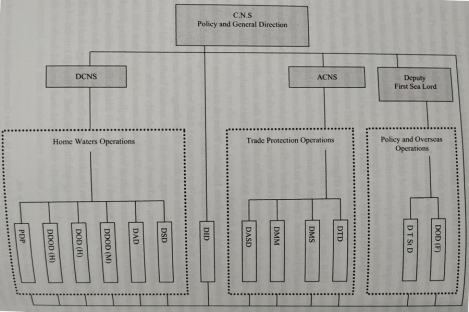
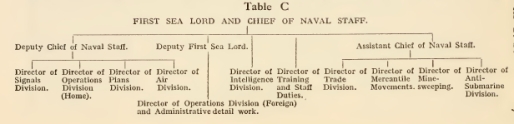

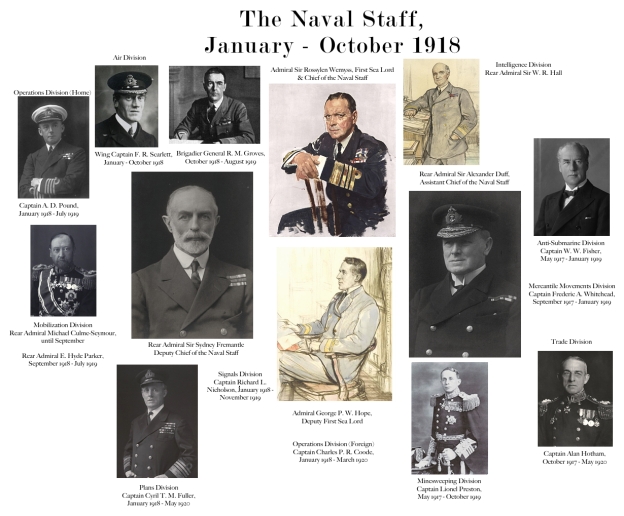

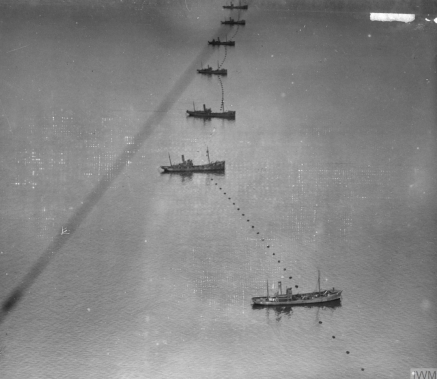
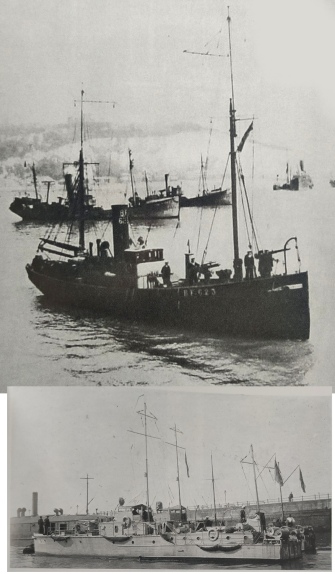
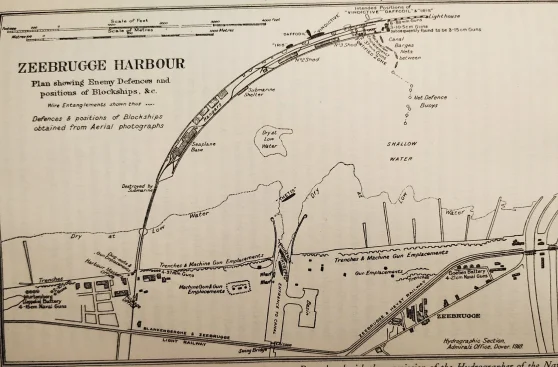


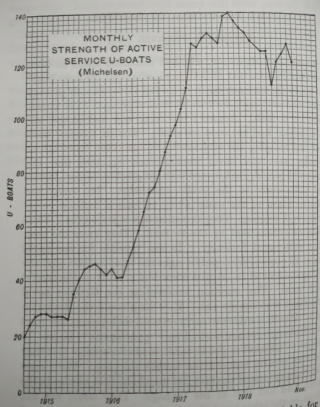


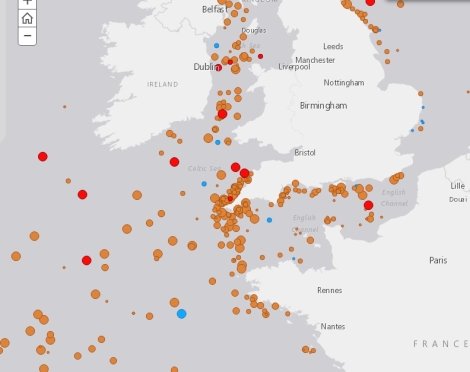

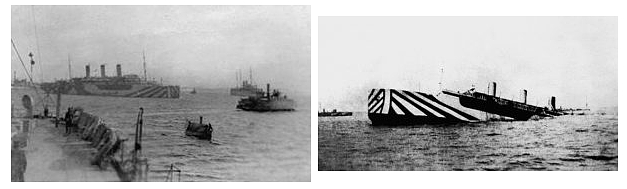
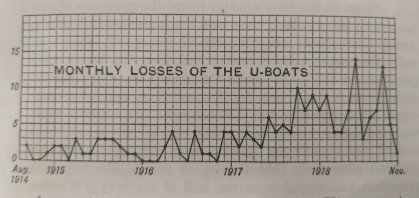
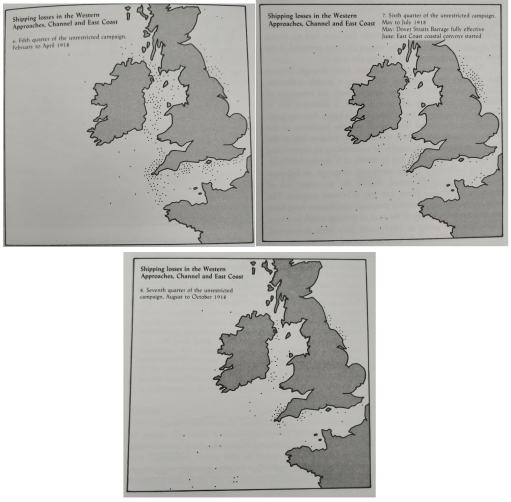

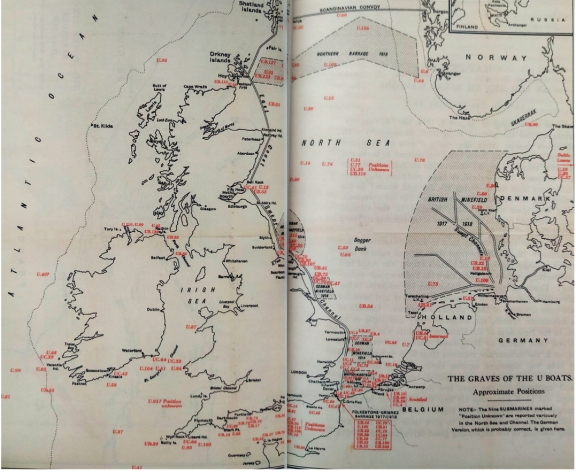


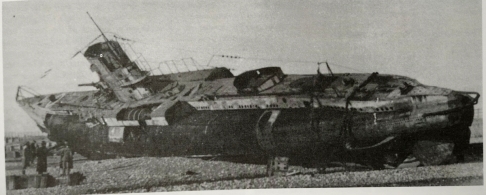
 The RAF memorial, Victoria Embankment, c. 1923 by William Wyllie
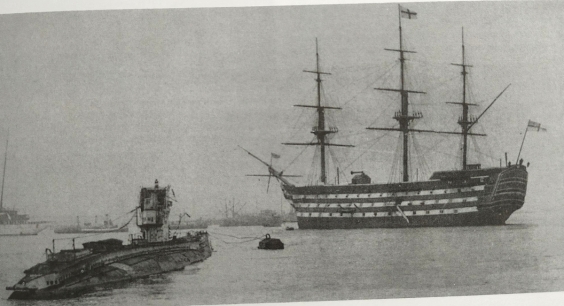
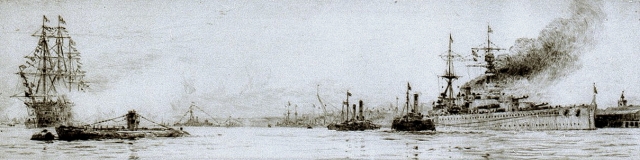
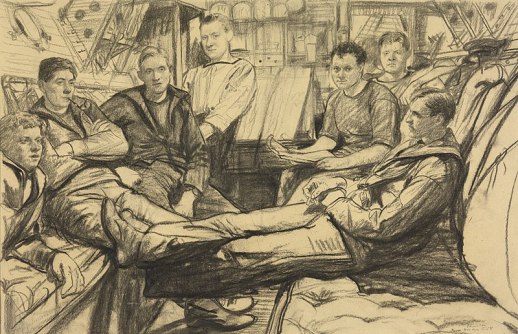
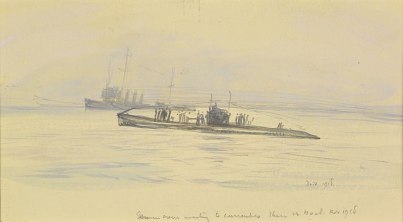

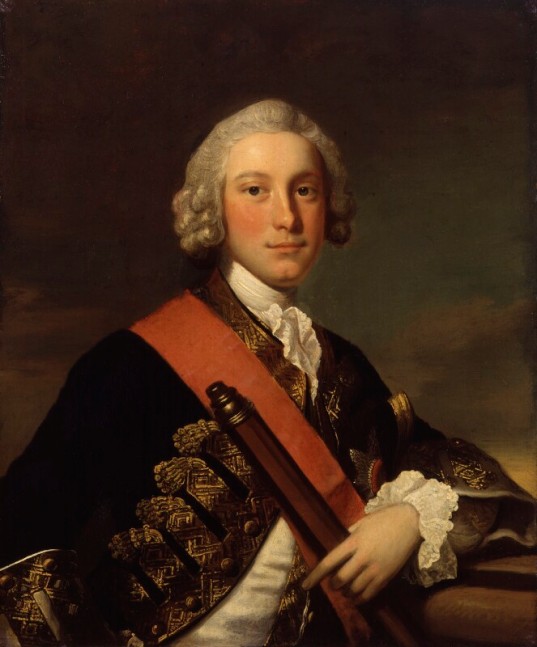
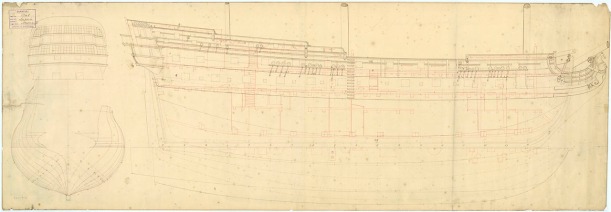
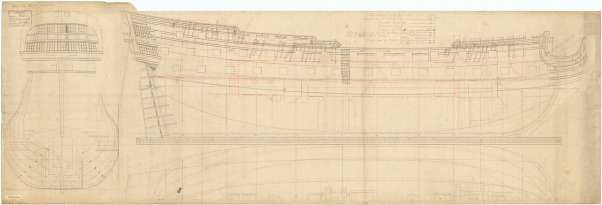
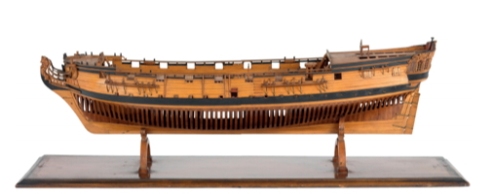
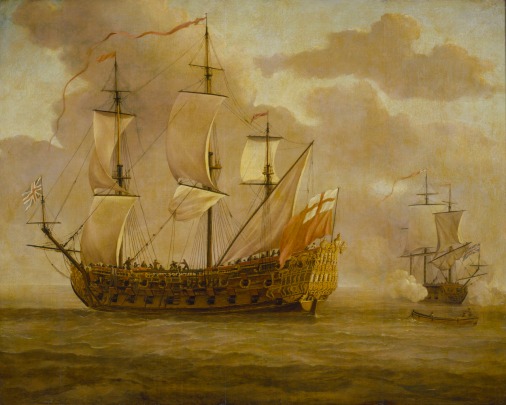
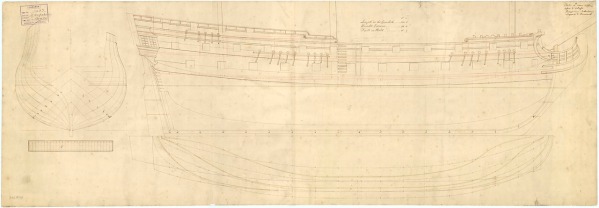


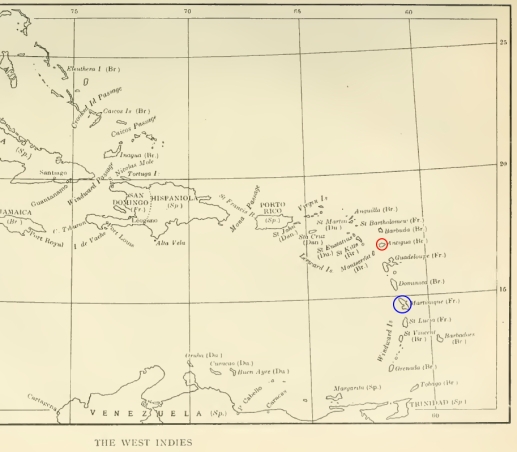

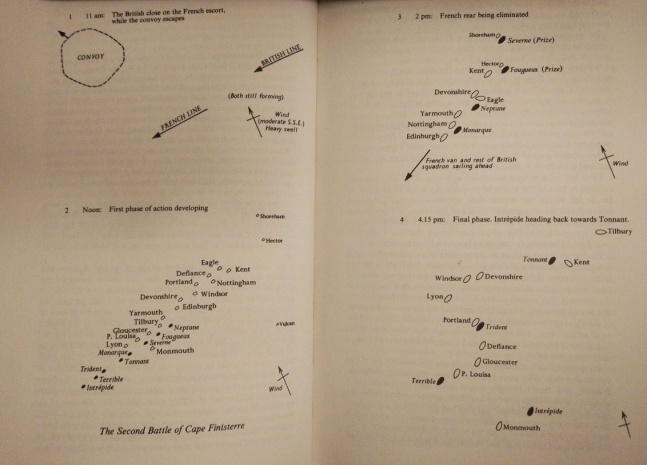
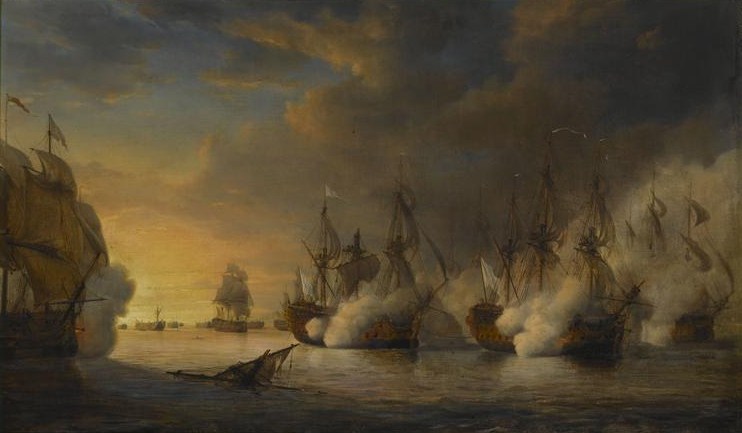
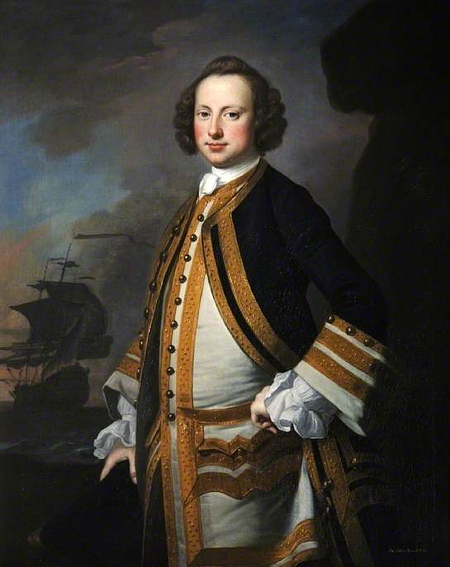
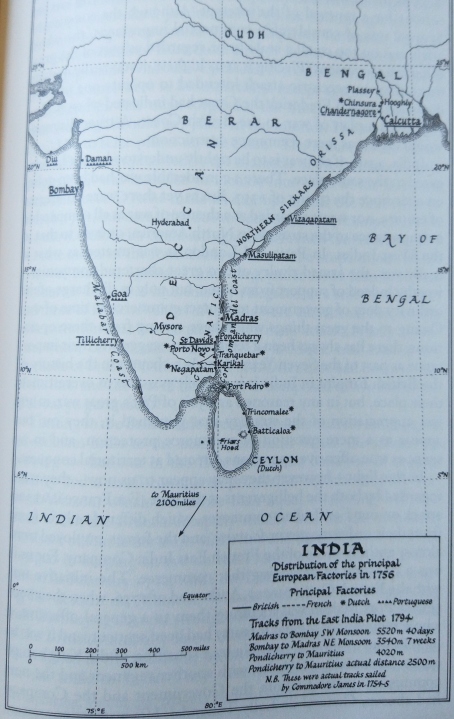
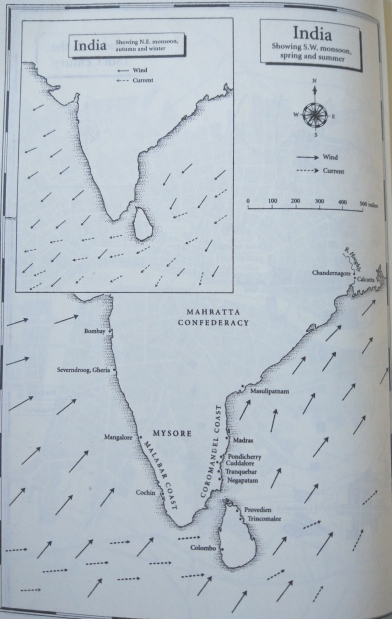
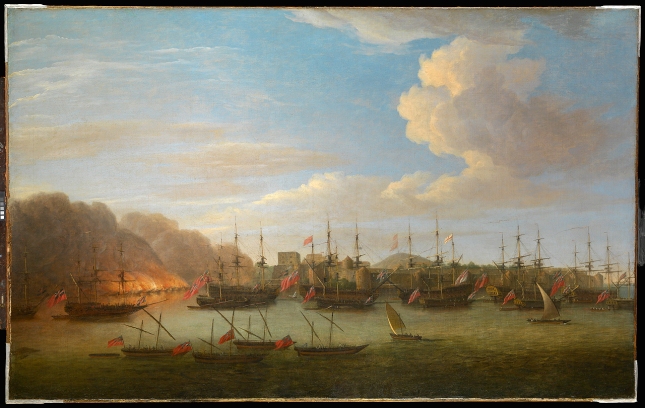

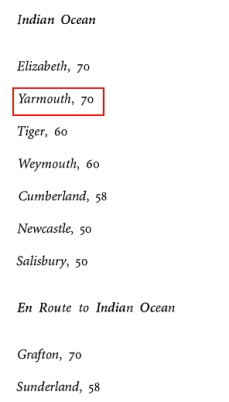
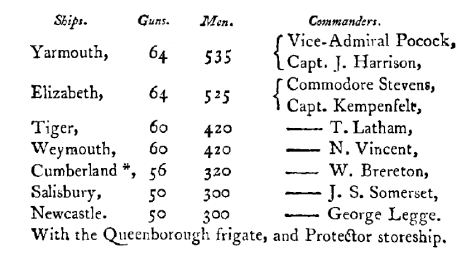
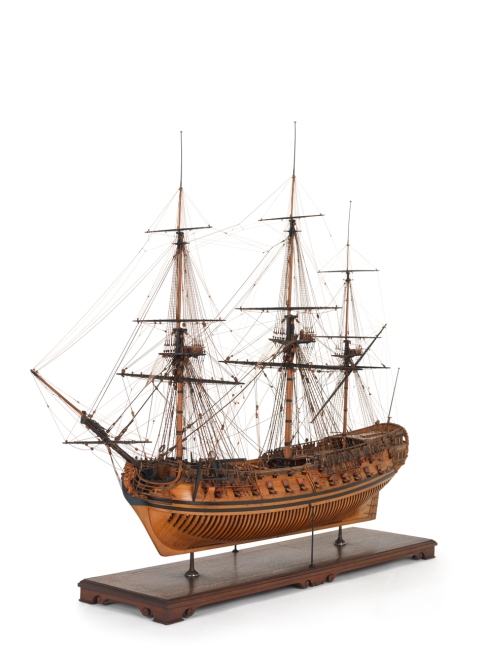
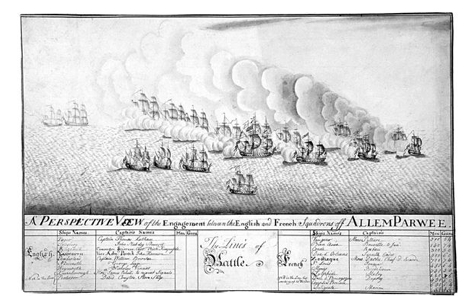
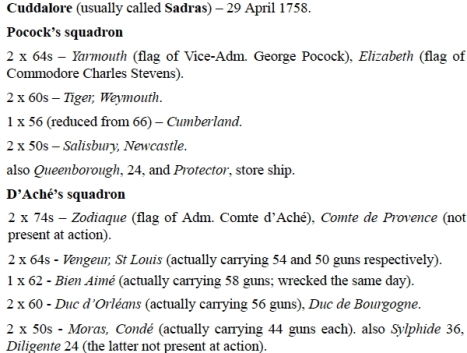
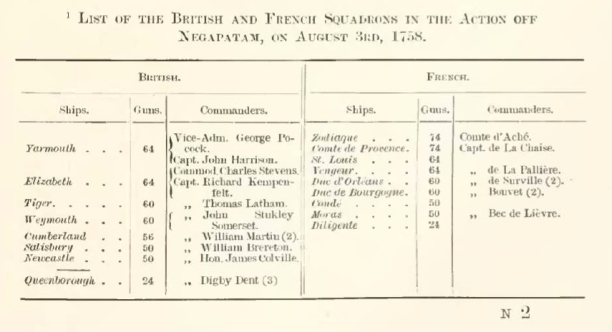


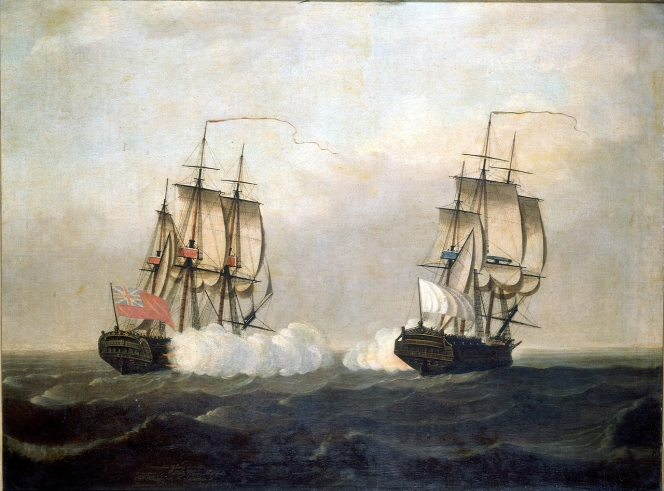
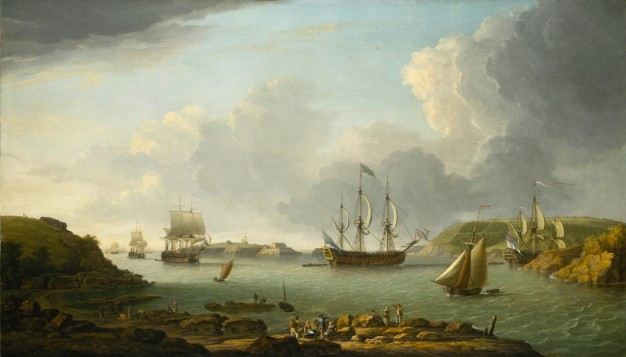

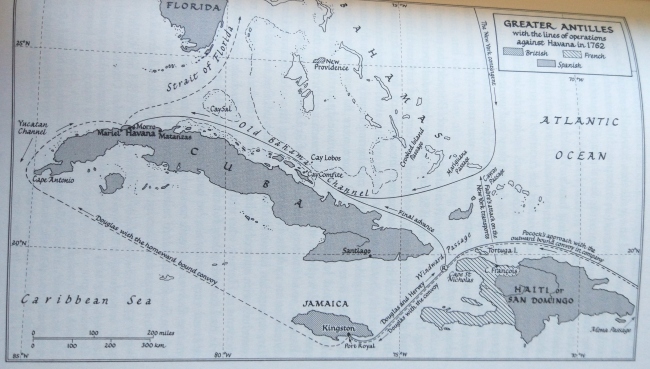
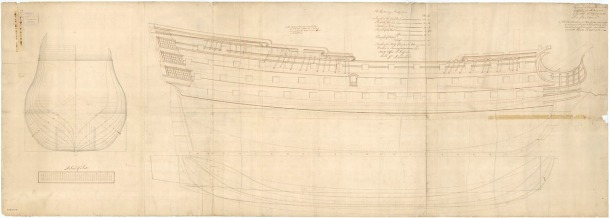

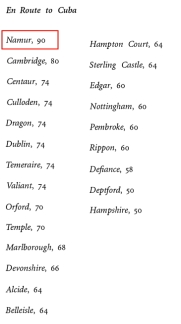
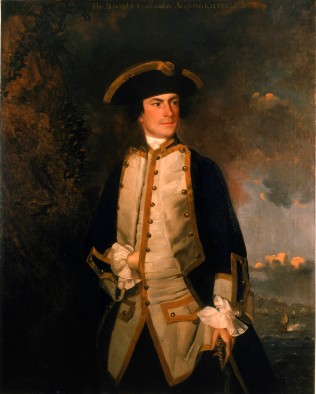

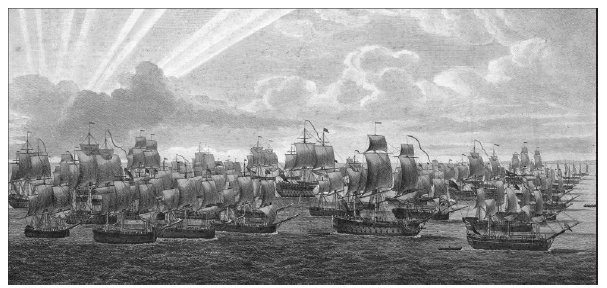
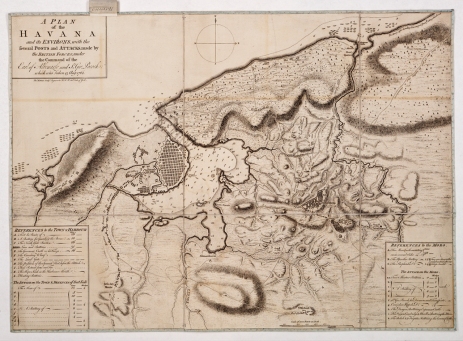

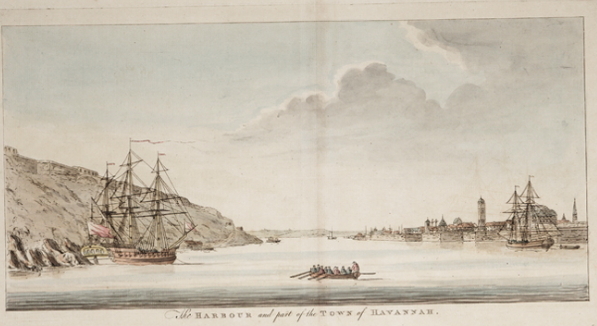

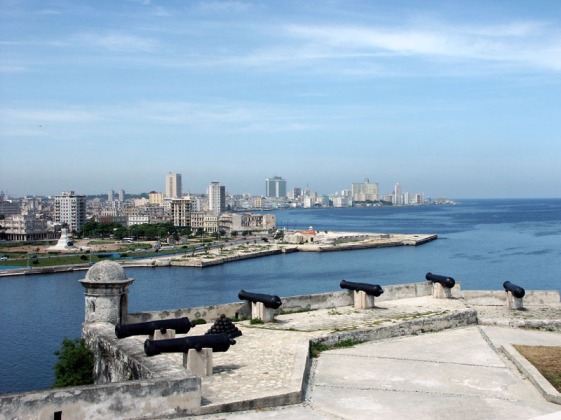

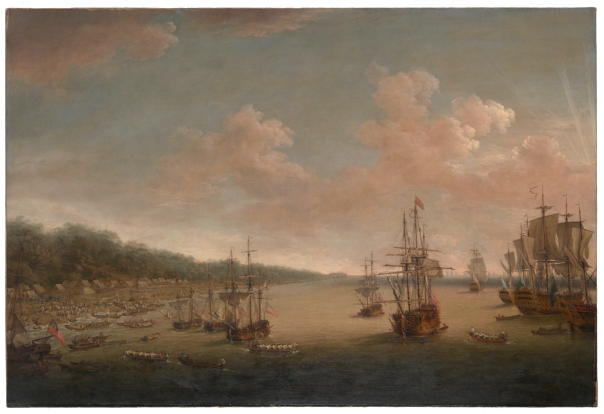

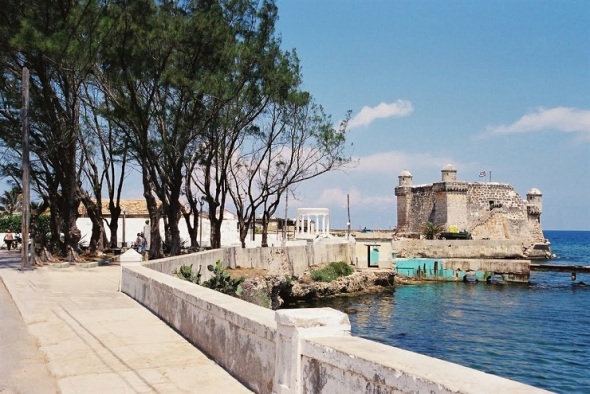

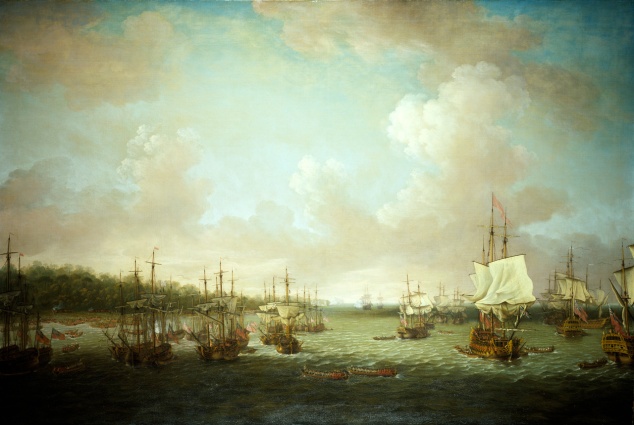
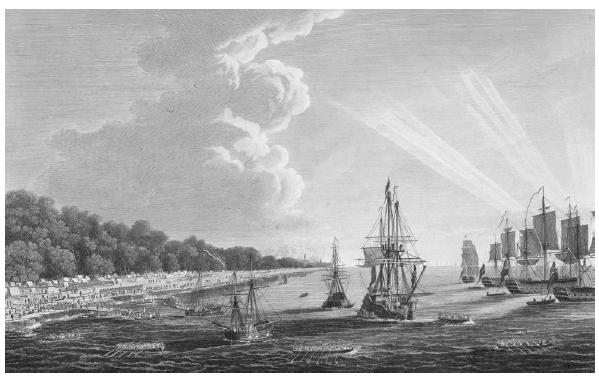
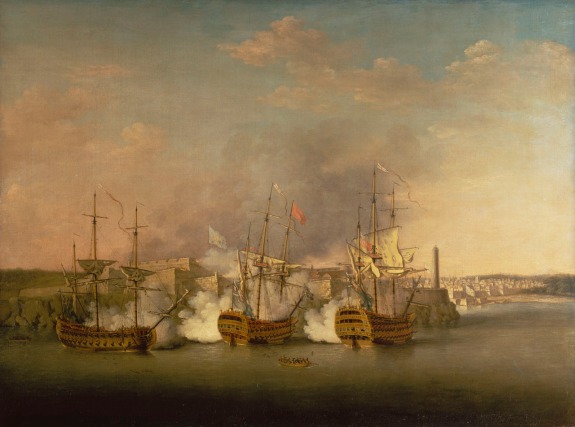

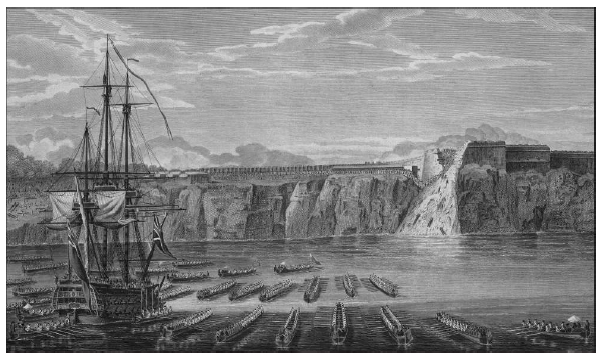
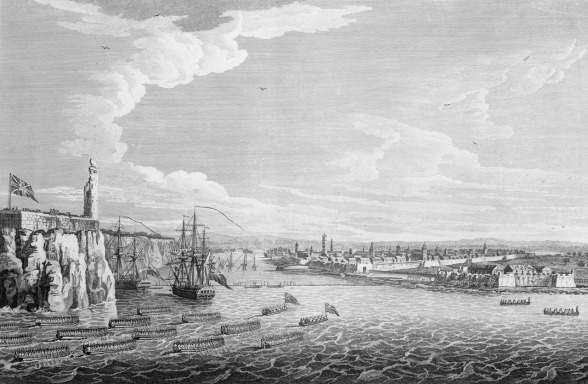

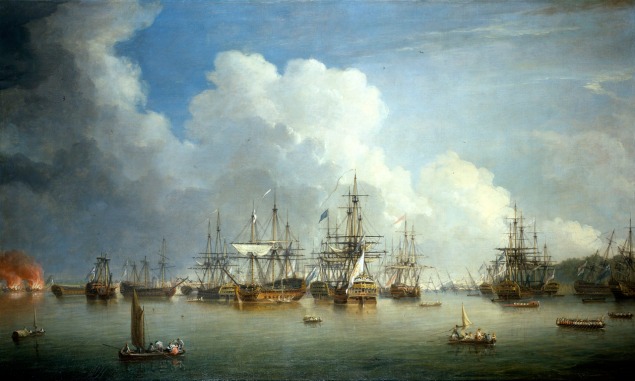
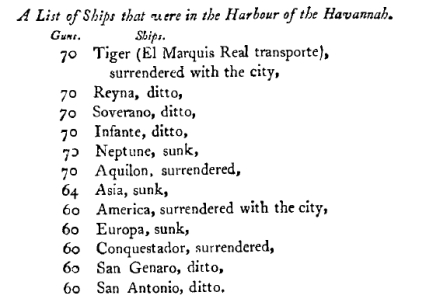
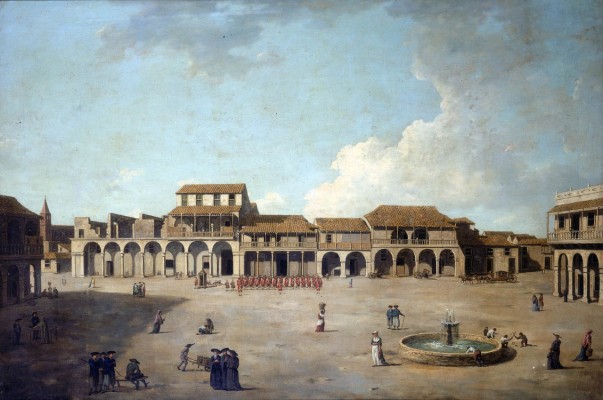
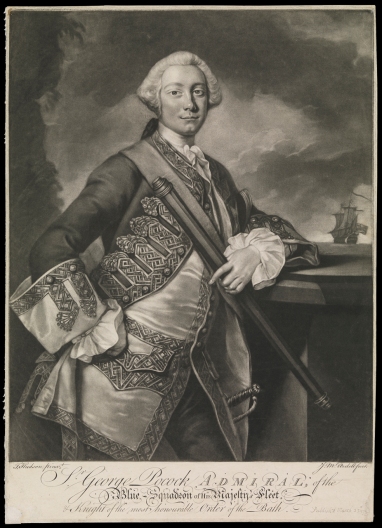
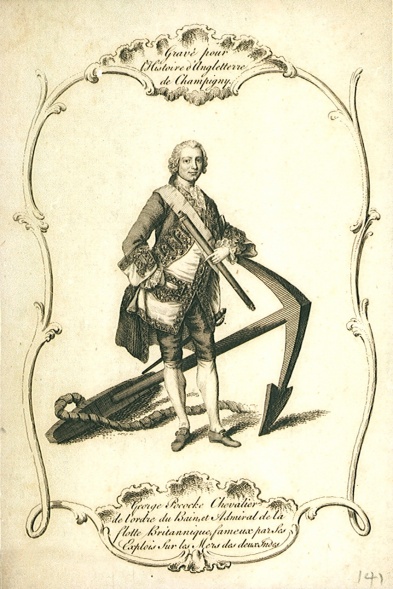
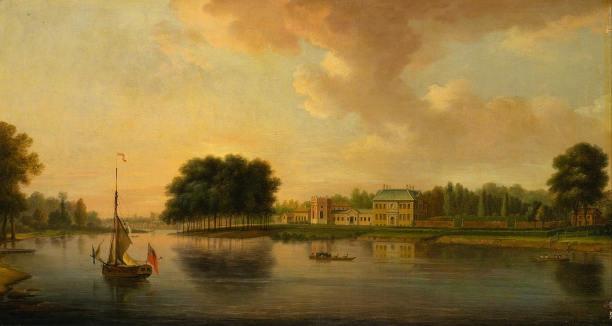

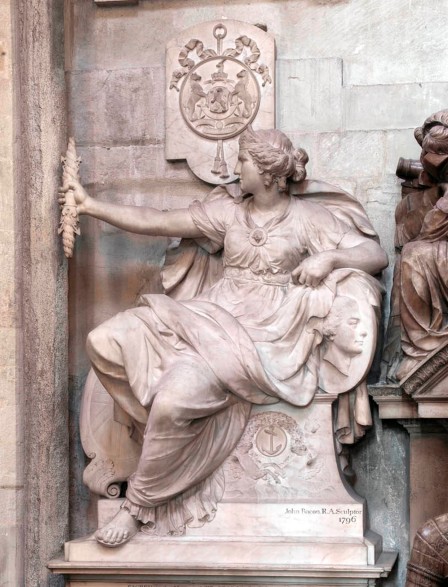


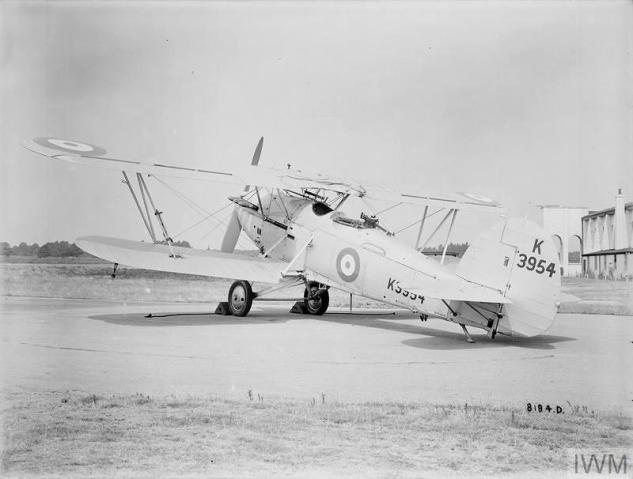


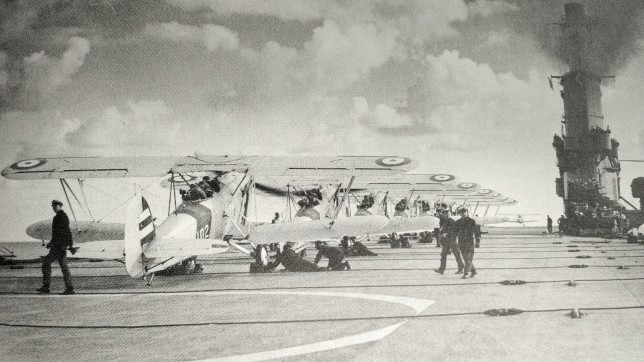


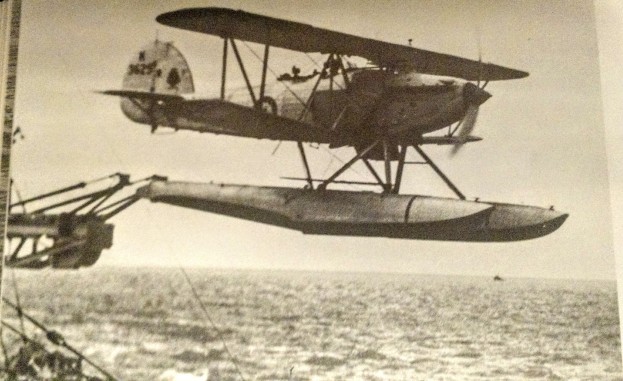

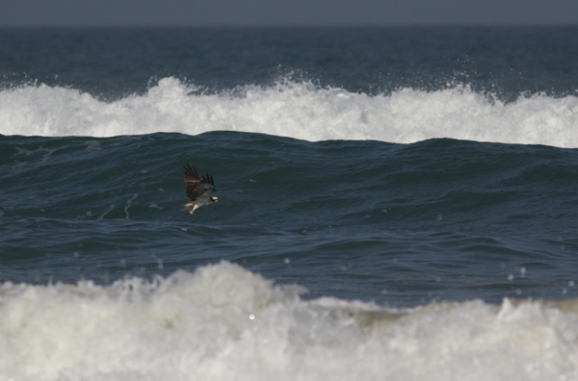
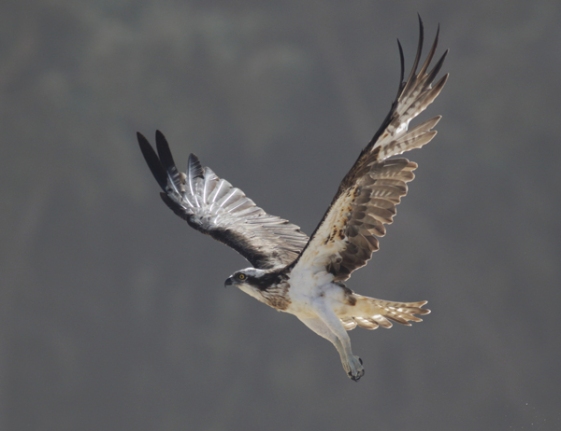


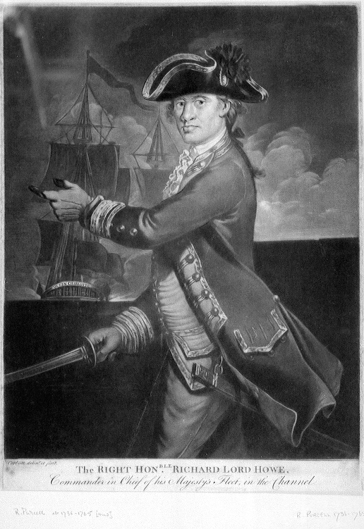


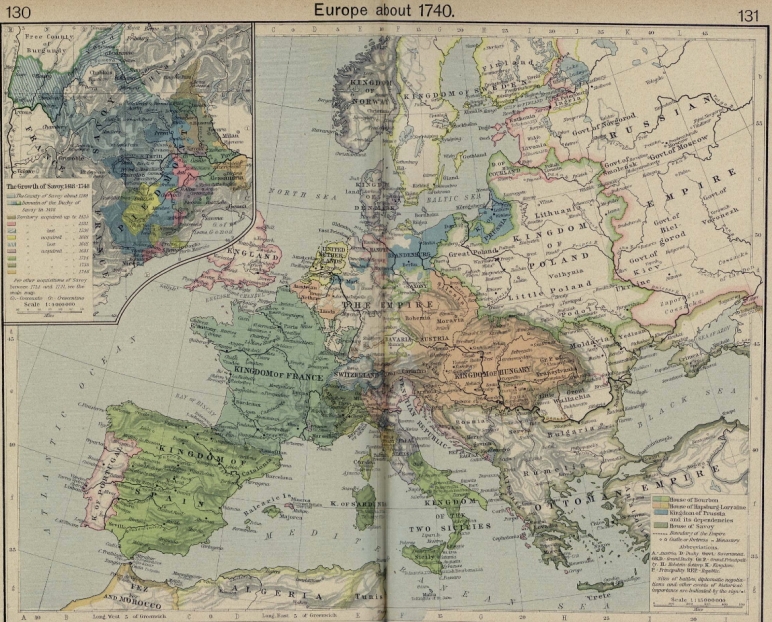

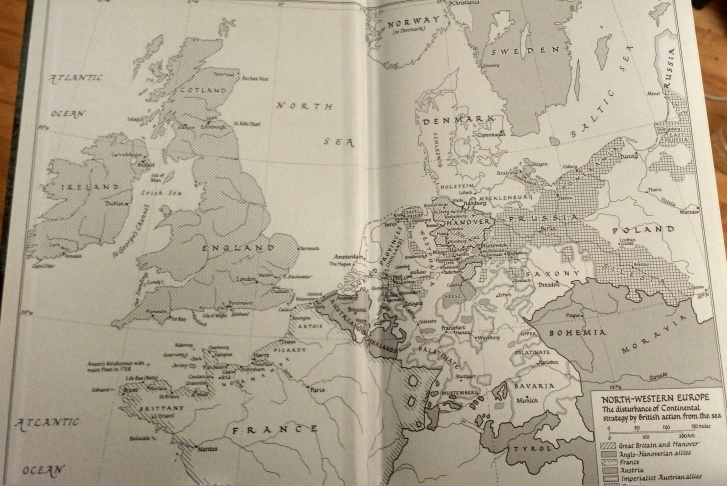


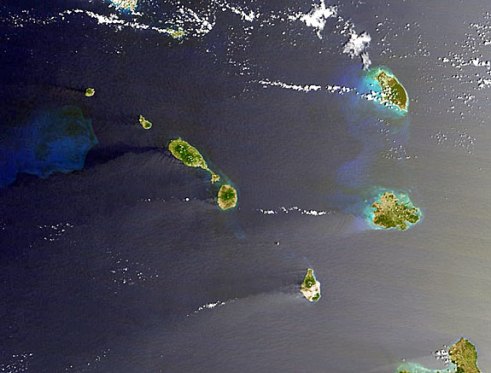


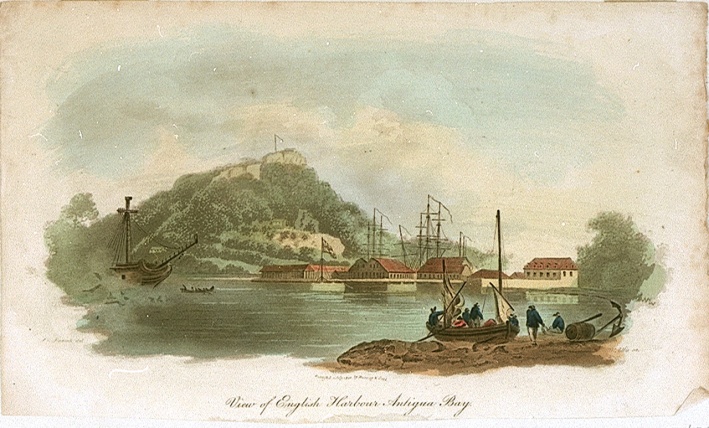


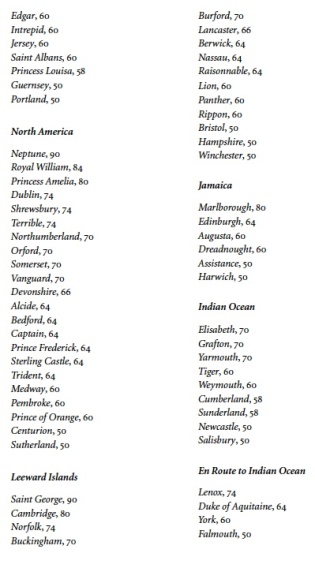


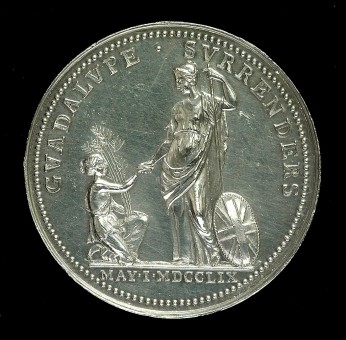


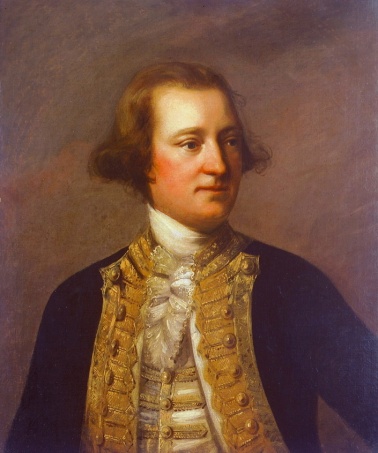

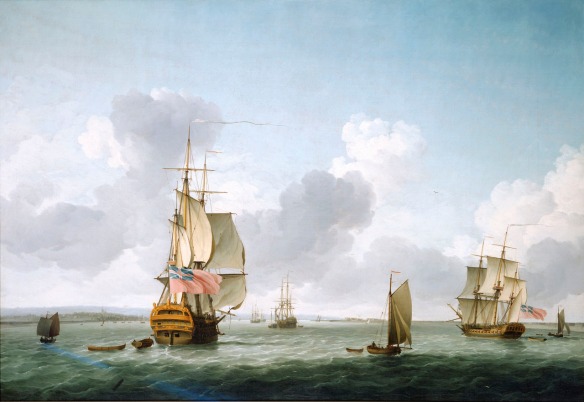


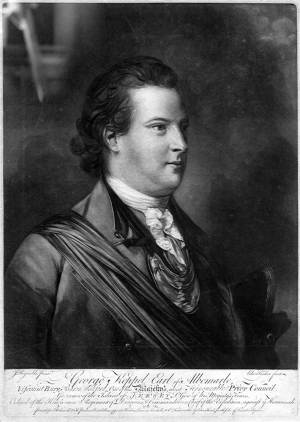


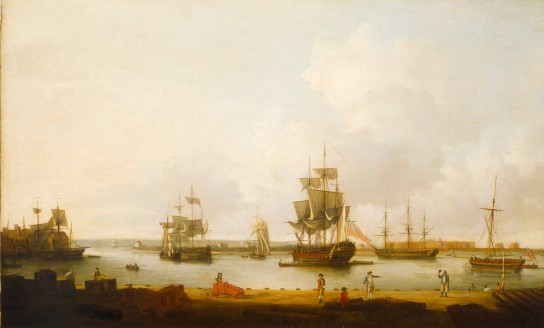


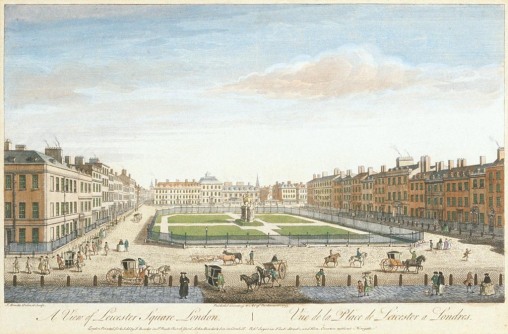


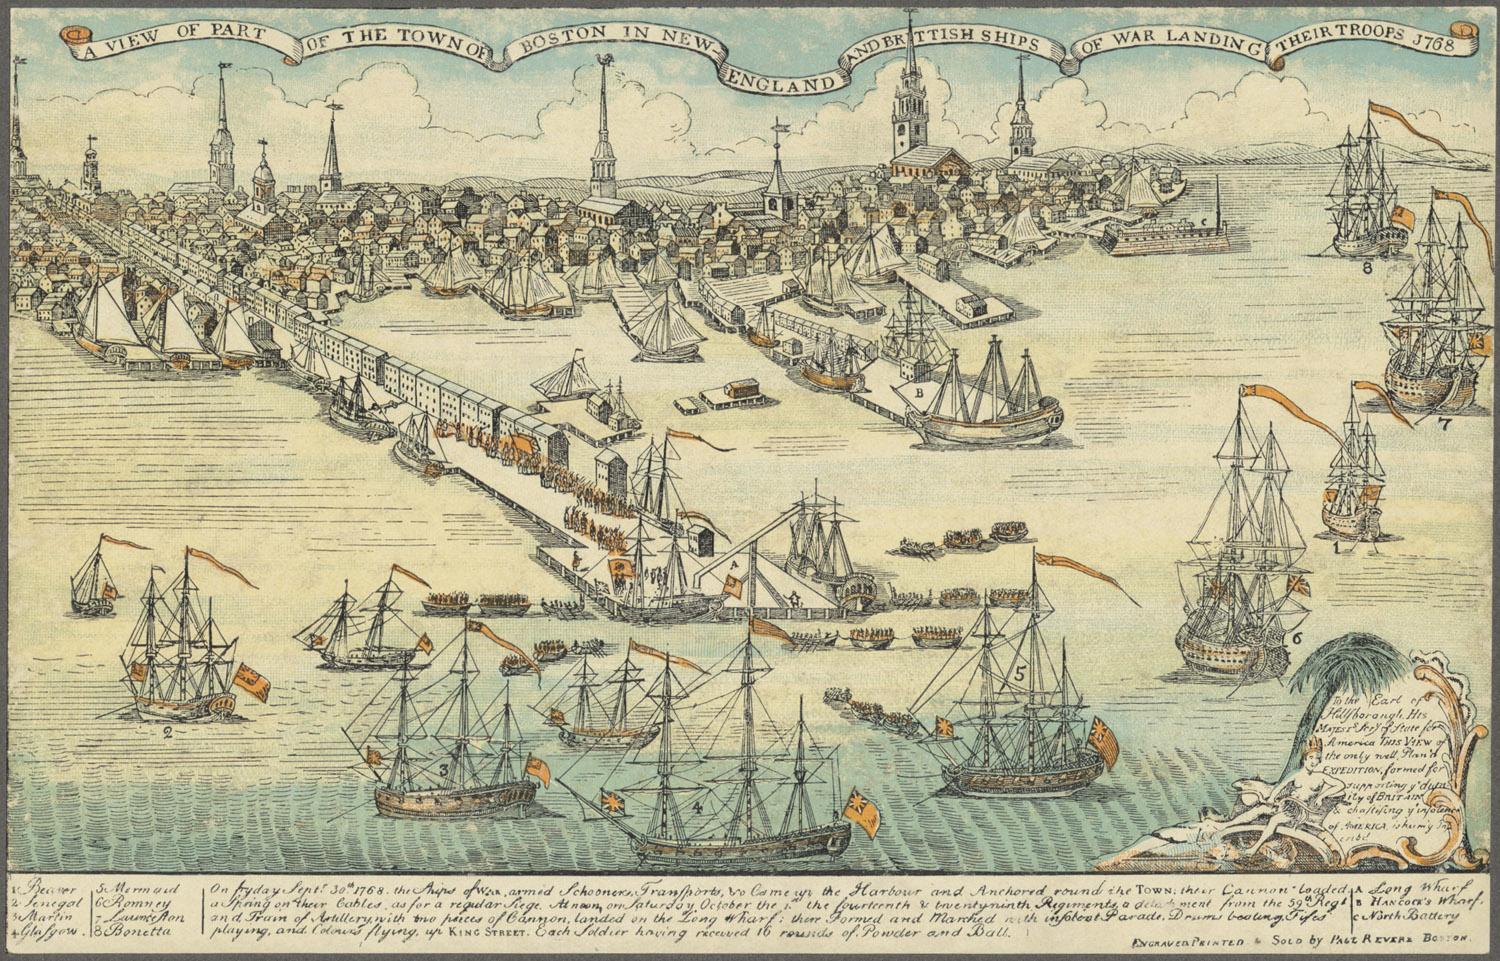


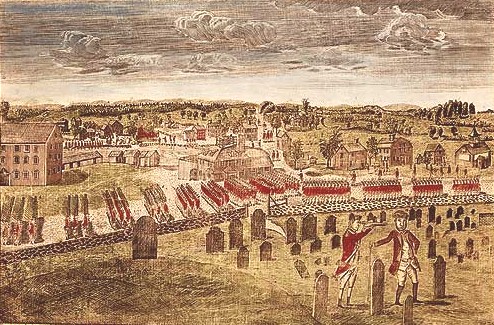

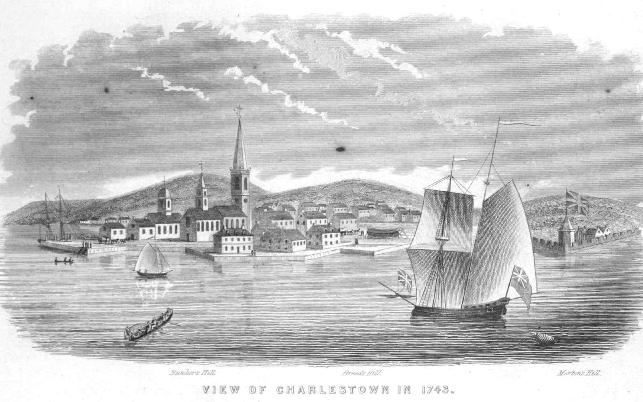
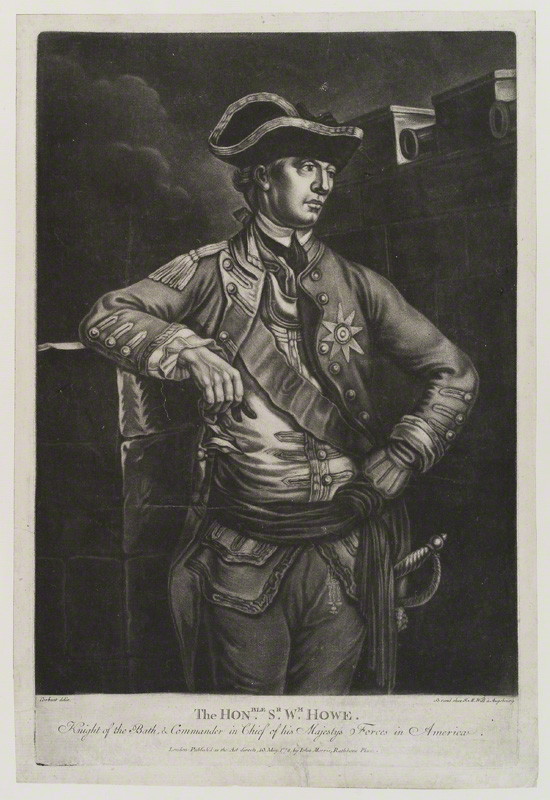


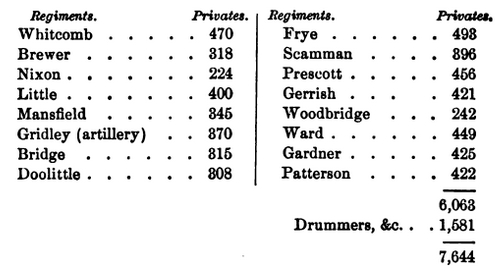
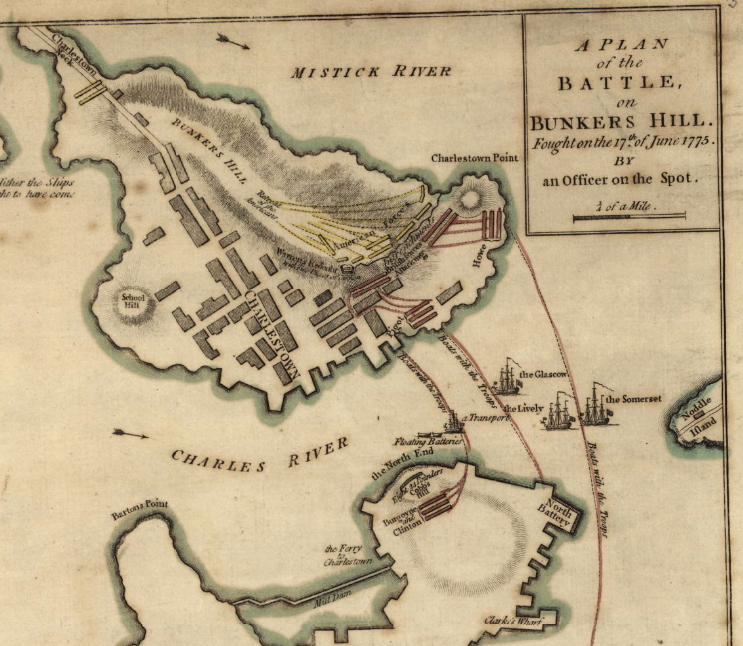
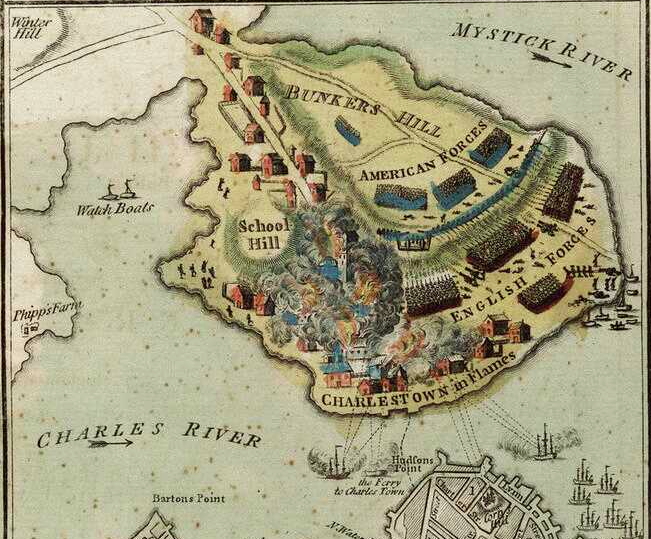
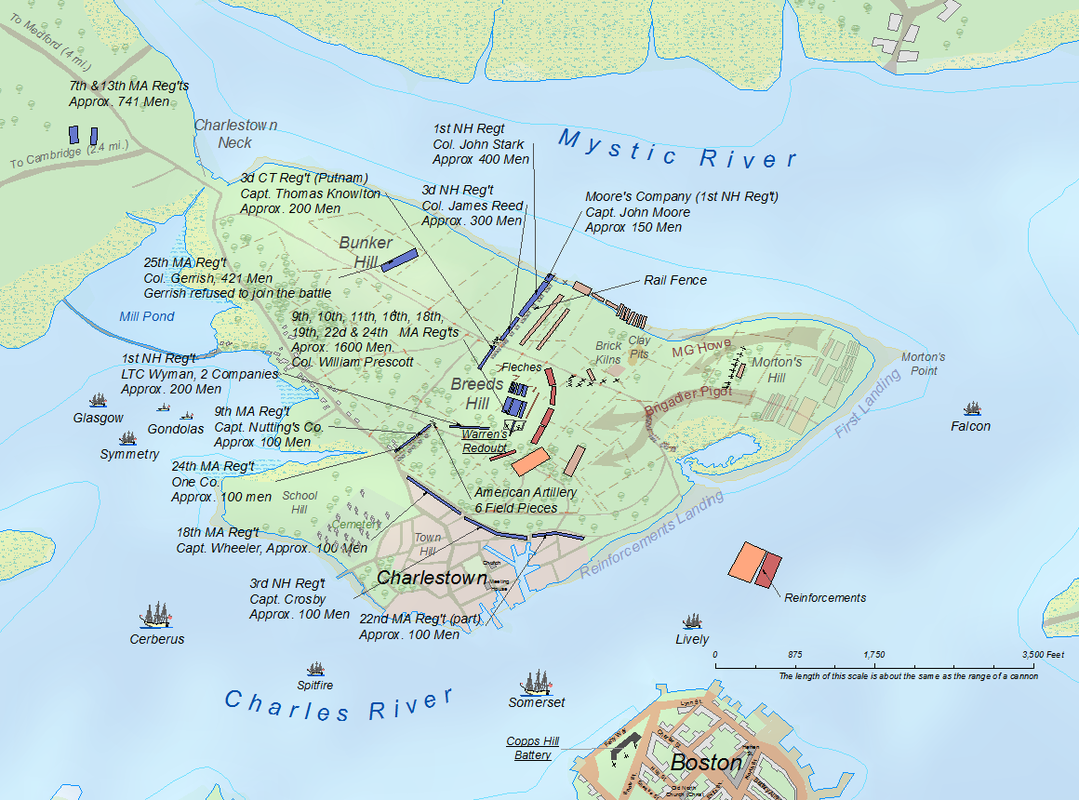
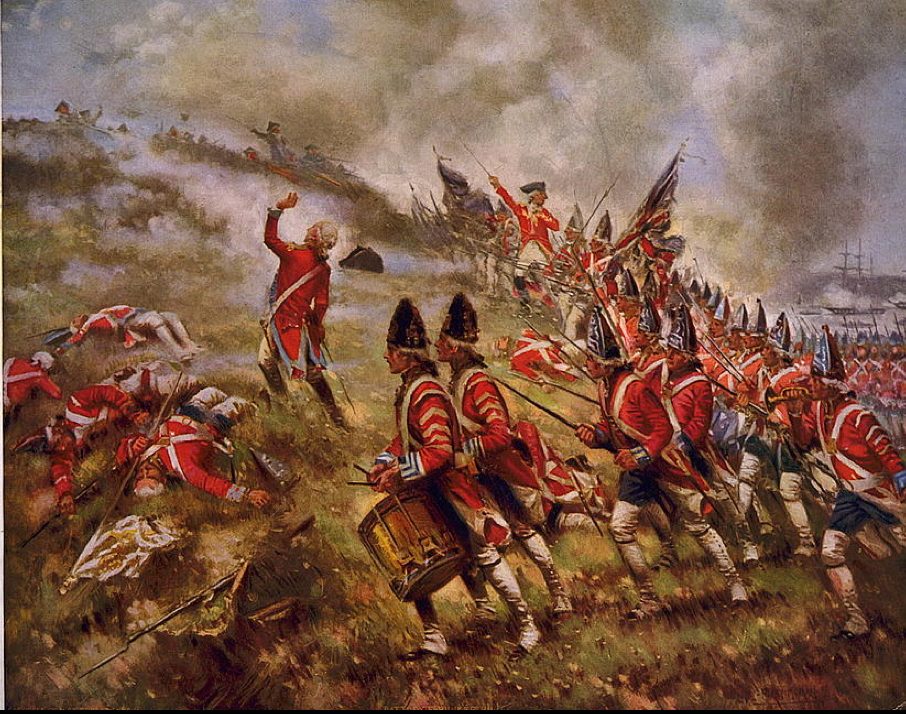
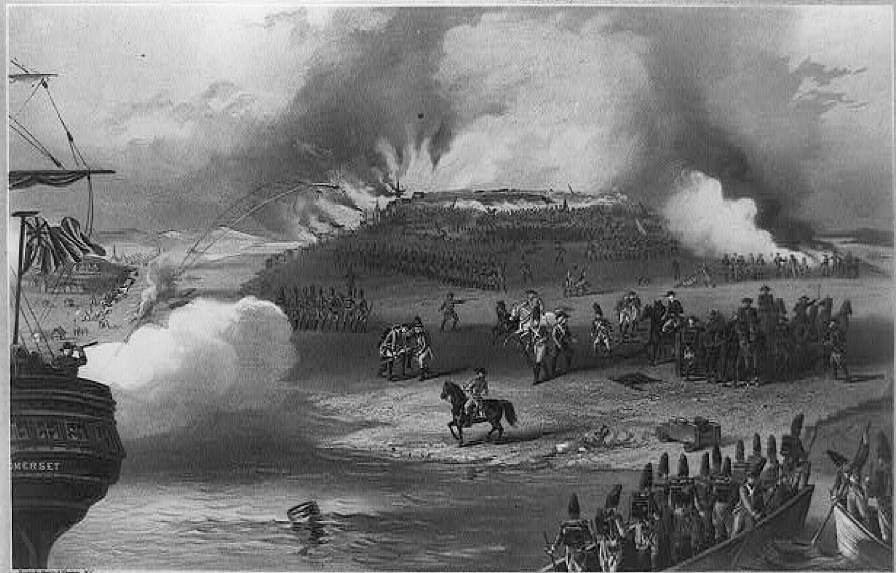
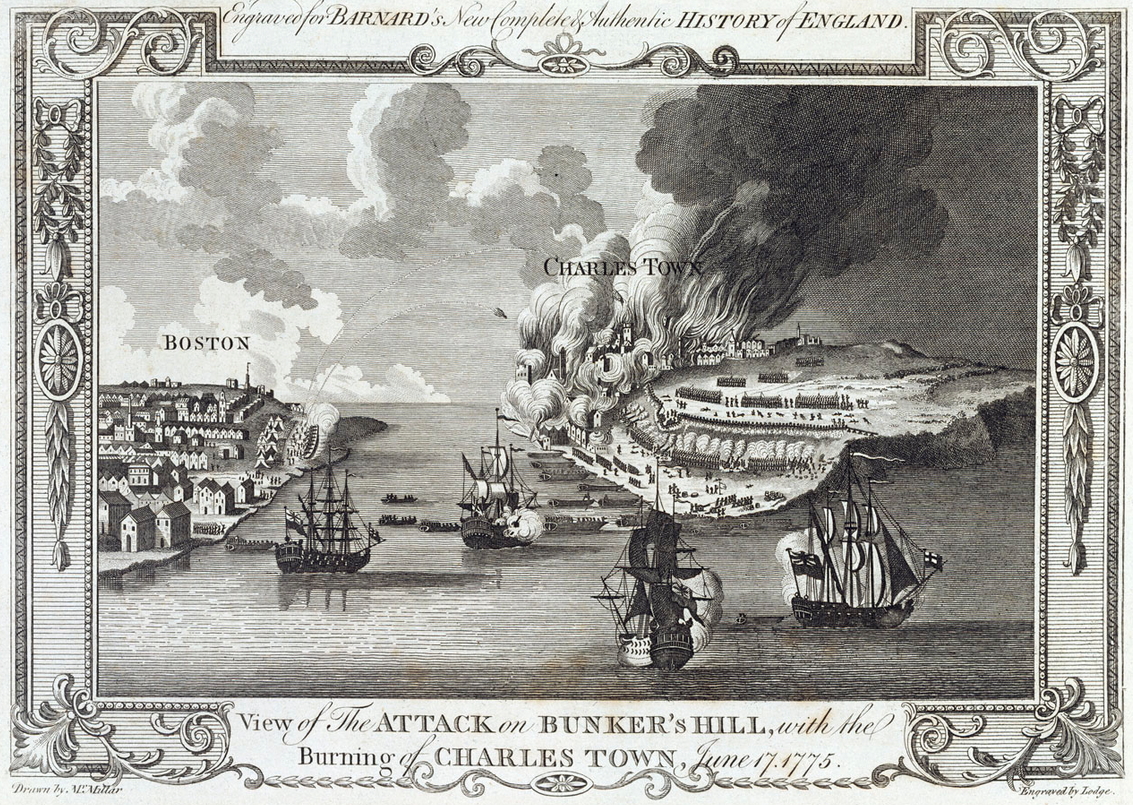
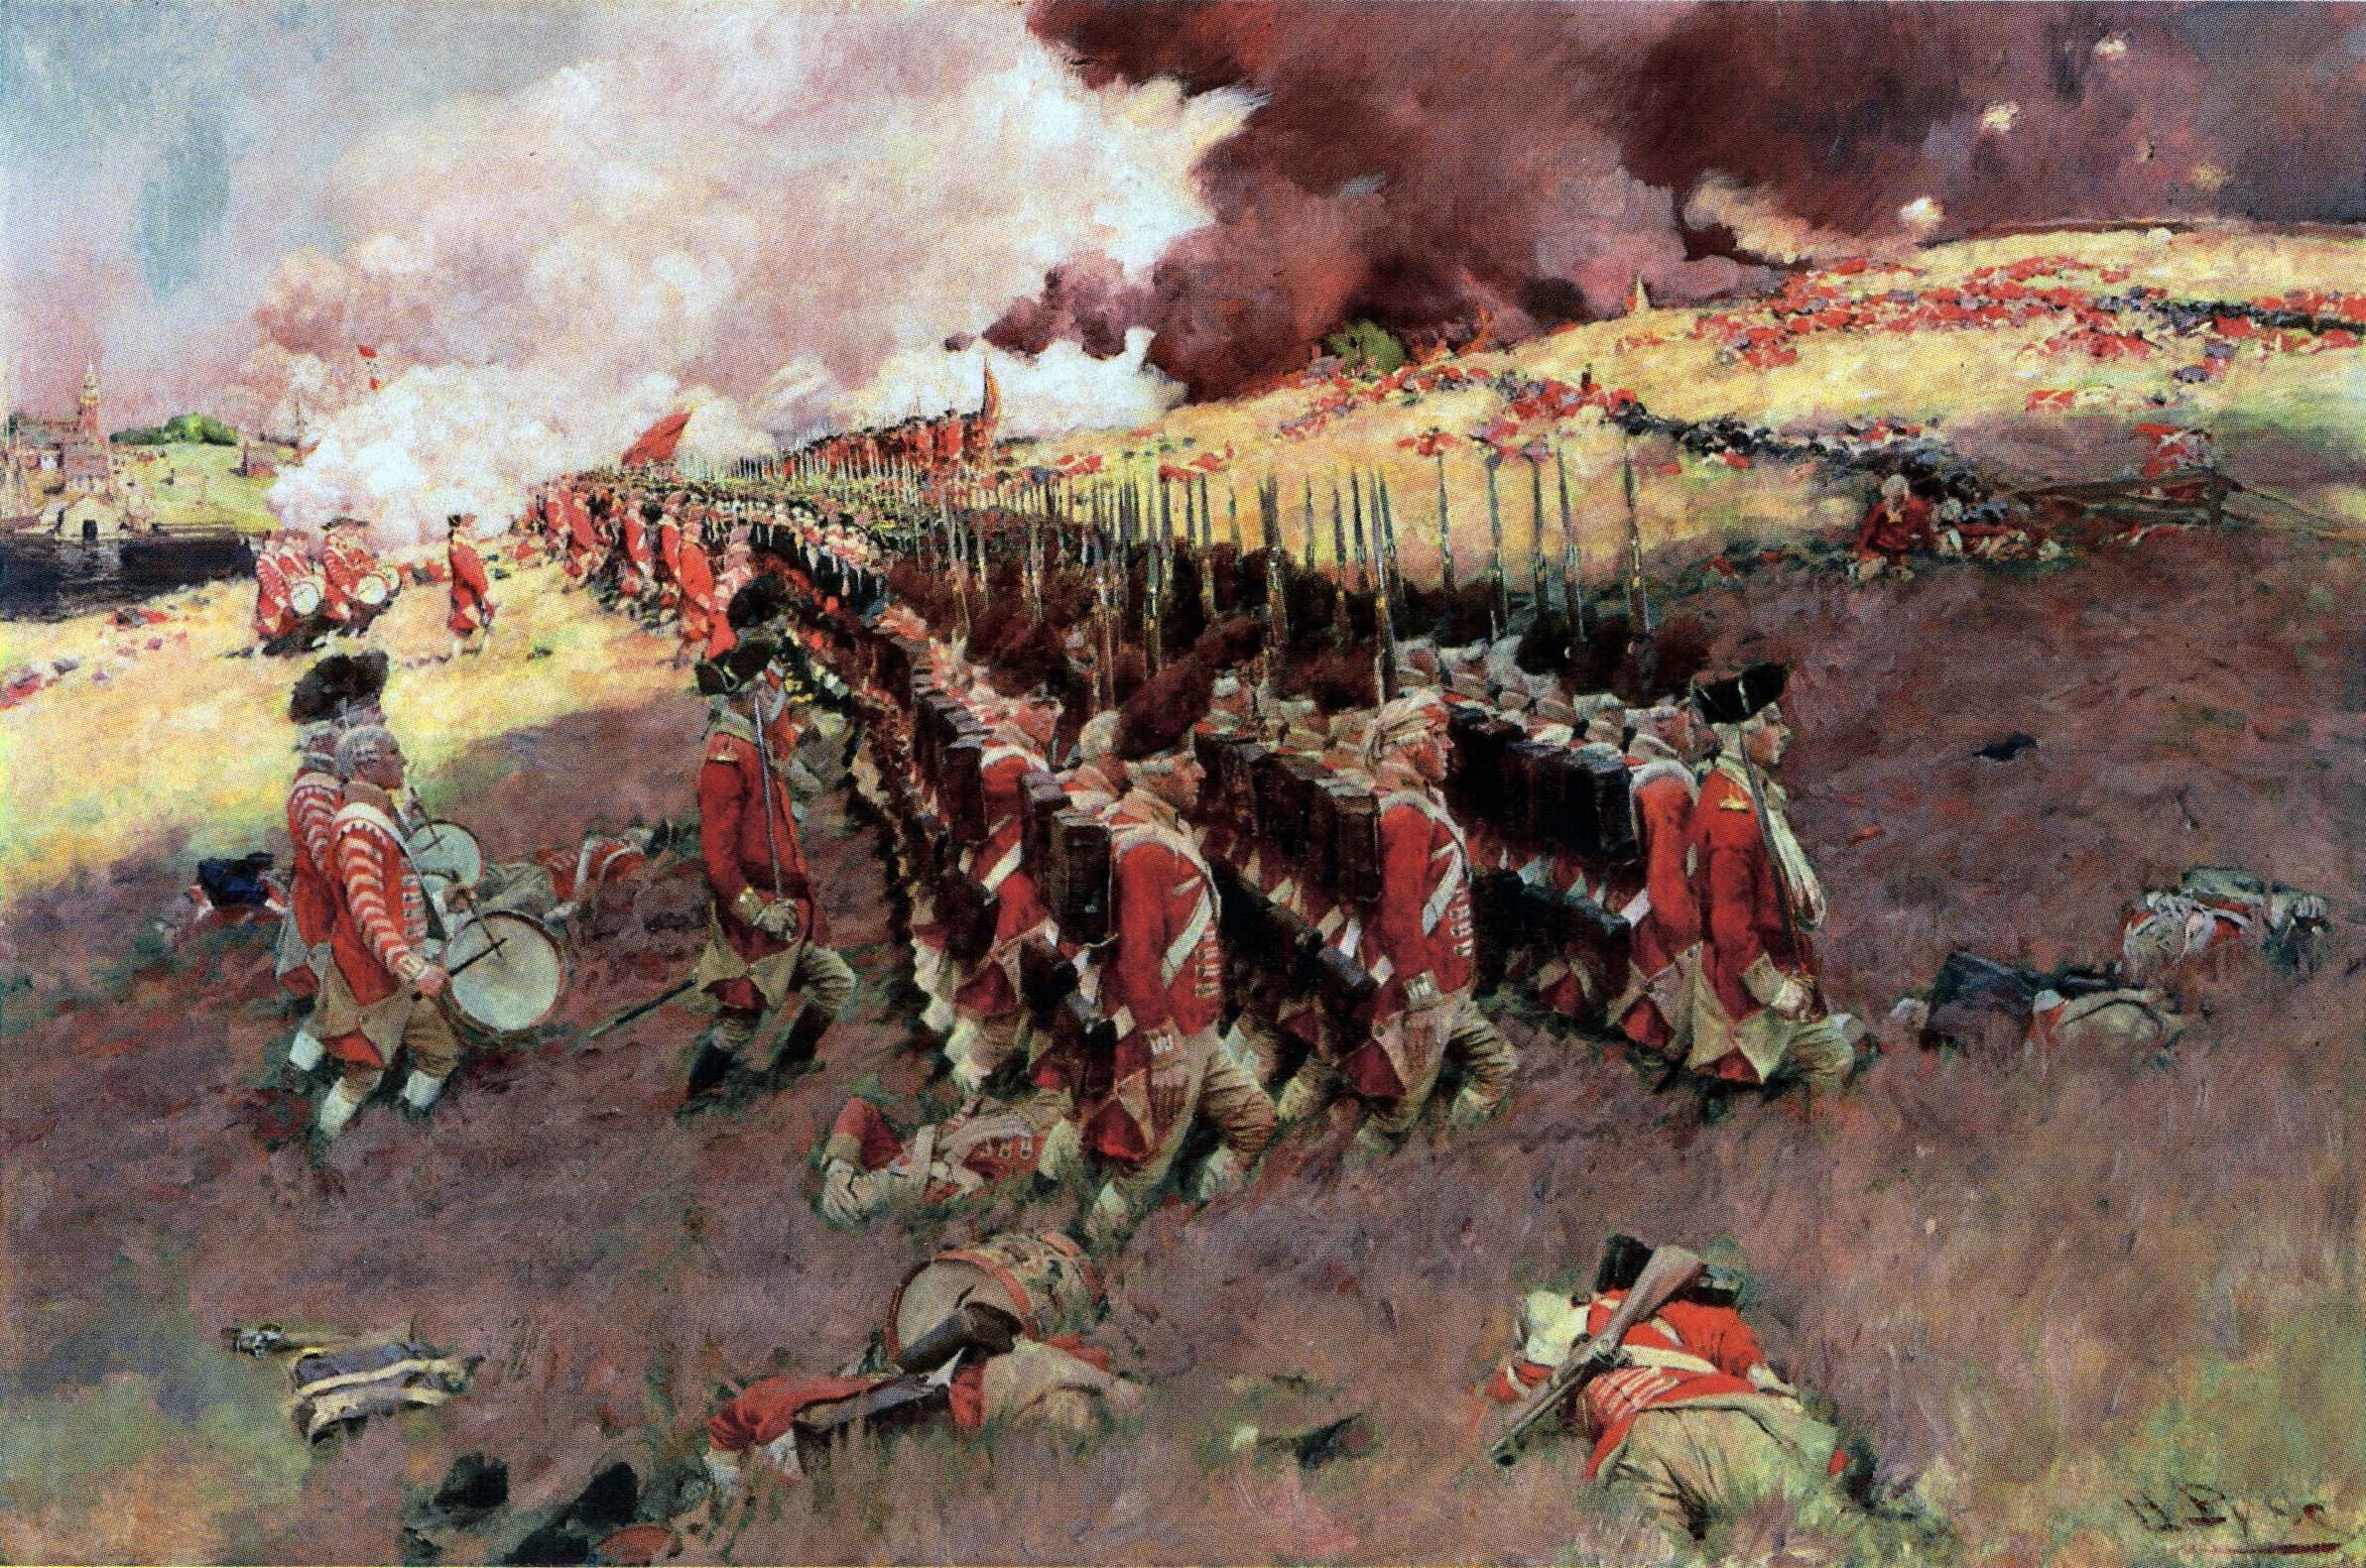

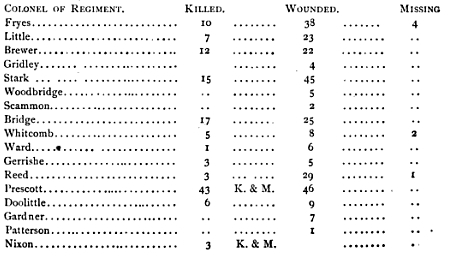


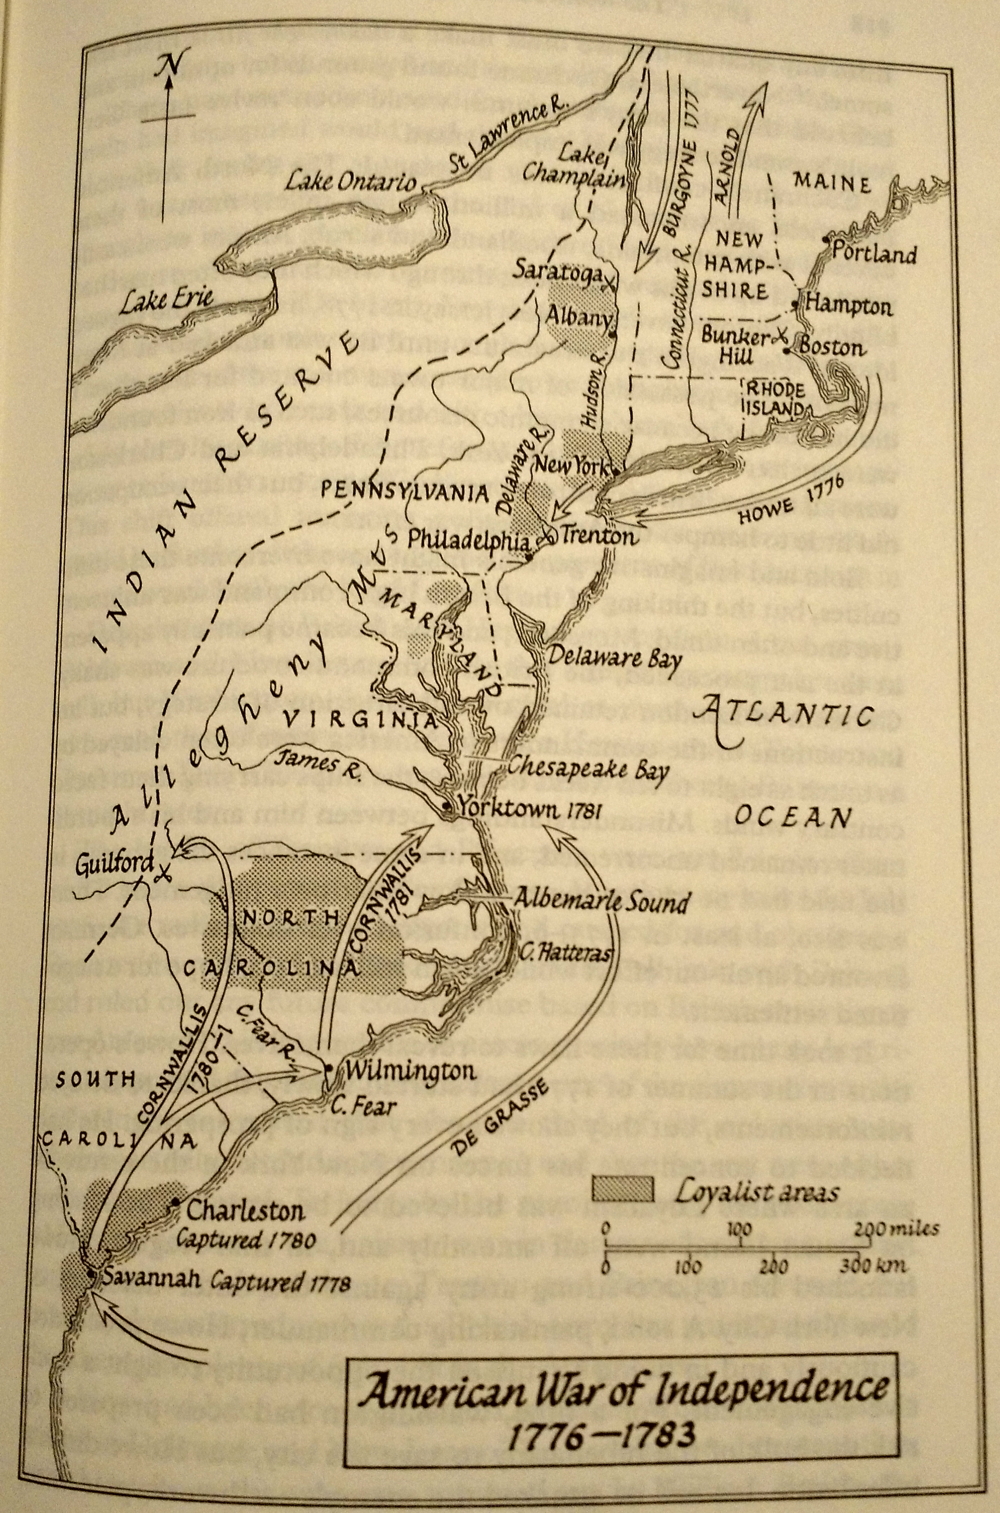
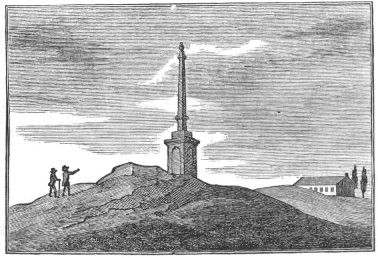

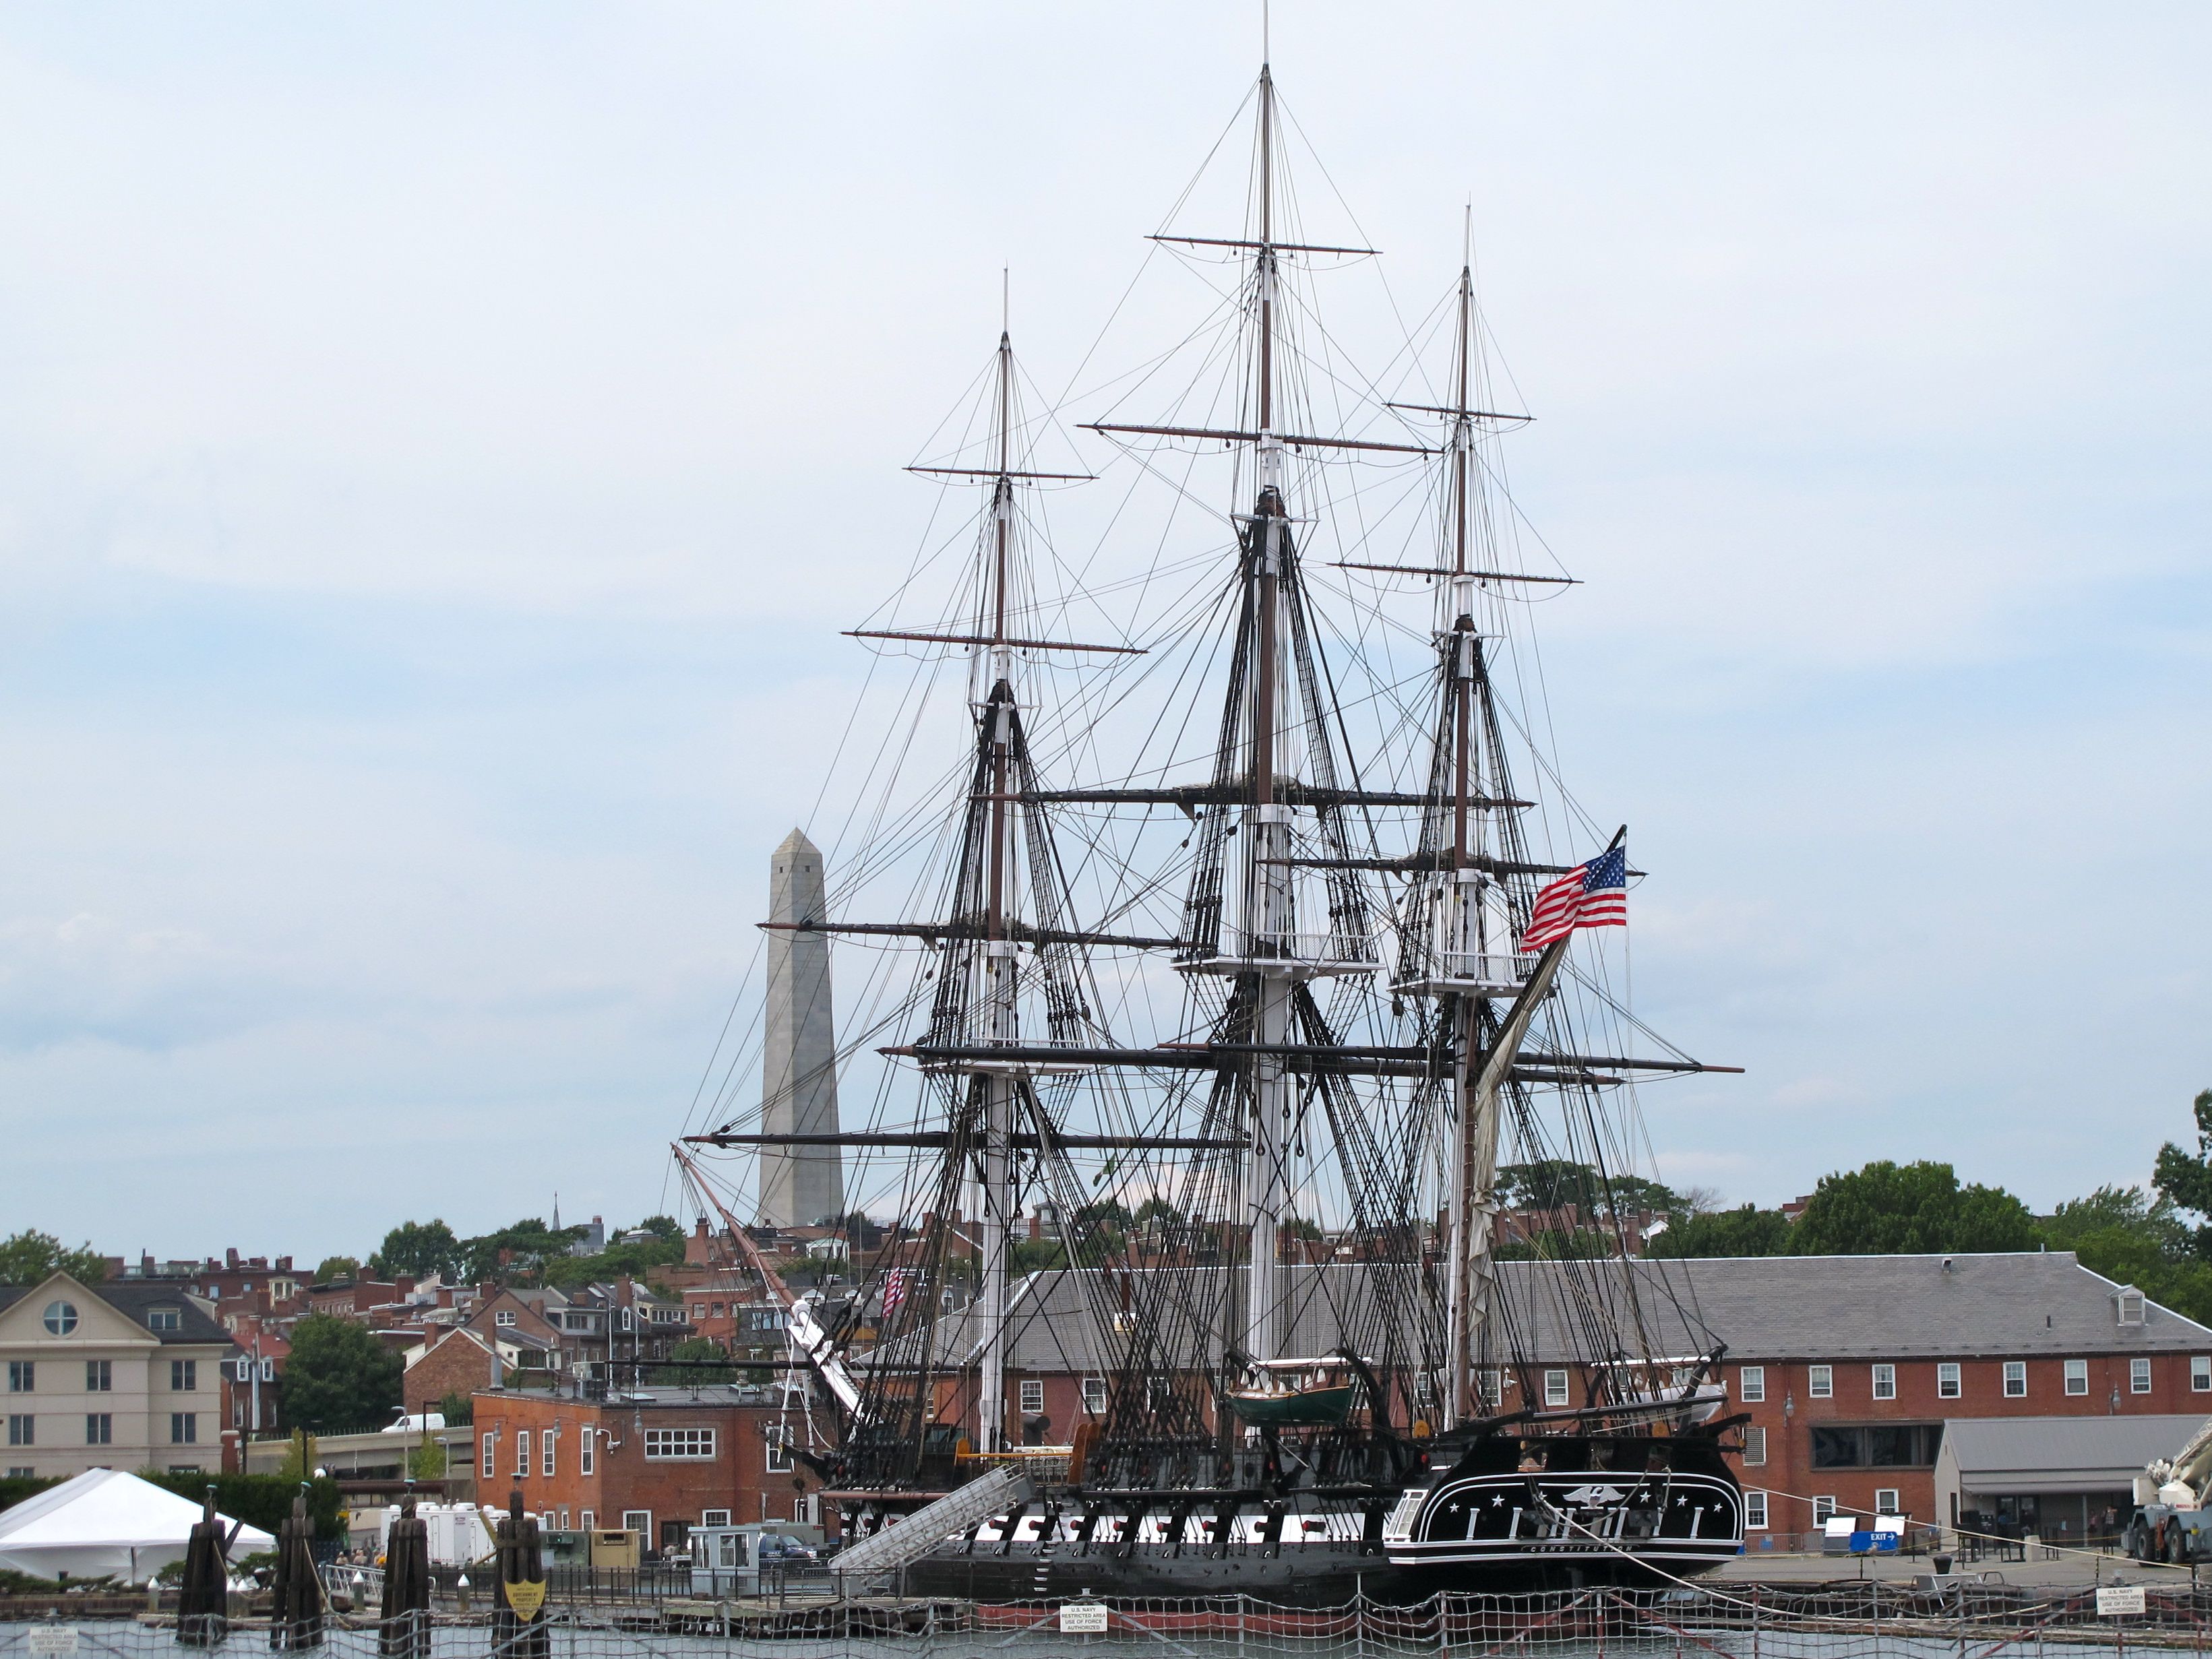


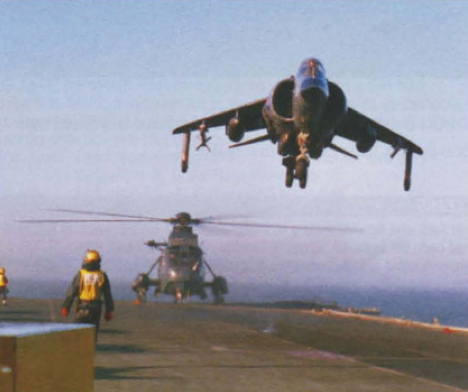


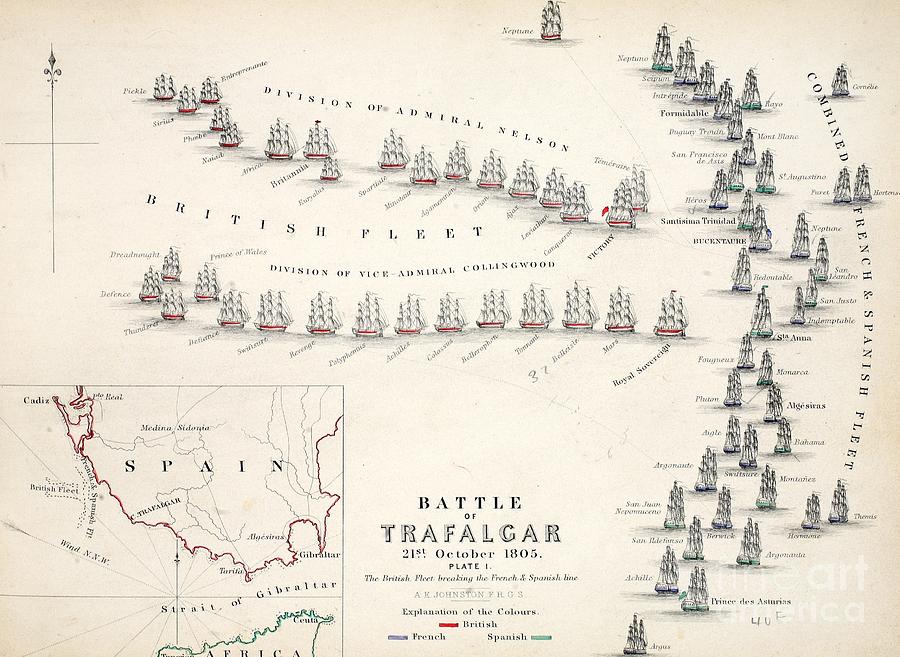
#/media/File:Death_of_Nelson.jpg)
#/media/File:Engelske_fl%C3%A5de_ud_for_K%C3%B8benhavn_august_1807.jpg)
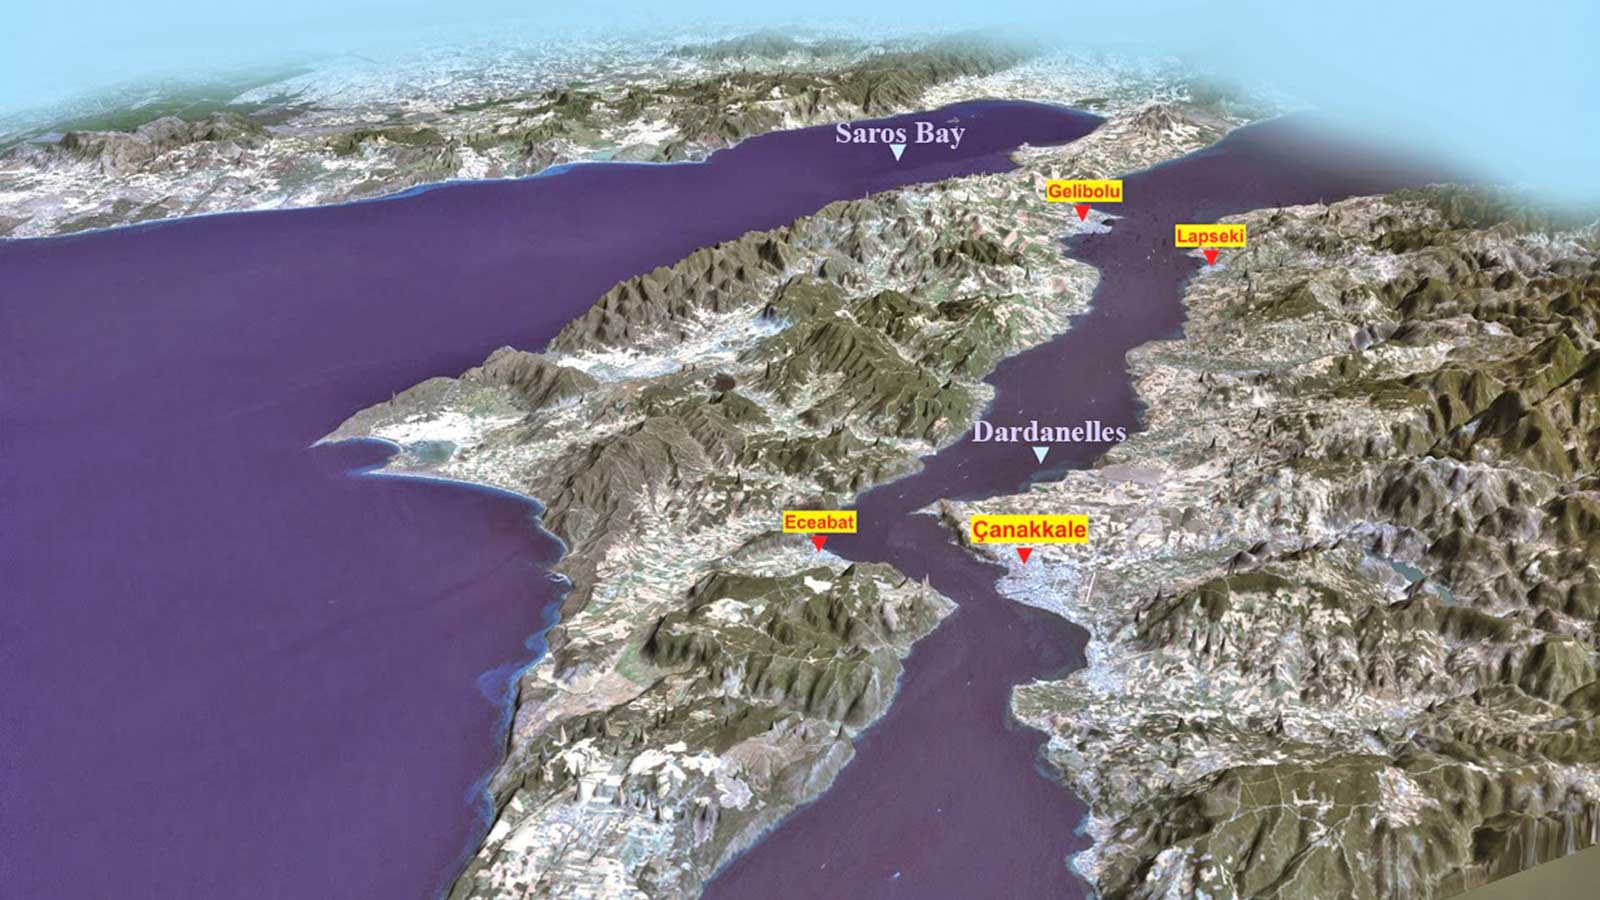
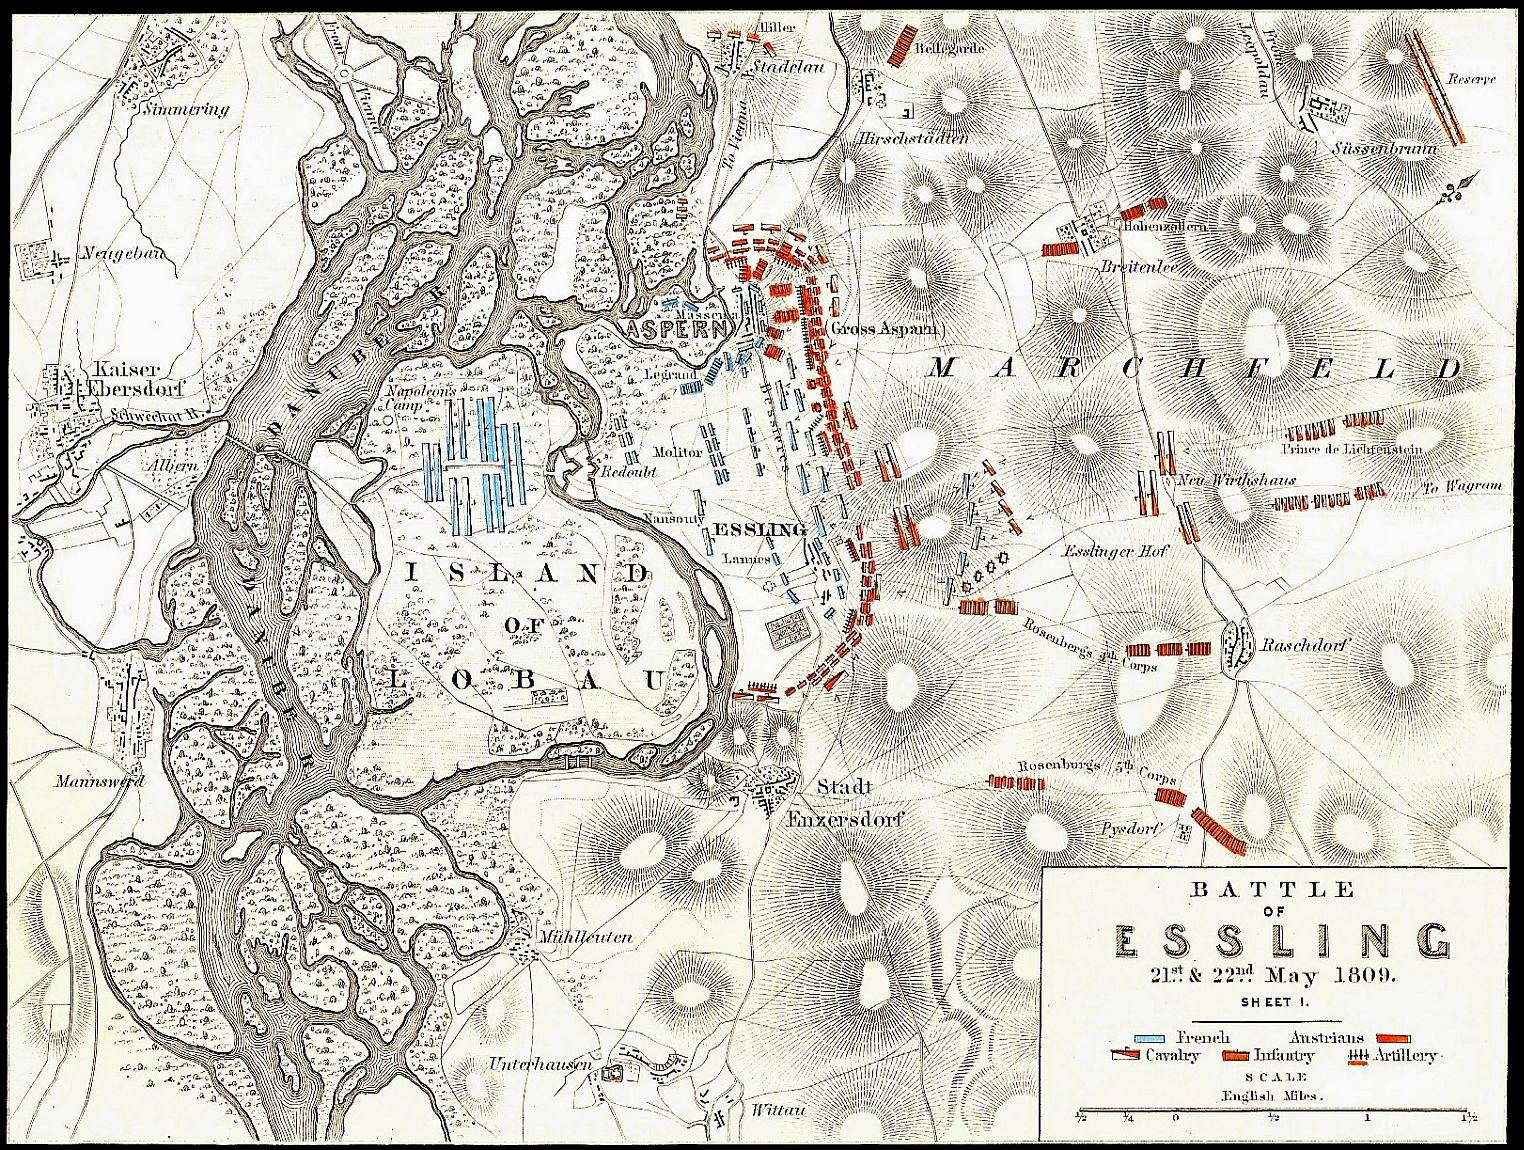
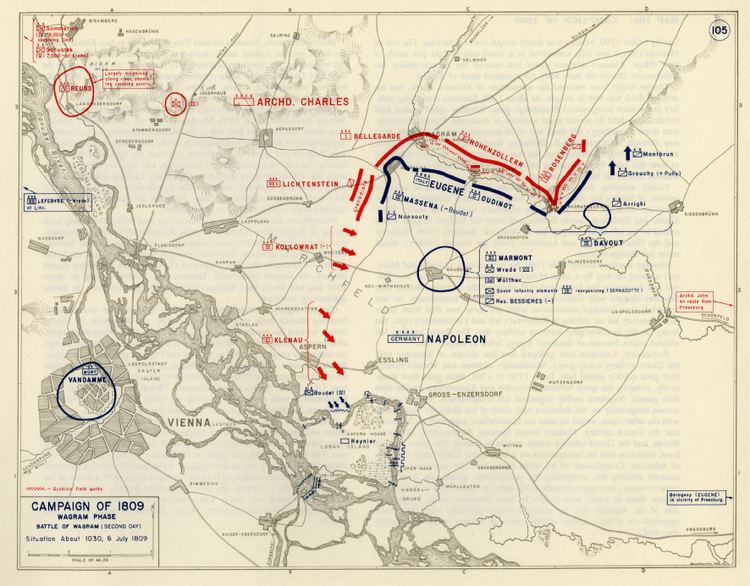
#/media/File:Sir_Eyre_Coote_(born_1762).jpg)
#/media/File:Maluku_in_Indonesia.svg)
.jpg)
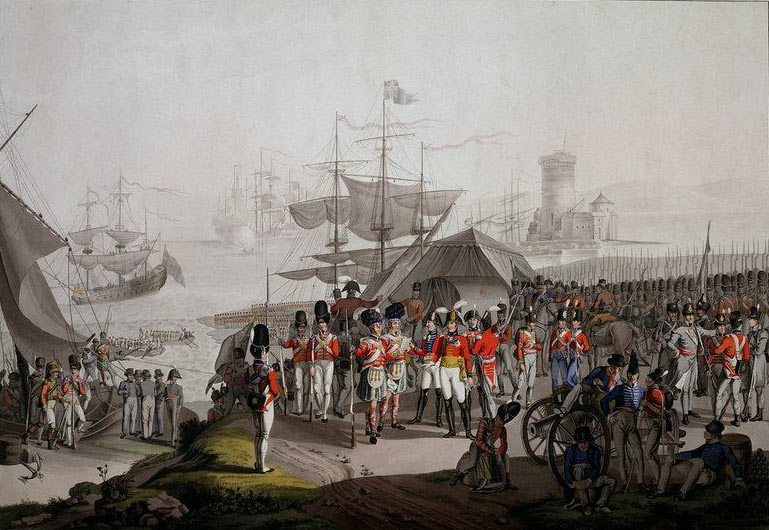
.jpg)
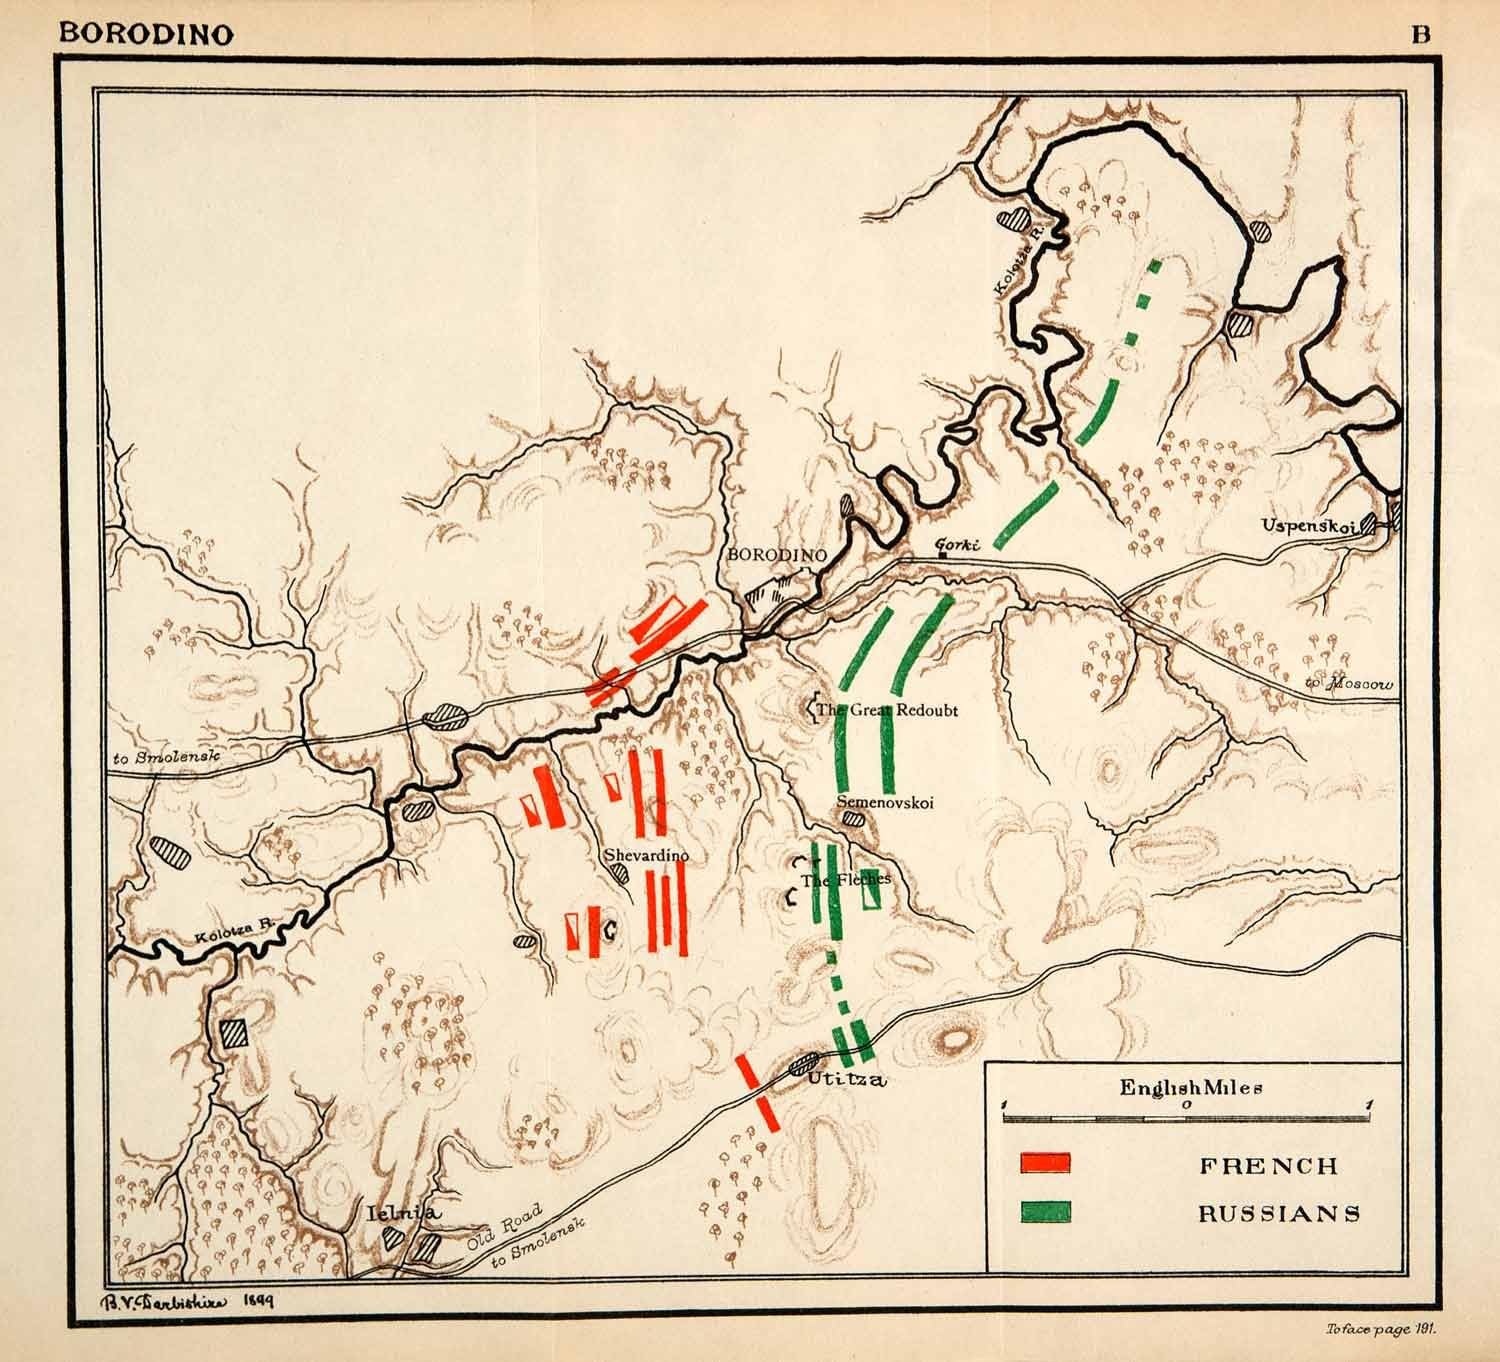
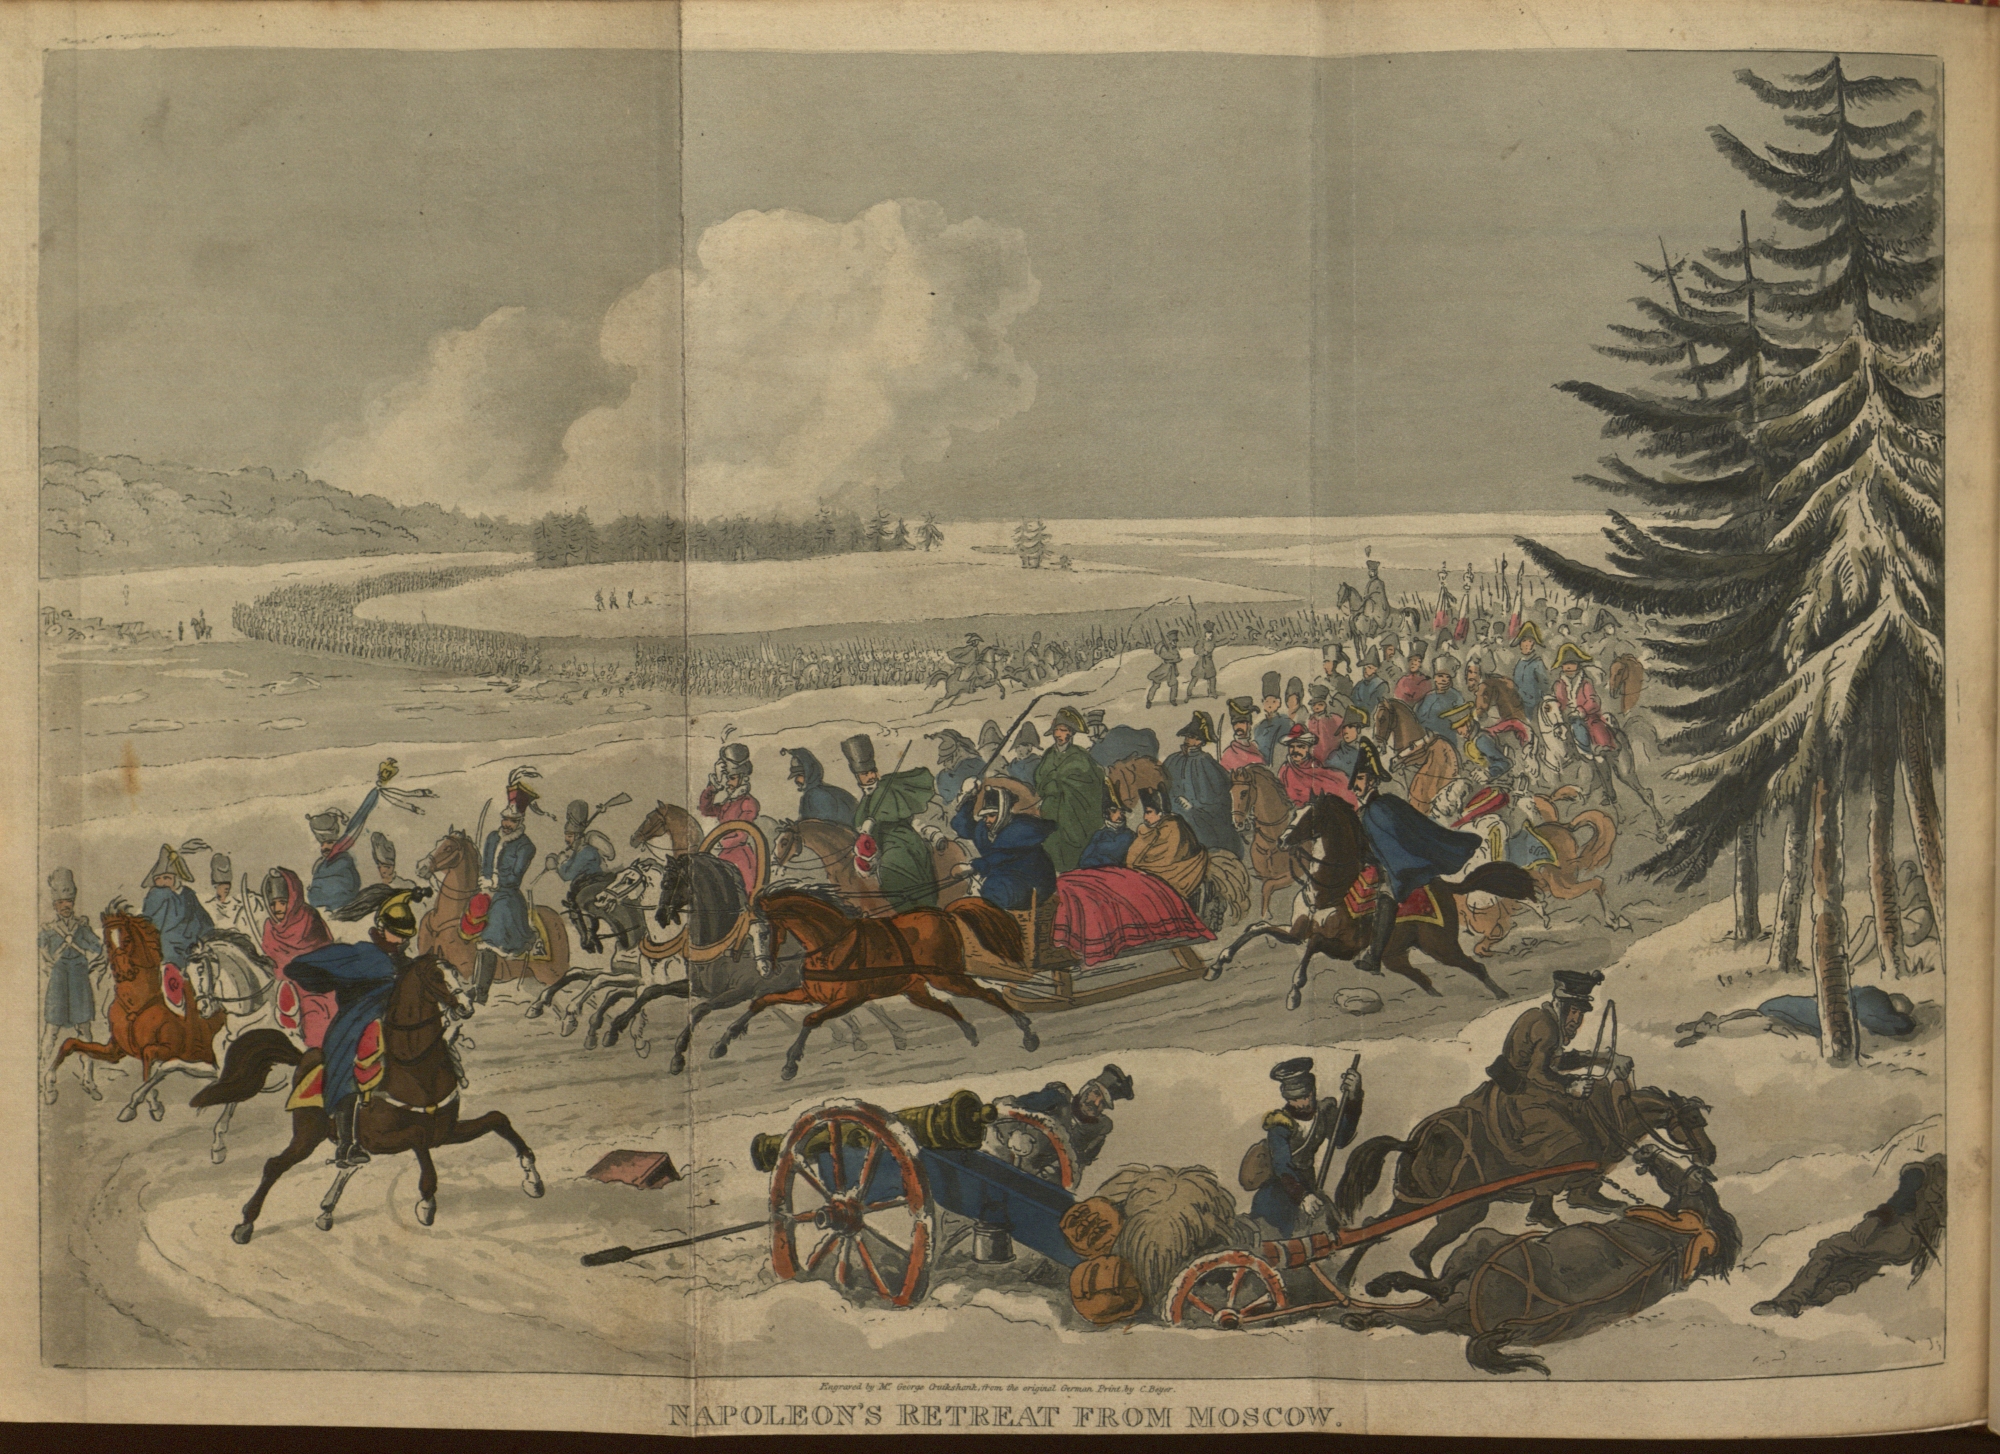
.jpg)
#/media/File:Nautilus_(1799).jpg)
.jpg)
.jpg)
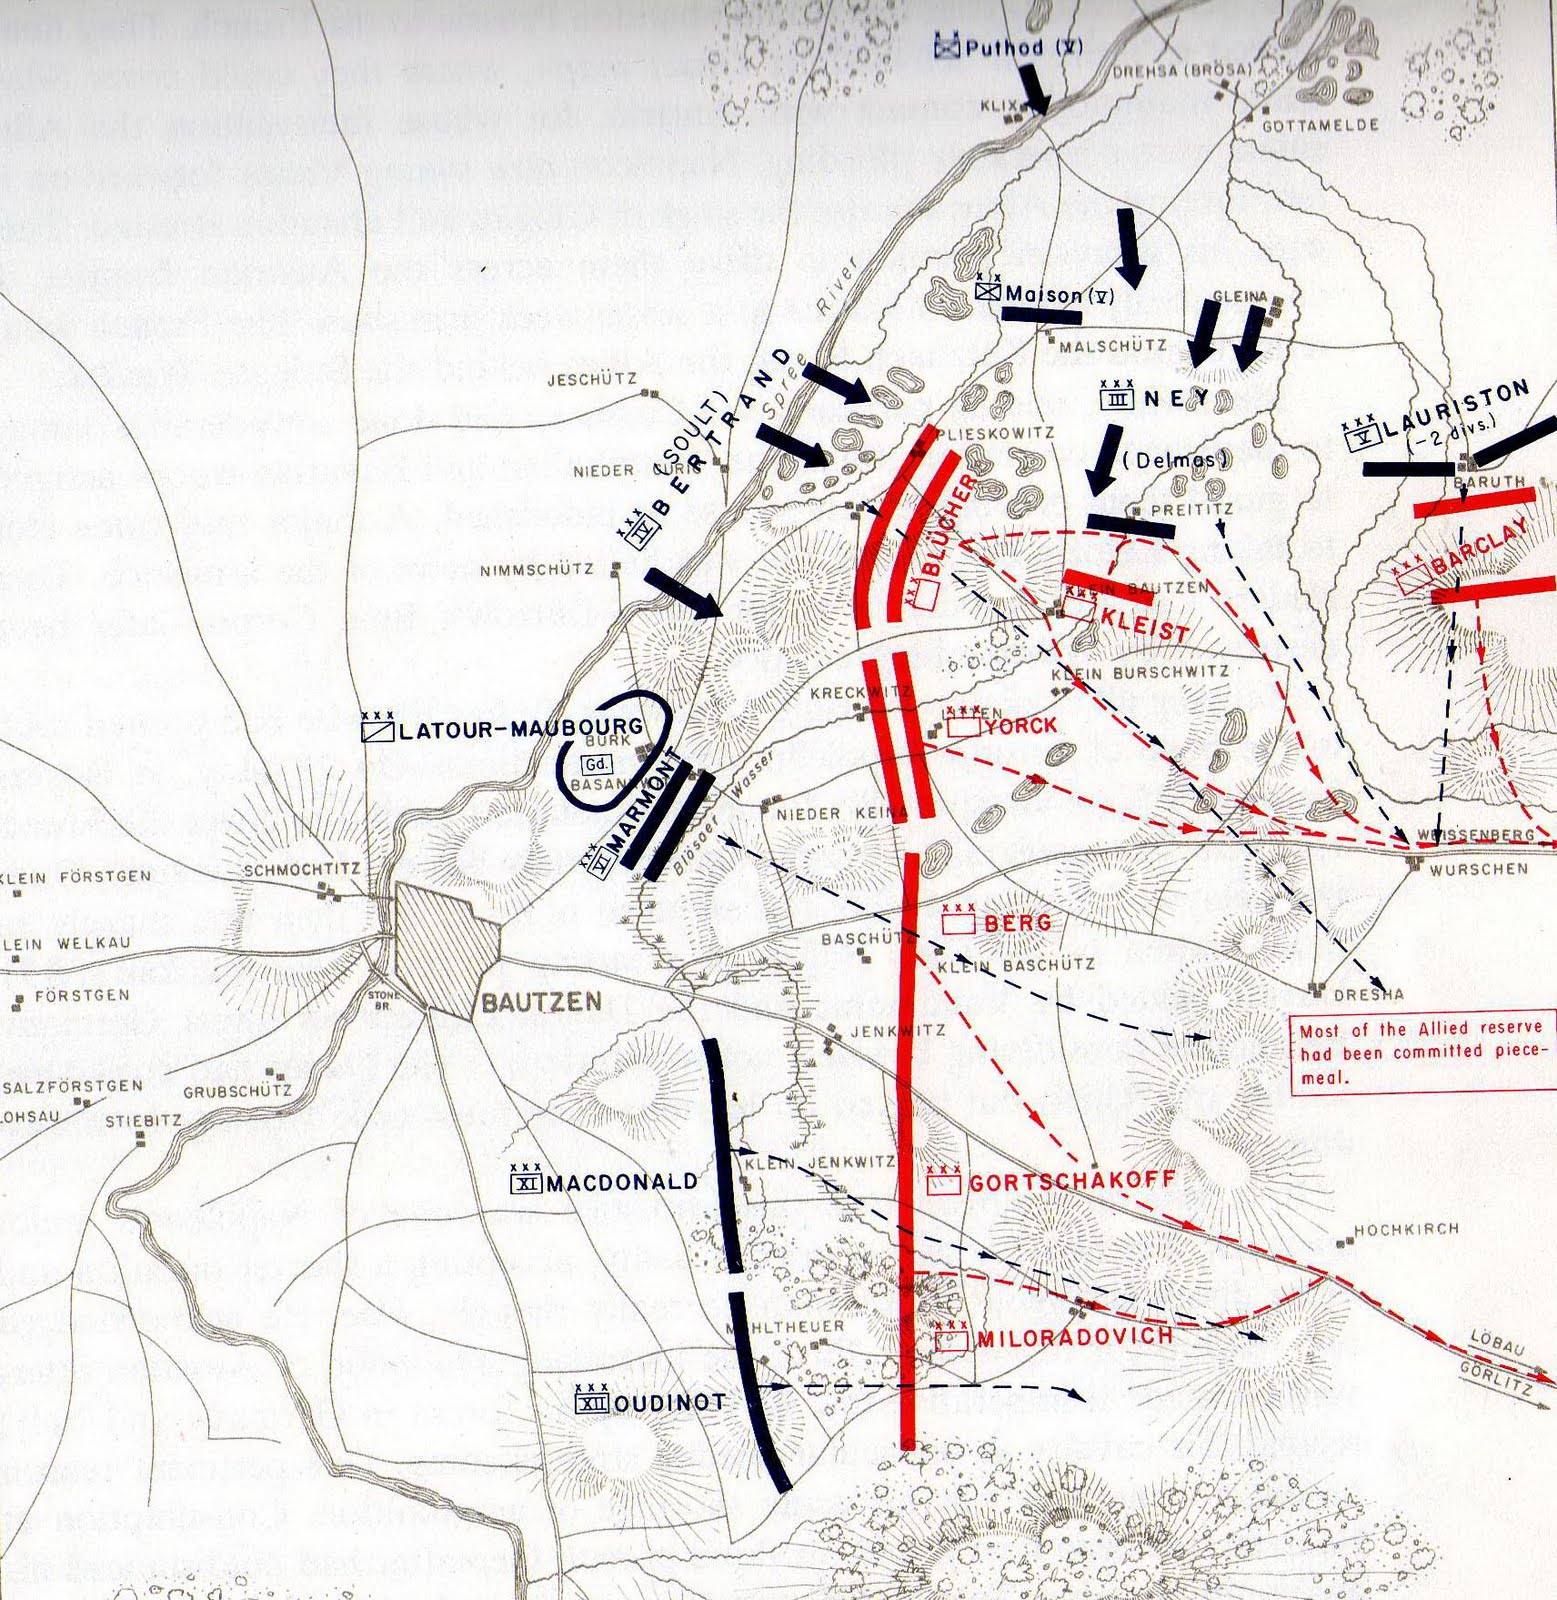
,_1818.jpg)
.jpg)
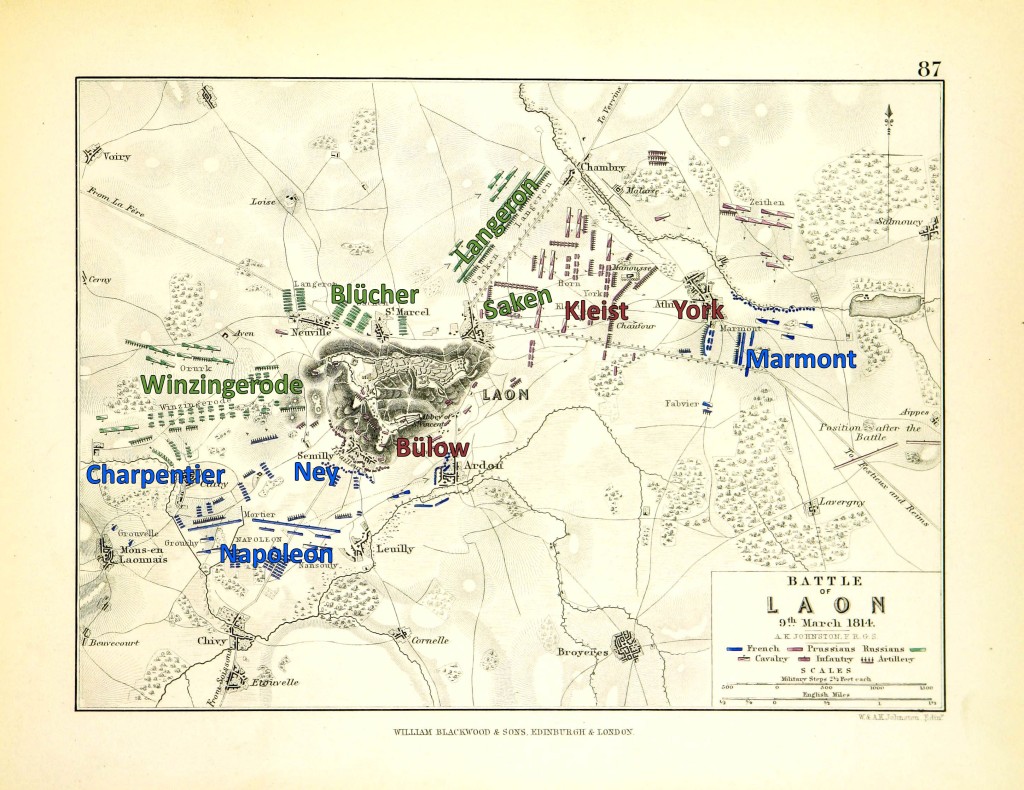
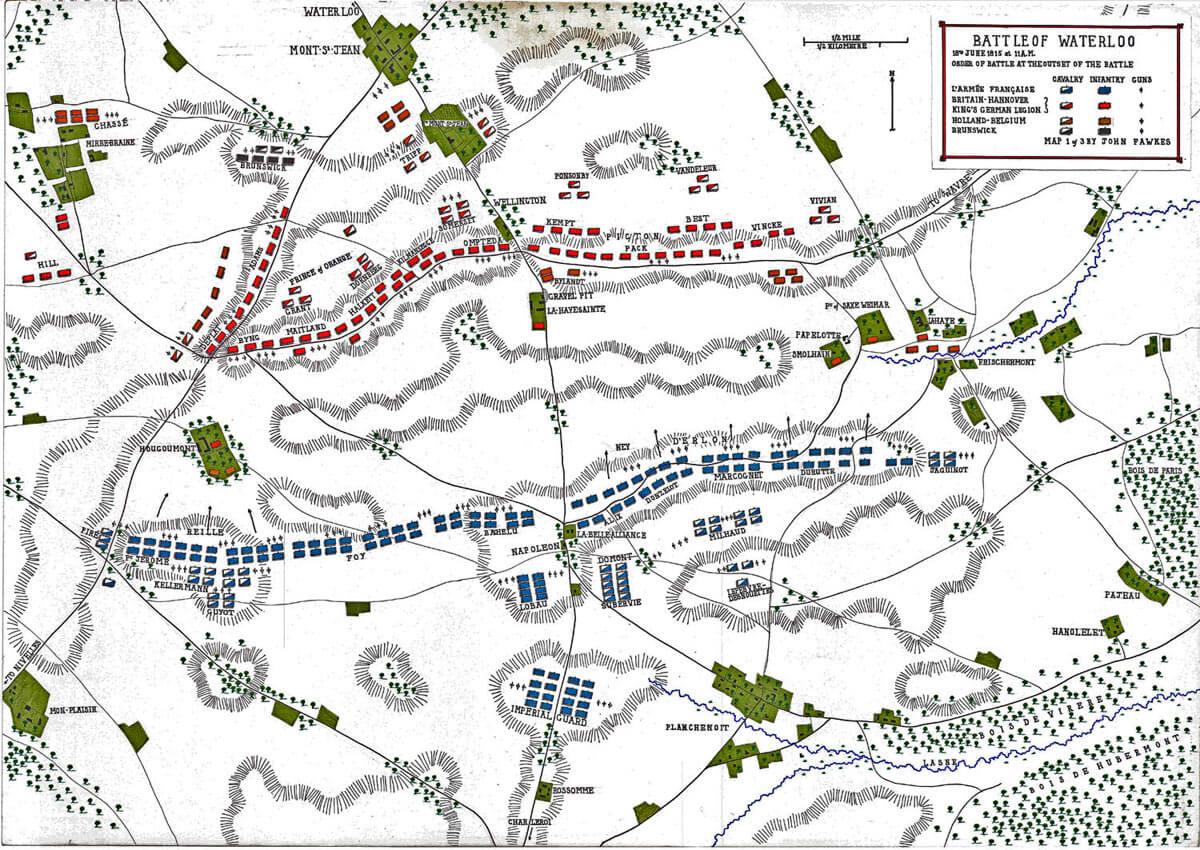
_(14596181448).jpg)
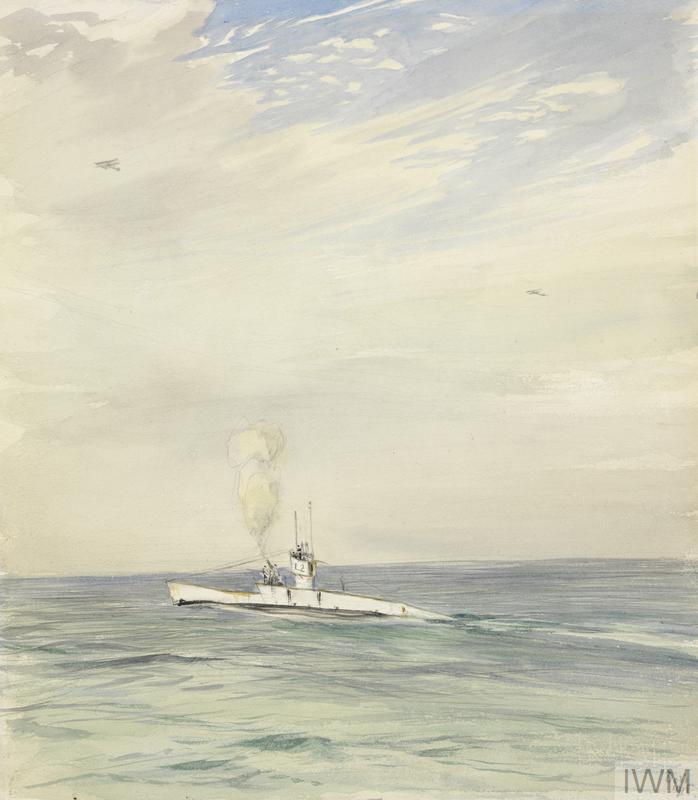
.jpg)
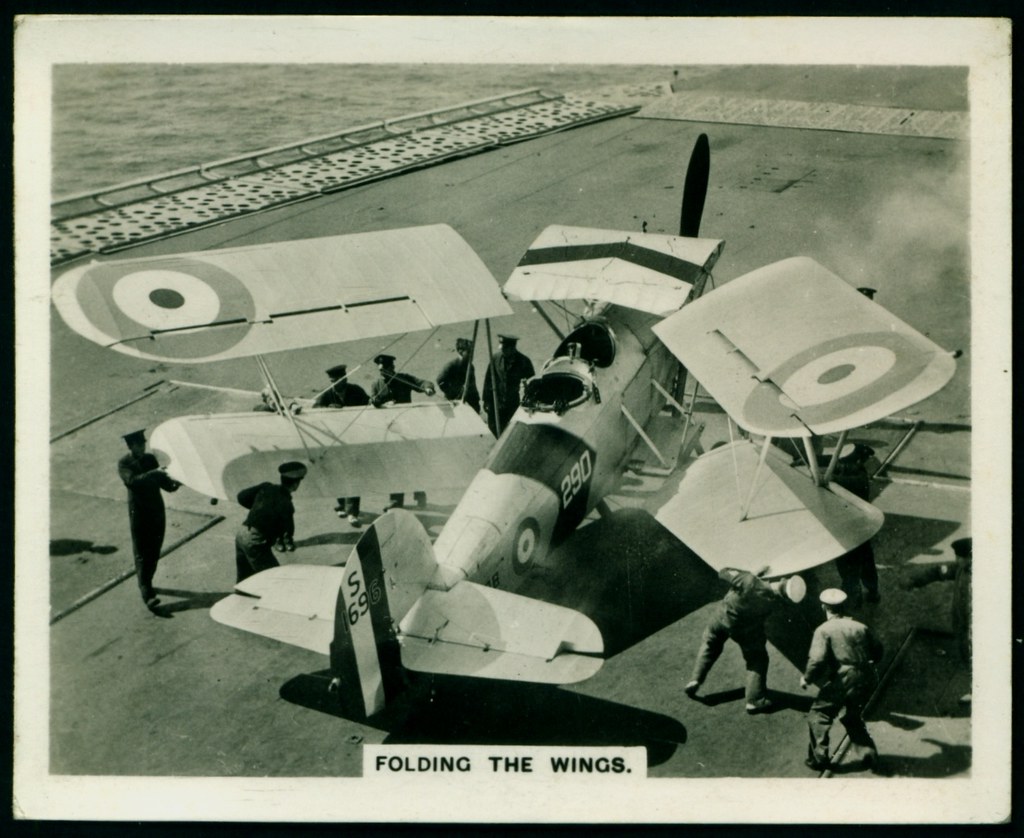
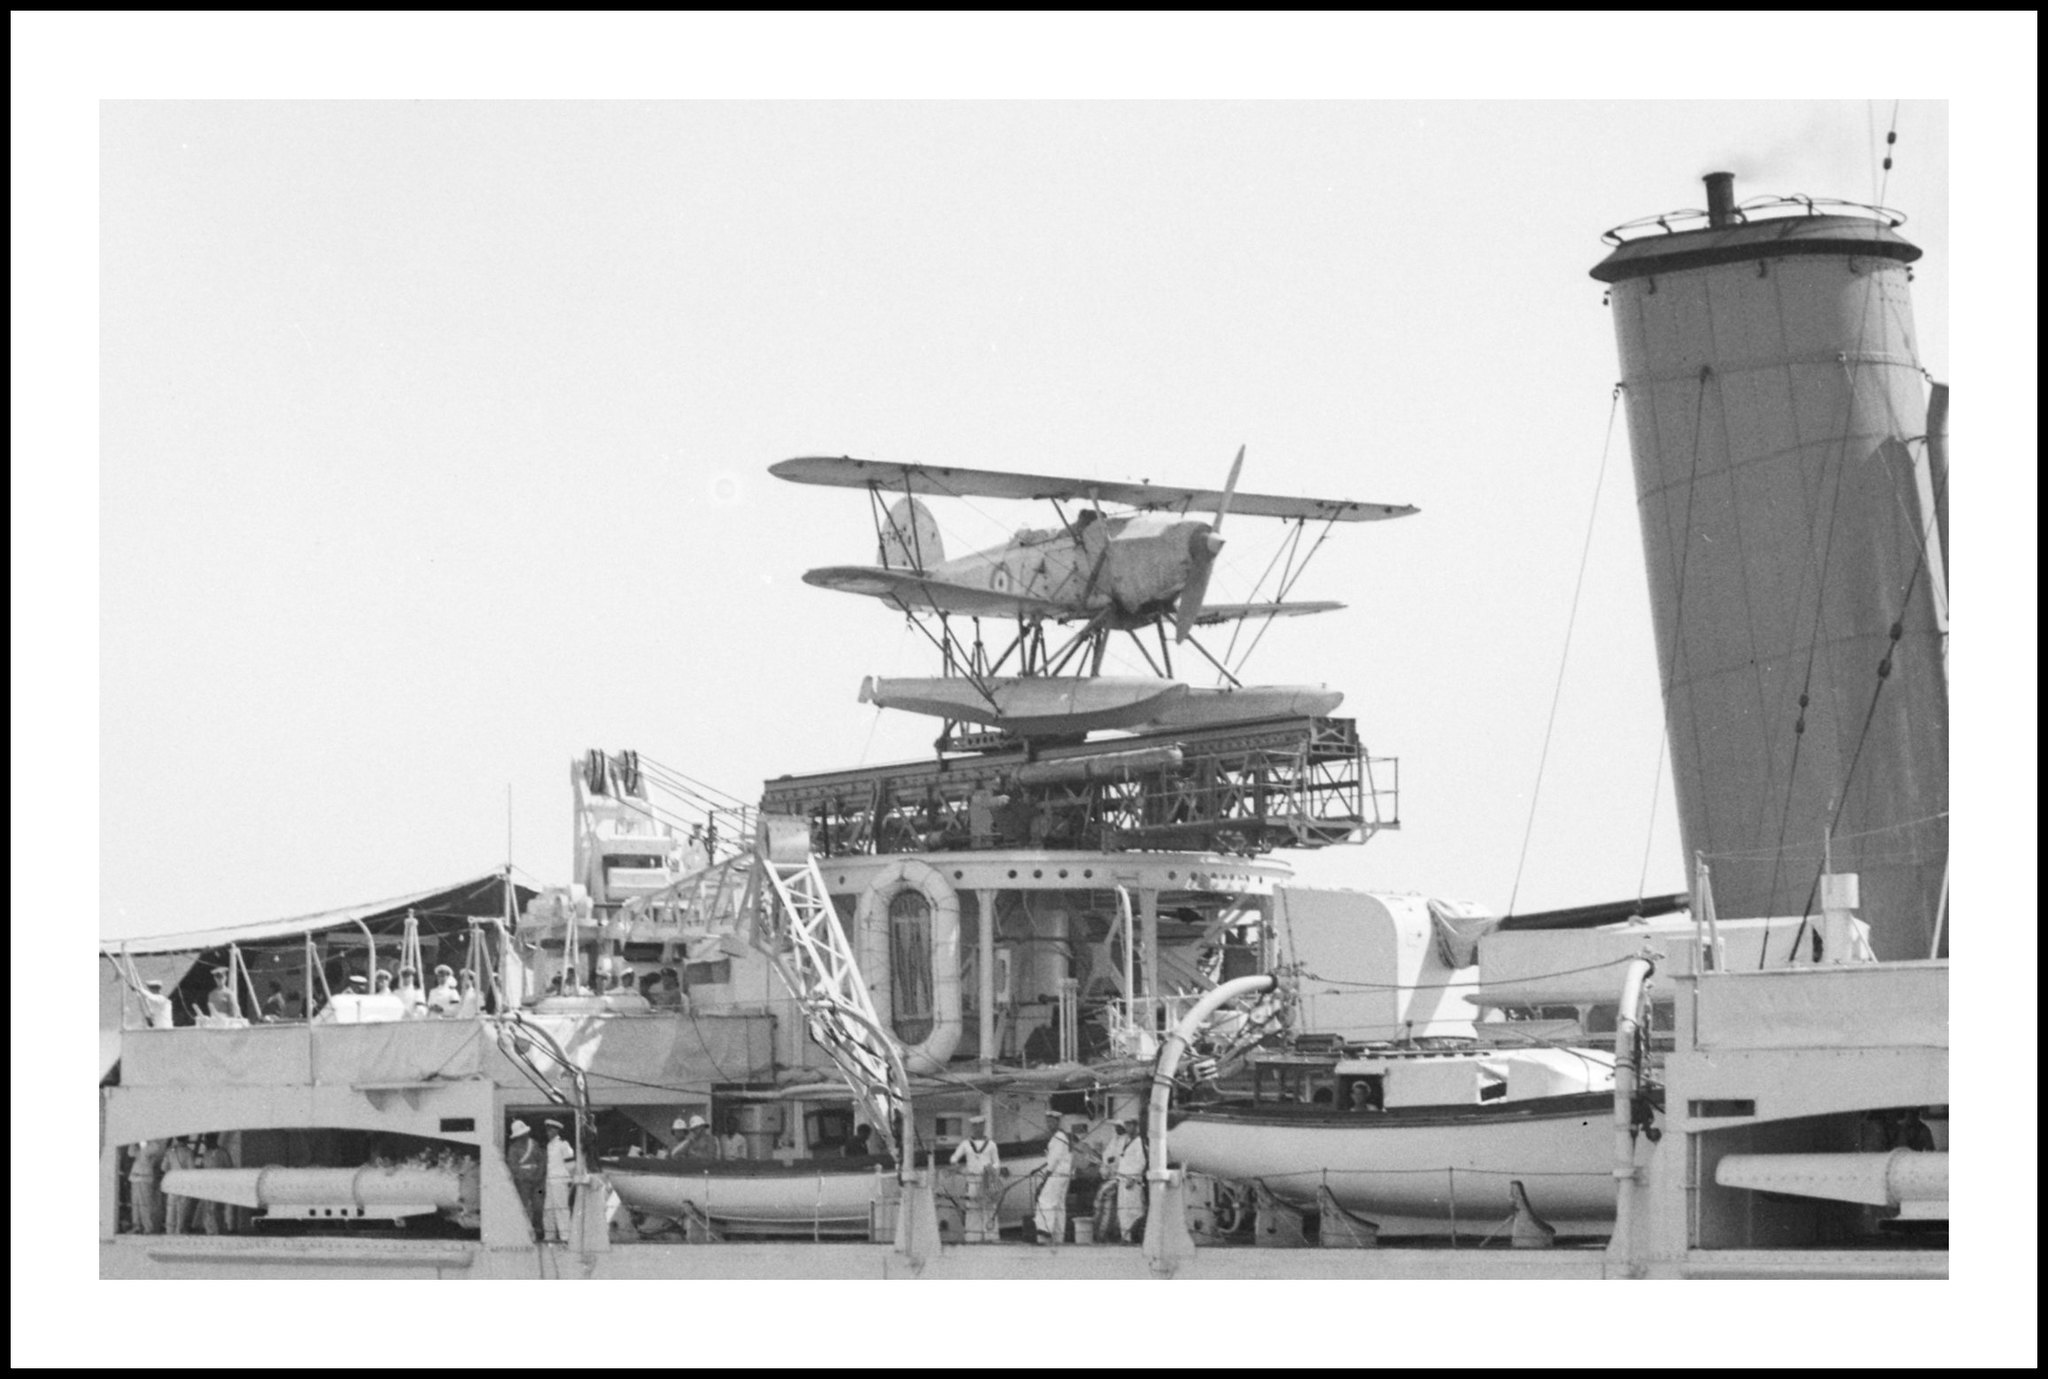
#/media/File:Prise_Port_Mahon_Minorque_20_mai_1756.jpg)
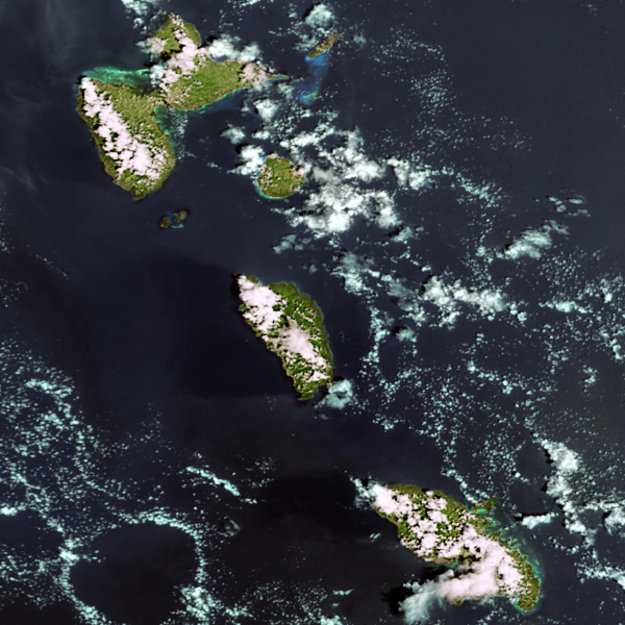
#/media/File:Invasion_of_Guadeloupe_(1759).jpg)
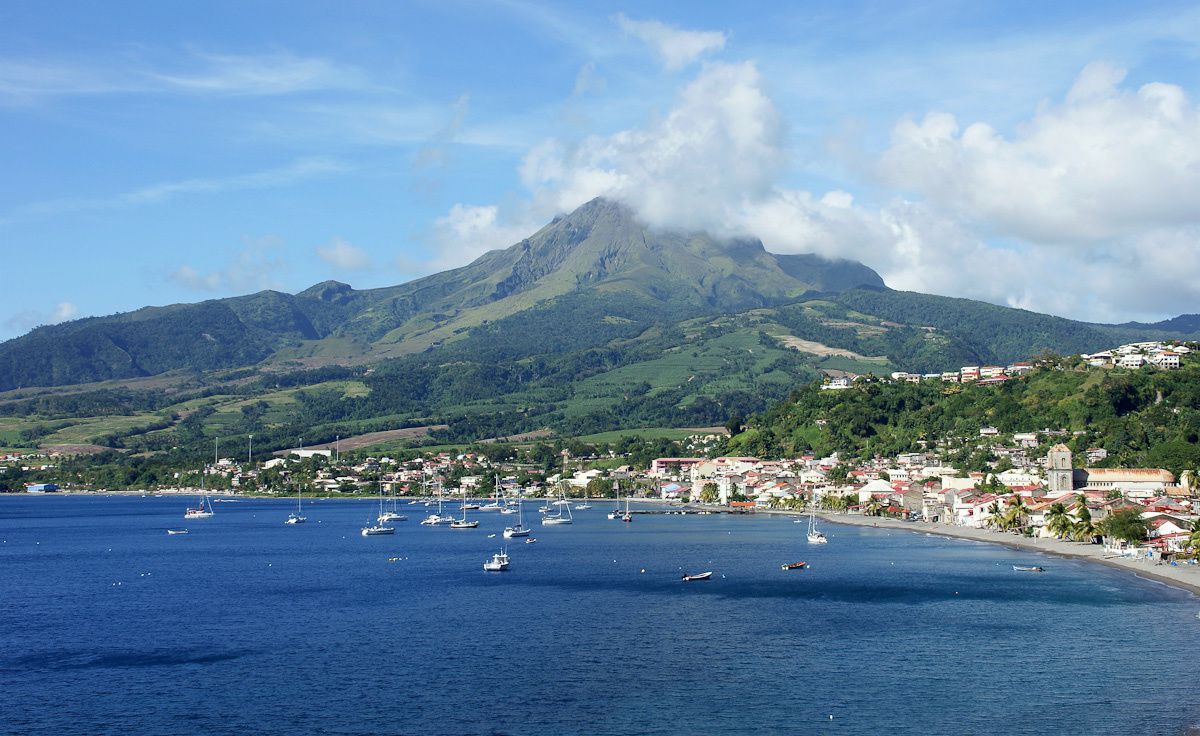
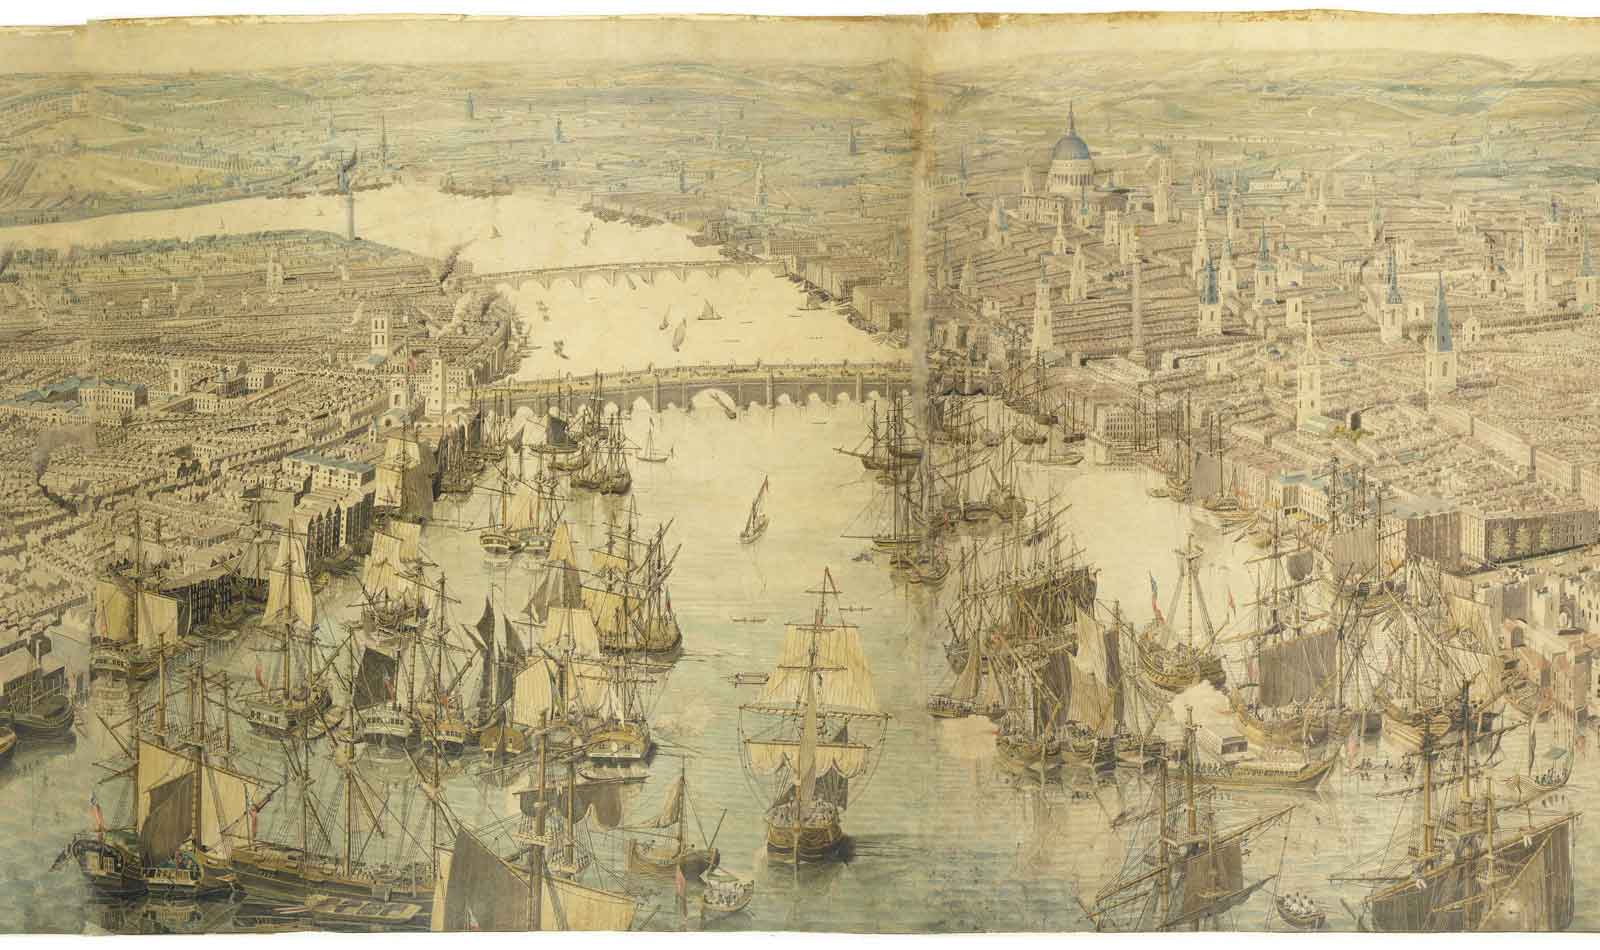
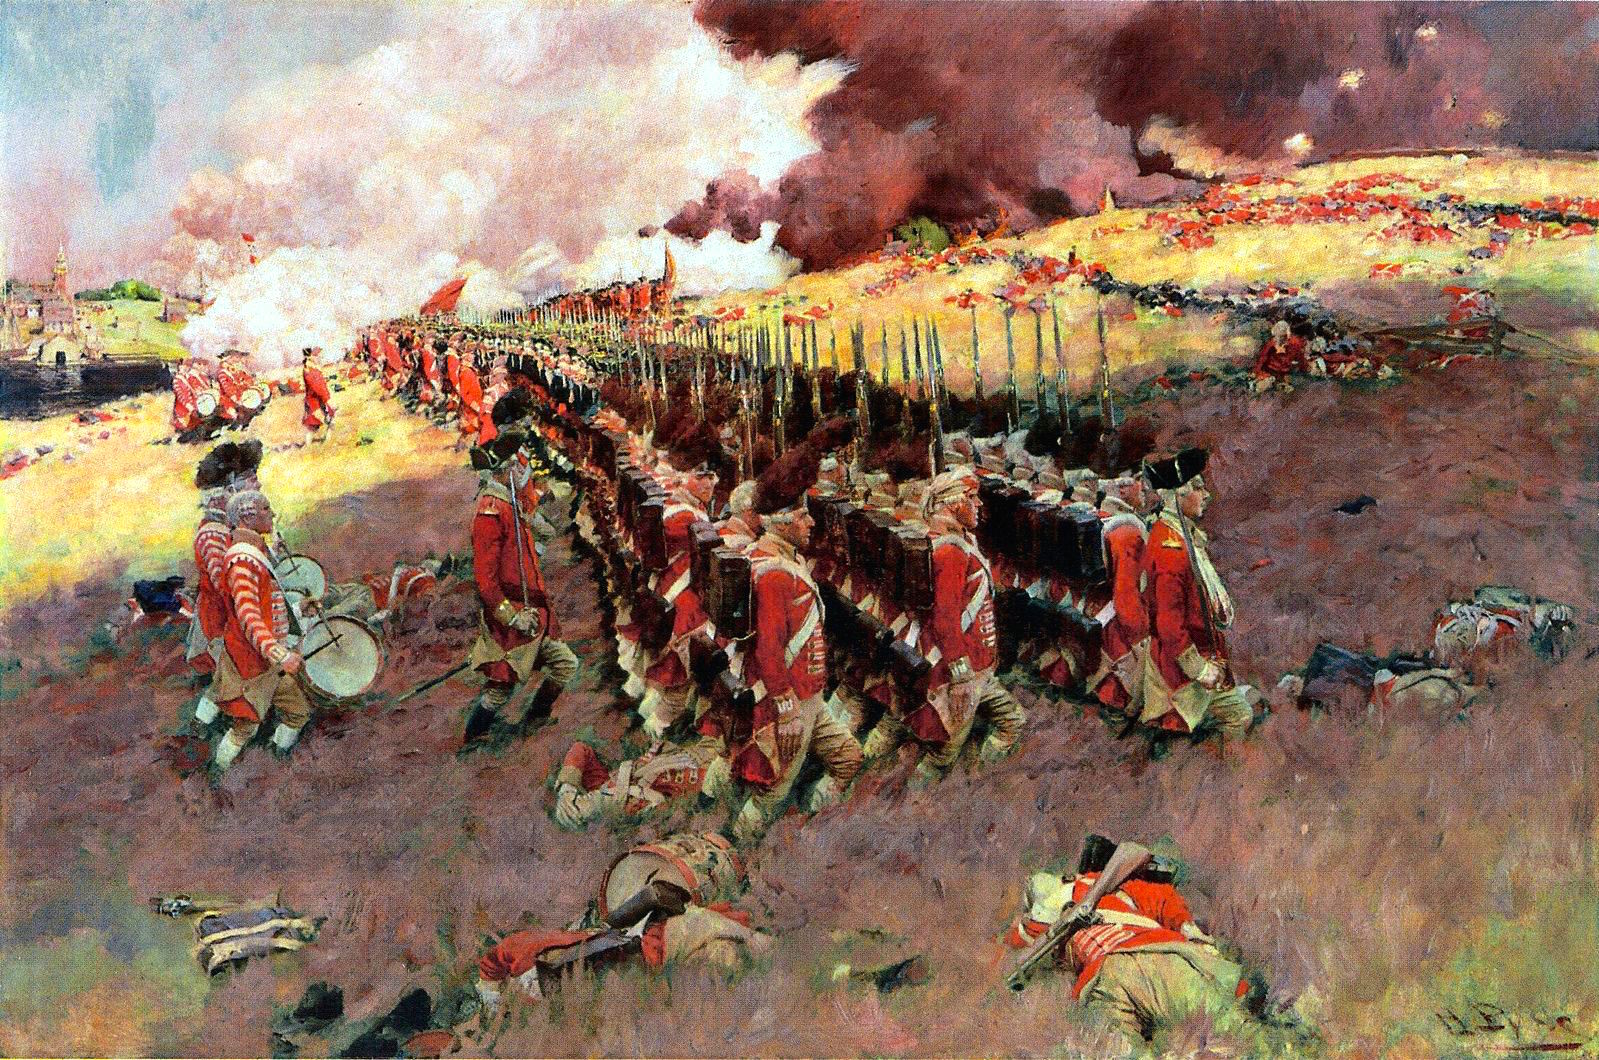